Site and Catalog Creation
Database Only Processes
These procedures can only be done via database code, and must be done for some of the Admin related procedures to work.
To create a Theme Definition:
<insert tableName="BLC_THEME_DEFINITION">
    <column name="THEME_DEFINITION_ID" value="TDID" />
    <column name="THEME_DESCRIPTION" value="Theme Definition Description" />
    <column name="THEME_NAME" value="Theme Definition Name" />
    <column name="THEME_PATH" value="Folder name that holds all the css, js, img, templates, and fonts folders for this theme" />
    <column name="IS_DEFAULT" value="ISDEFAULTT" />
</insert>
Note that if you are wanting to immediately tie this Catalog entry to an exisitng site, please add this line to the above entry
<column name="SITE_DISC" valueNumeric="SITEID" />.
- TDID - The Theme Definition ID of this Theme Definition entry.
- "Theme Definition Description" - A Description for this Theme Definition entry.
- "Theme Definition Name" - The Name you wish to list this Theme Definition entry by.
- THEME_PATH - The value of this column corresponds to a folder that exists in your Site project's directory in the
src/main/webapp/WEB-INF/folder that will contain your/css,/js,/img,/templates, and/fontsfolders to hold those respective items. This folder must exist or you will run into errors and exceptions at runtime. - ISDEFAULTT - This boolean value determines whether or not it is the default Theme Definition to be used.
Further Database Processes
To create a Site:
<insert tableName="BLC_SITE">
    <column name="SITE_ID" valueNumeric="SITEID" />
    <column name="SITE_TYPE" value="STYPE" />
    <column name="NAME" value="Site Name" />
    <column name="SITE_IDENTIFIER_TYPE" value="SIT" />
    <column name="SITE_IDENTIFIER_VALUE" value="SIV" />
</insert>
Note that if you are wanting this site to inherit a profile from another existing site, please add this line to the above entry
<column name="BASE_PROFILE_SITE_ID" valueNumeric="ID of the parent site" />.
- SITEID - The Site ID for this Site entry
- STYPE - The value of this column is an enumerated Site Type. These enumerations live within
SiteType.java. - "Site Name" - The Name you wish to list this Site entry by.
- SIT - The value of this column is an enumerated Site Identifier Type. These enumerations live within
SiteResolutionType.java. - SIV - This is Name that will be used either as a url prefix (http://SIV.base.url), or as a full domain (http://SIV) for this Site entry.
To create a Catalog:
<insert tableName="BLC_CATALOG">
    <column name="CATALOG_ID" valueNumeric="CATAID" />
    <column name="NAME" value="Catalog Name" />
</insert>
Note that if you are wanting to immediately tie this Catalog entry to an existing site, please add this line to the above entry `
.
- CATAID - The Catalog ID for this Catalog entry.
- "Catalog Name" - The Name you wish to list this Catalog entry by.
To set a Default Catalog for a Site:
<update tableName="BLC_SITE">
    <column name="DEFAULT_CATALOG" valueNumeric="CATAID" />
    <where>SITE_ID = 'SITEID'</where>
</update>
- CATAID - The ID relating to an entry from
BLC_CATALOG. - SITEID - The ID relating to an etry from
BLC_SITE.
To tie a Catalog to a Site:
<insert tableName="BLC_SITE_CATALOG">
    <column name="SITE_CATALOG_XREF_ID" valueNumeric="SCXID"/>
    <column name="MUTABILITY_TYPE" value="MT"/>
    <column name="CATALOG_ID" valueNumeric="CATAID"/>
    <column name="SITE_ID" valueNumeric="SITEID"/>
</insert>
- SCXID - The Site Catalog Crossreference ID for this Site Catalog Crossreference entry.
- MT - The value of this column is an enumerated catalog mutability type. These enumerations live within
AssignedCatalogType.javaand define the relationship between the Site and Catalog. - CATAID - The ID relating to an entry from
BLC_CATALOG. - SITEID - the ID relating to an entry from
BLC_SITE.
To create a Theme Configuration:
<insert tableName="BLC_THEME_CONFIGURATION">
    <column name="THEME_CONFIGURATION_ID" valueNumeric="TCID" />
    <column name="DATE_CREATED" valueDate="CURRENT_TIMESTAMP" />
    <column name="DATE_UPDATED" valueDate="CURRENT_TIMESTAMP" />
    <column name="IS_DEFAULT" valueBoolean="ISDEFAULTTC" />
    <column name="THEME_DESCRIPTION" value="Theme Configuration Description" />
    <column name="THEME_NAME" value="Theme Configuration Name" />
    <column name="THEME_DEFINITION_ID" valueNumeric="TDID" />
</insert>
There are also the
DEFAULT_CAT_TEMPLATE_ID,DEFAULT_PAGE_TEMPLATE_ID, andDEFAULT_PROD_TEMPLATE_IDcolumns whose value will correspond to theIDvalue of a Theme Definition. The corresponding Theme Definition should be formatted for one of those 3 Types (Category, Page, and Product respectively).
Also you may wish to tie this Theme Configuration directly to a site, to do so please add this line to the above entry<column name="SITE_DISC" valueNumeric="SITEID" />.
- TCID - The Theme Configuration ID of this Theme Configuration entry.
- "Theme Configuration Description" - A Description of this Theme Configuration entry.
- "Theme Configuration Name" - The Name you wish to list this Theme Configuration entry by.
- TDID - The ID relating to an entry in
BLC_THEME_DEFINITION. - ISDEFAULTTC - This boolean value determines whether or not it is the default Theme Configuration to be used.
To create a Theme File:
<insert tableName="BLC_THEME_FILE">
    <column name="ID" valueNumeric="TID" />
    <column name="CONTENTS" value="Theme File Contents" />
    <column name="FILE_TYPE" value="Enumerated File Type" />
    <column name="PATH" value="File Path" />
    <column name="OVERRIDE_GENERATED_PATH" valueBoolean="TRUE" />
    <column name="TEMPLATE_TYPE" value="Template Type" />
    <column name="THEME_CONFIG_ID" valueNumeric="TCID" />
</insert>
Note that if you are using the Enumerated type
pageforTEMPLATE_TYPE, you must also supply a Page Type ID for thePAGE_TYPE_IDcolumn corresponding to an entry inBLC_PAGE_TYPE, using the following line<column name="PAGE_TYPE_ID" valueNumeric="Page Type ID" />.
Also, if you are wanting to immediately tie this Site, please add this line to the above entry<column name="SITE_DISC" valueNumeric="SITEID" />
- TID - The Theme File ID of this Theme File entry.
- "Theme File Contents" - The value will either be
Nullif you are wanting this Theme File Definition to reference an existing file, or will consist of Themeleaf Template code that will be used in the generation of a page using this Theme File. - "Enumerated File Type" - The value of this column is an enumerated File Type. These enumerations live in
ThemeFileType.java. - "File Path" - The value will either be the path to a file whose contents you want used when this Theme File is used, or the name by which you want to reference the
CONTENTSvalue of this Theme File. - "OVERRIDE_GENERATED_PATH" - This boolean value determines whether or not to override the generated path.
- "Template Type" - The value of this column will either be
NULLif the type of file iscssorjs, but will be an enumerated type ifhtml. These enumerations live inThemeTemplateType.java. - TCID - The ID relating to an entry in
BLC_THEME_CONFIGURATION.
To tie a Theme to a Site:
<update tableName="BLC_THEME_CONFIGURATION">
    <column name="SITE_DISC" valueNumeric="SITEID" />
    <where>THEME_CONFIGURATION_ID = 'TCID'</where>
</update>
<update tableName="BLC_THEME_DEFINITION">
    <column name="SITE_DISC" valueNumeric="SITEID" />
    <where>THEME_DEFINITION_ID = 'TDID'</where>
</update>
- SITEID - The ID relating to an entry in
BLC_SITE. - TCID - The ID relating to an entry in
BLC_THEME_CONFIGURATION. - TDID - The ID relating to an entry in
BLC_THEME_DEFINITION.
To create an Admin for a Site:
<insert tableName="BLC_ADMIN_USER">
    <column name="ADMIN_USER_ID" valueNumeric="AUID" />
    <column name="ACTIVE_STATUS_FLAG" valueBoolean="ASF" />
    <column name="EMAIL" value="Email" />
    <column name="LOGIN" value="Login" />
    <column name="NAME" value="Admin User Name" />
    <column name="PASSWORD" value="Password" />
    <column name="PHONE_NUMBER" value="Phone Number" />
    <column name="SITE_ID" valueNumeric="SITEID" />
</insert>
- AUID - The Admin User ID for this Admin User Entry
- ASF - A boolean value that determines whether or not this admin user is active.
- "Email" - An Email that can be used to contact this Admin User.
- "Login" - The login name to be used with this Admin User.
- "Admin User Name" - The name you wish to list this Admin User by.
- "Password" - The password for this Admin User entry.
- "Phone Number" - A Phone Number that can be used to contac tthis Admin User.
- SITEID - The ID relating to an entry in
BLC_SITE. This is used to make this Admin User an Admin User only for that site specifically.
Admin Processes
As a note, to perform the first four procedures, you must be logged into the Master Site for the Site you want to manage.
To create a Catalog:
- Select 'Catalog' from the sidebar and then choose 'Catalogs'.
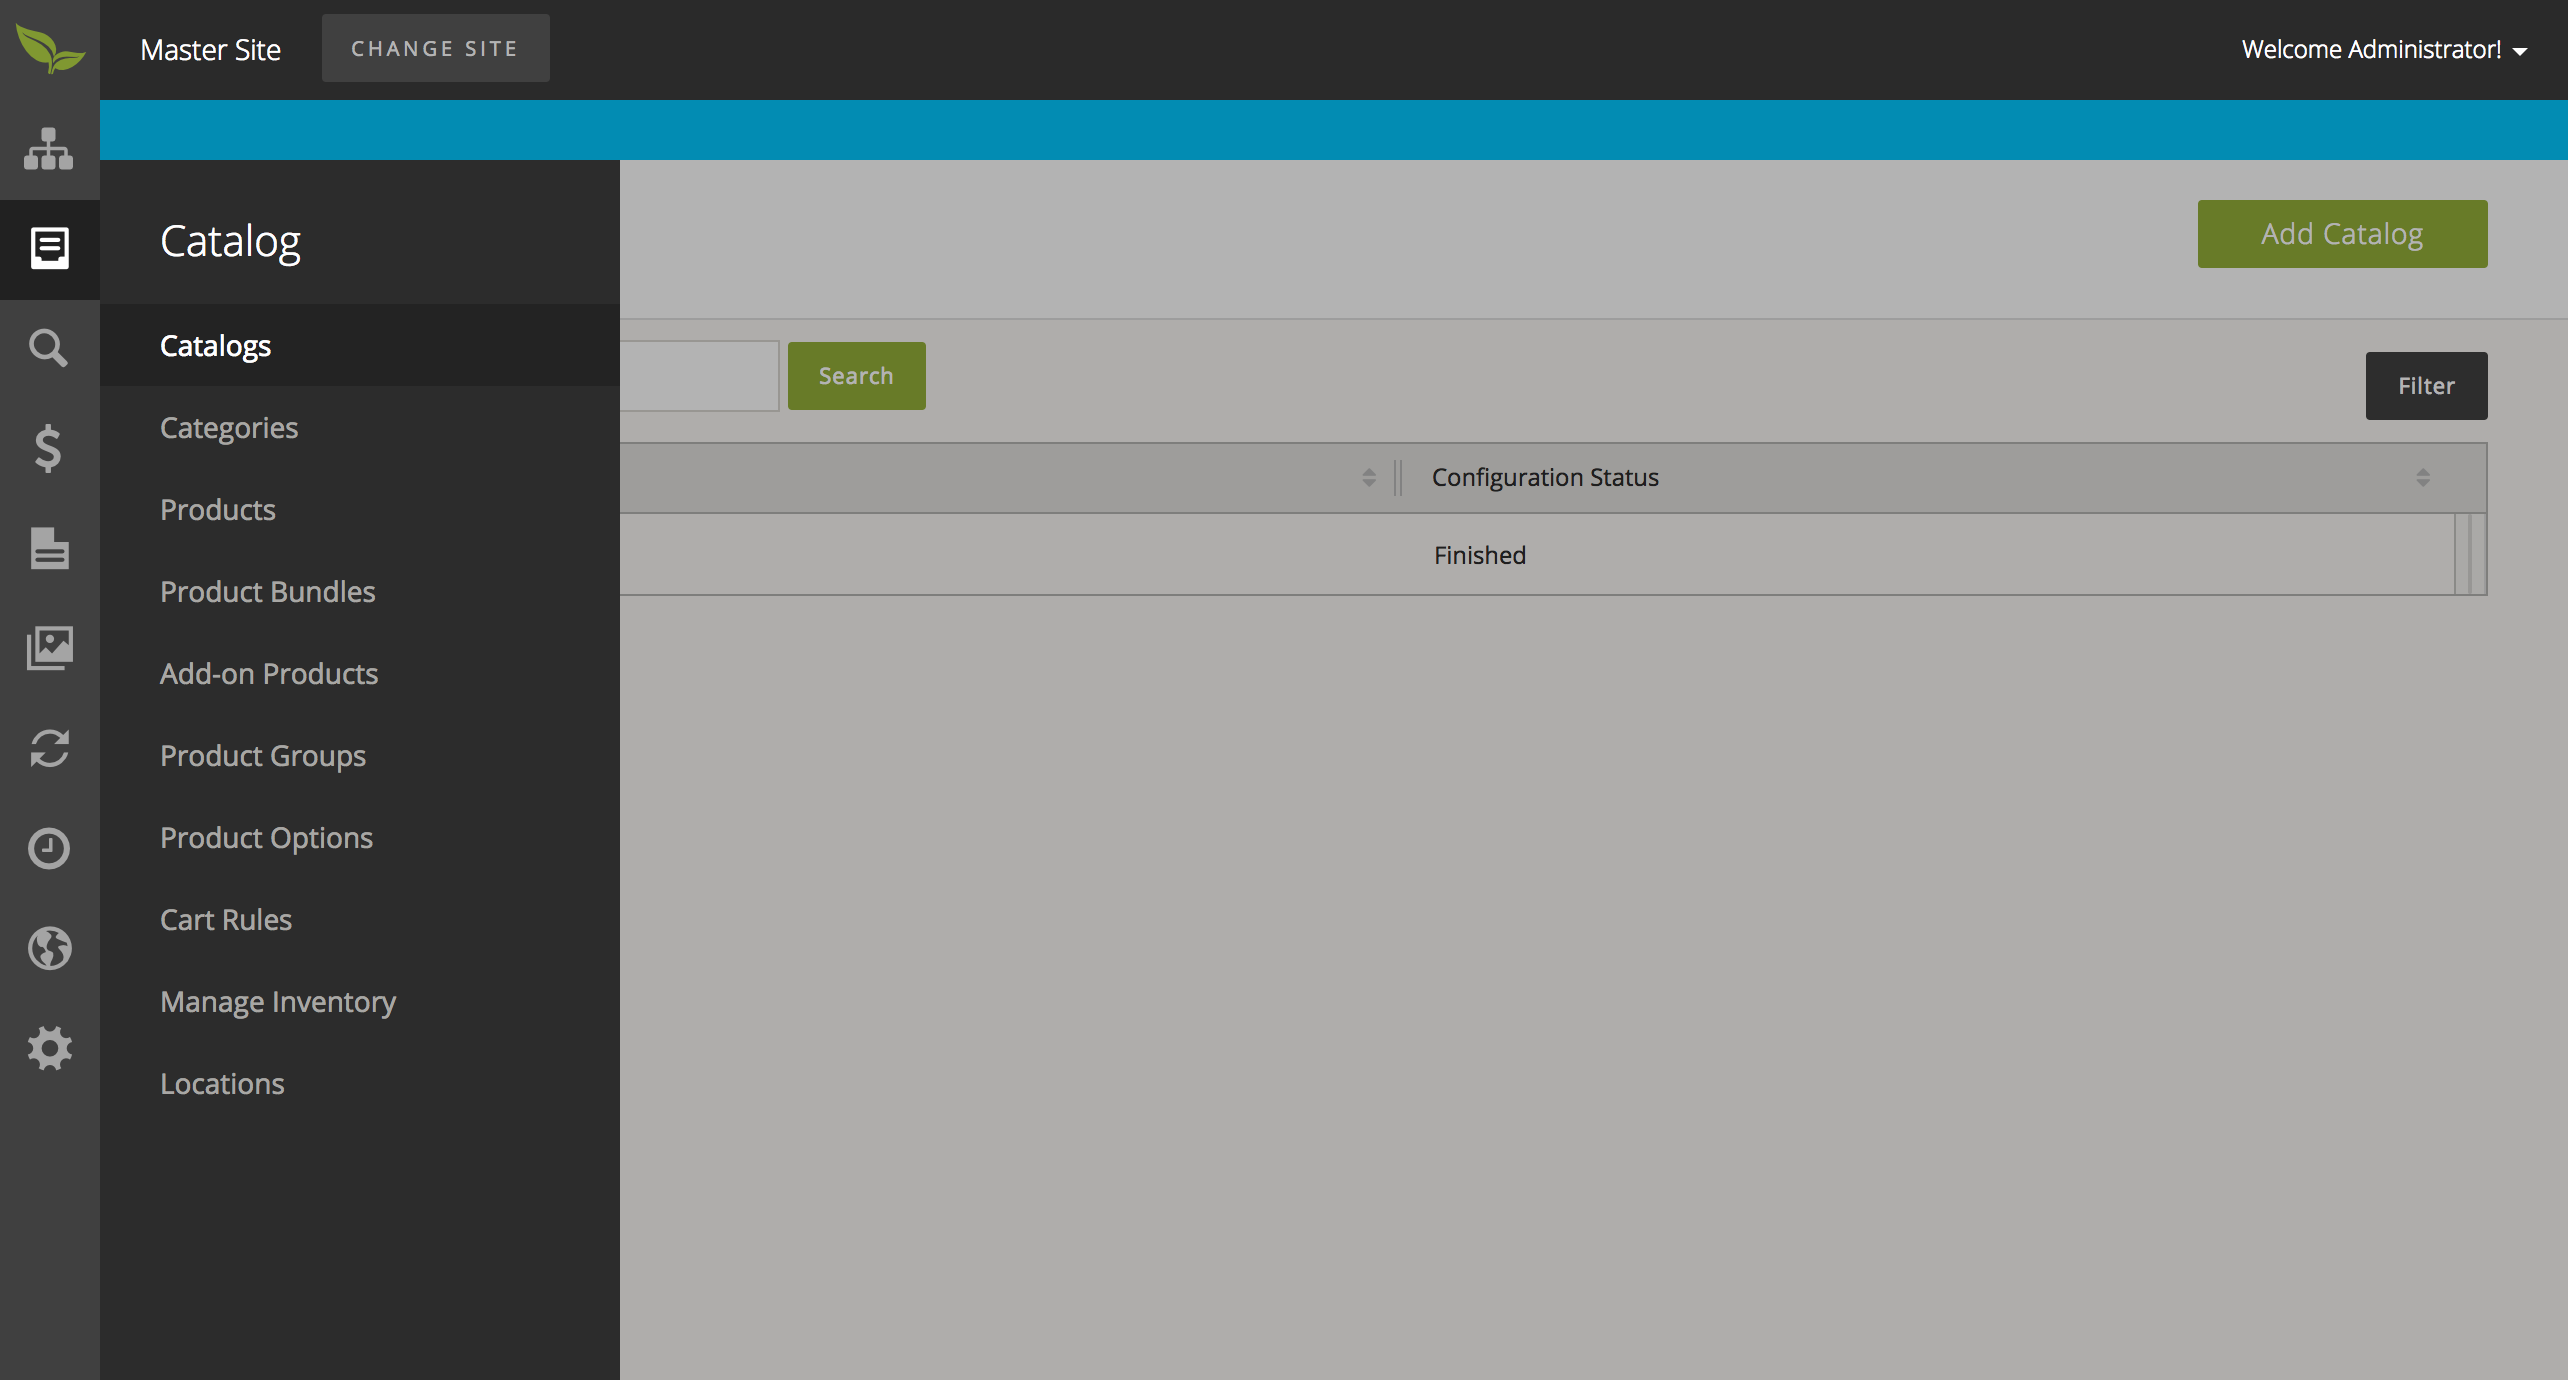
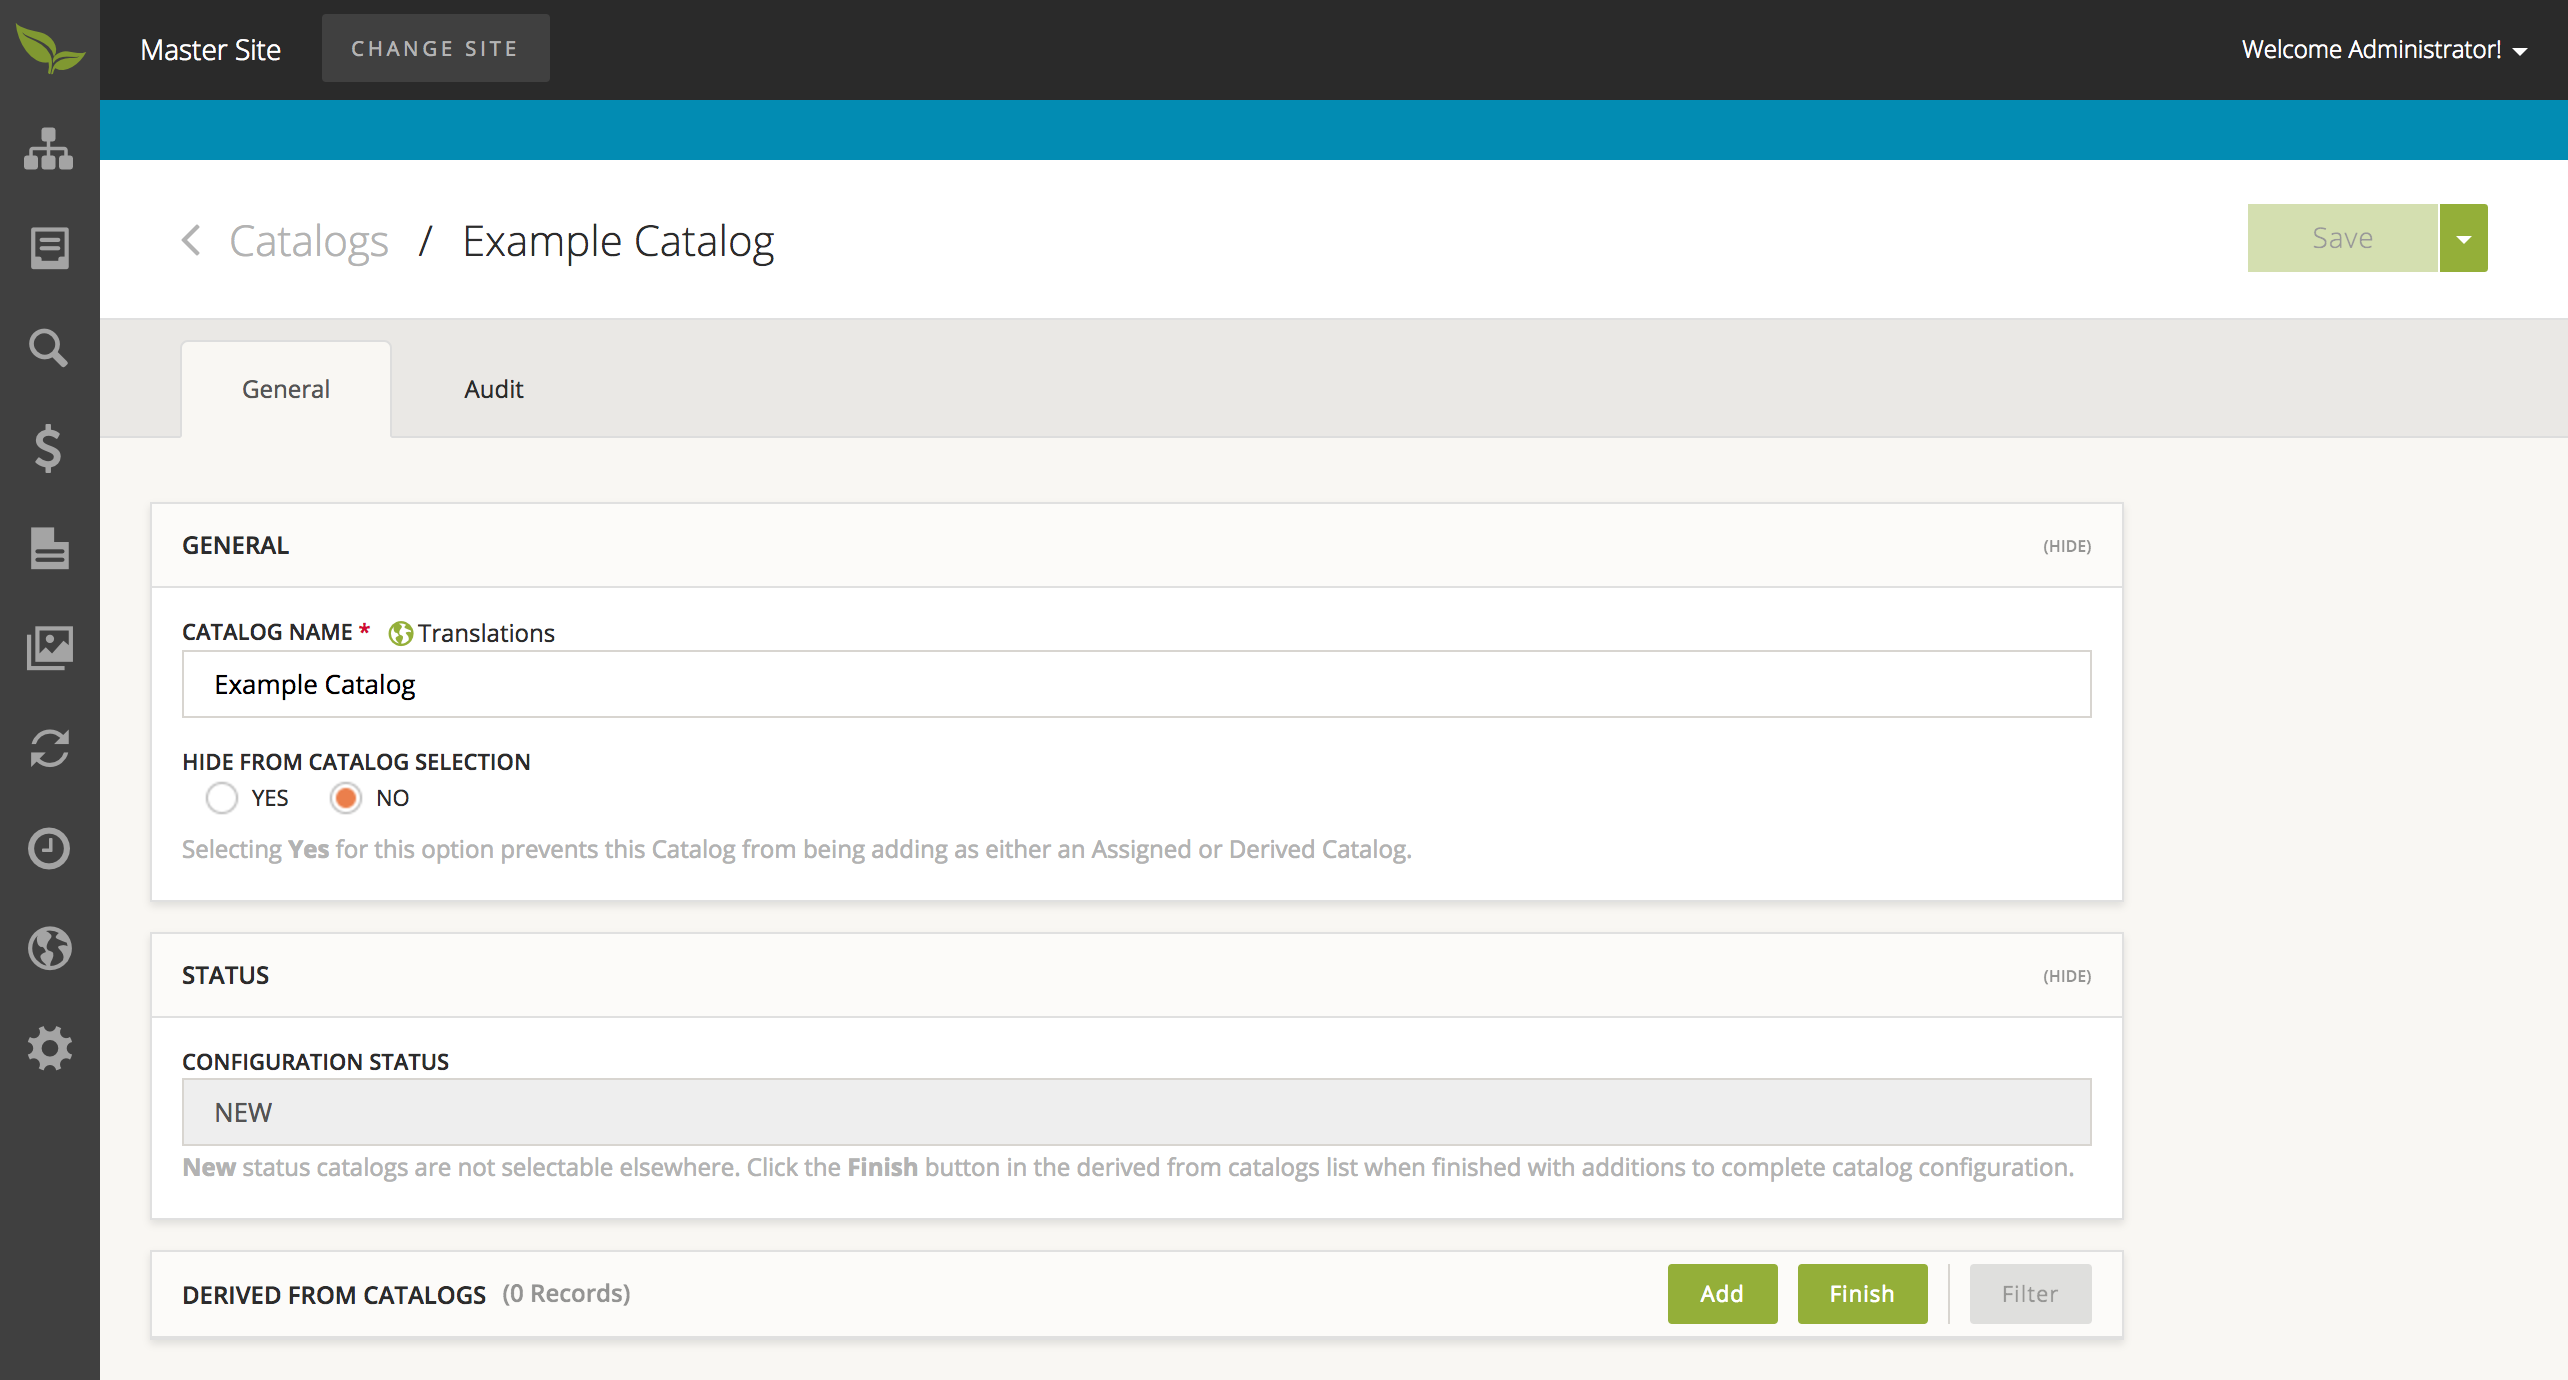
- From this page, select 'Add Catalog' in the upper right corner of the page. Please provide all necessary information, then select the 'Save' button.
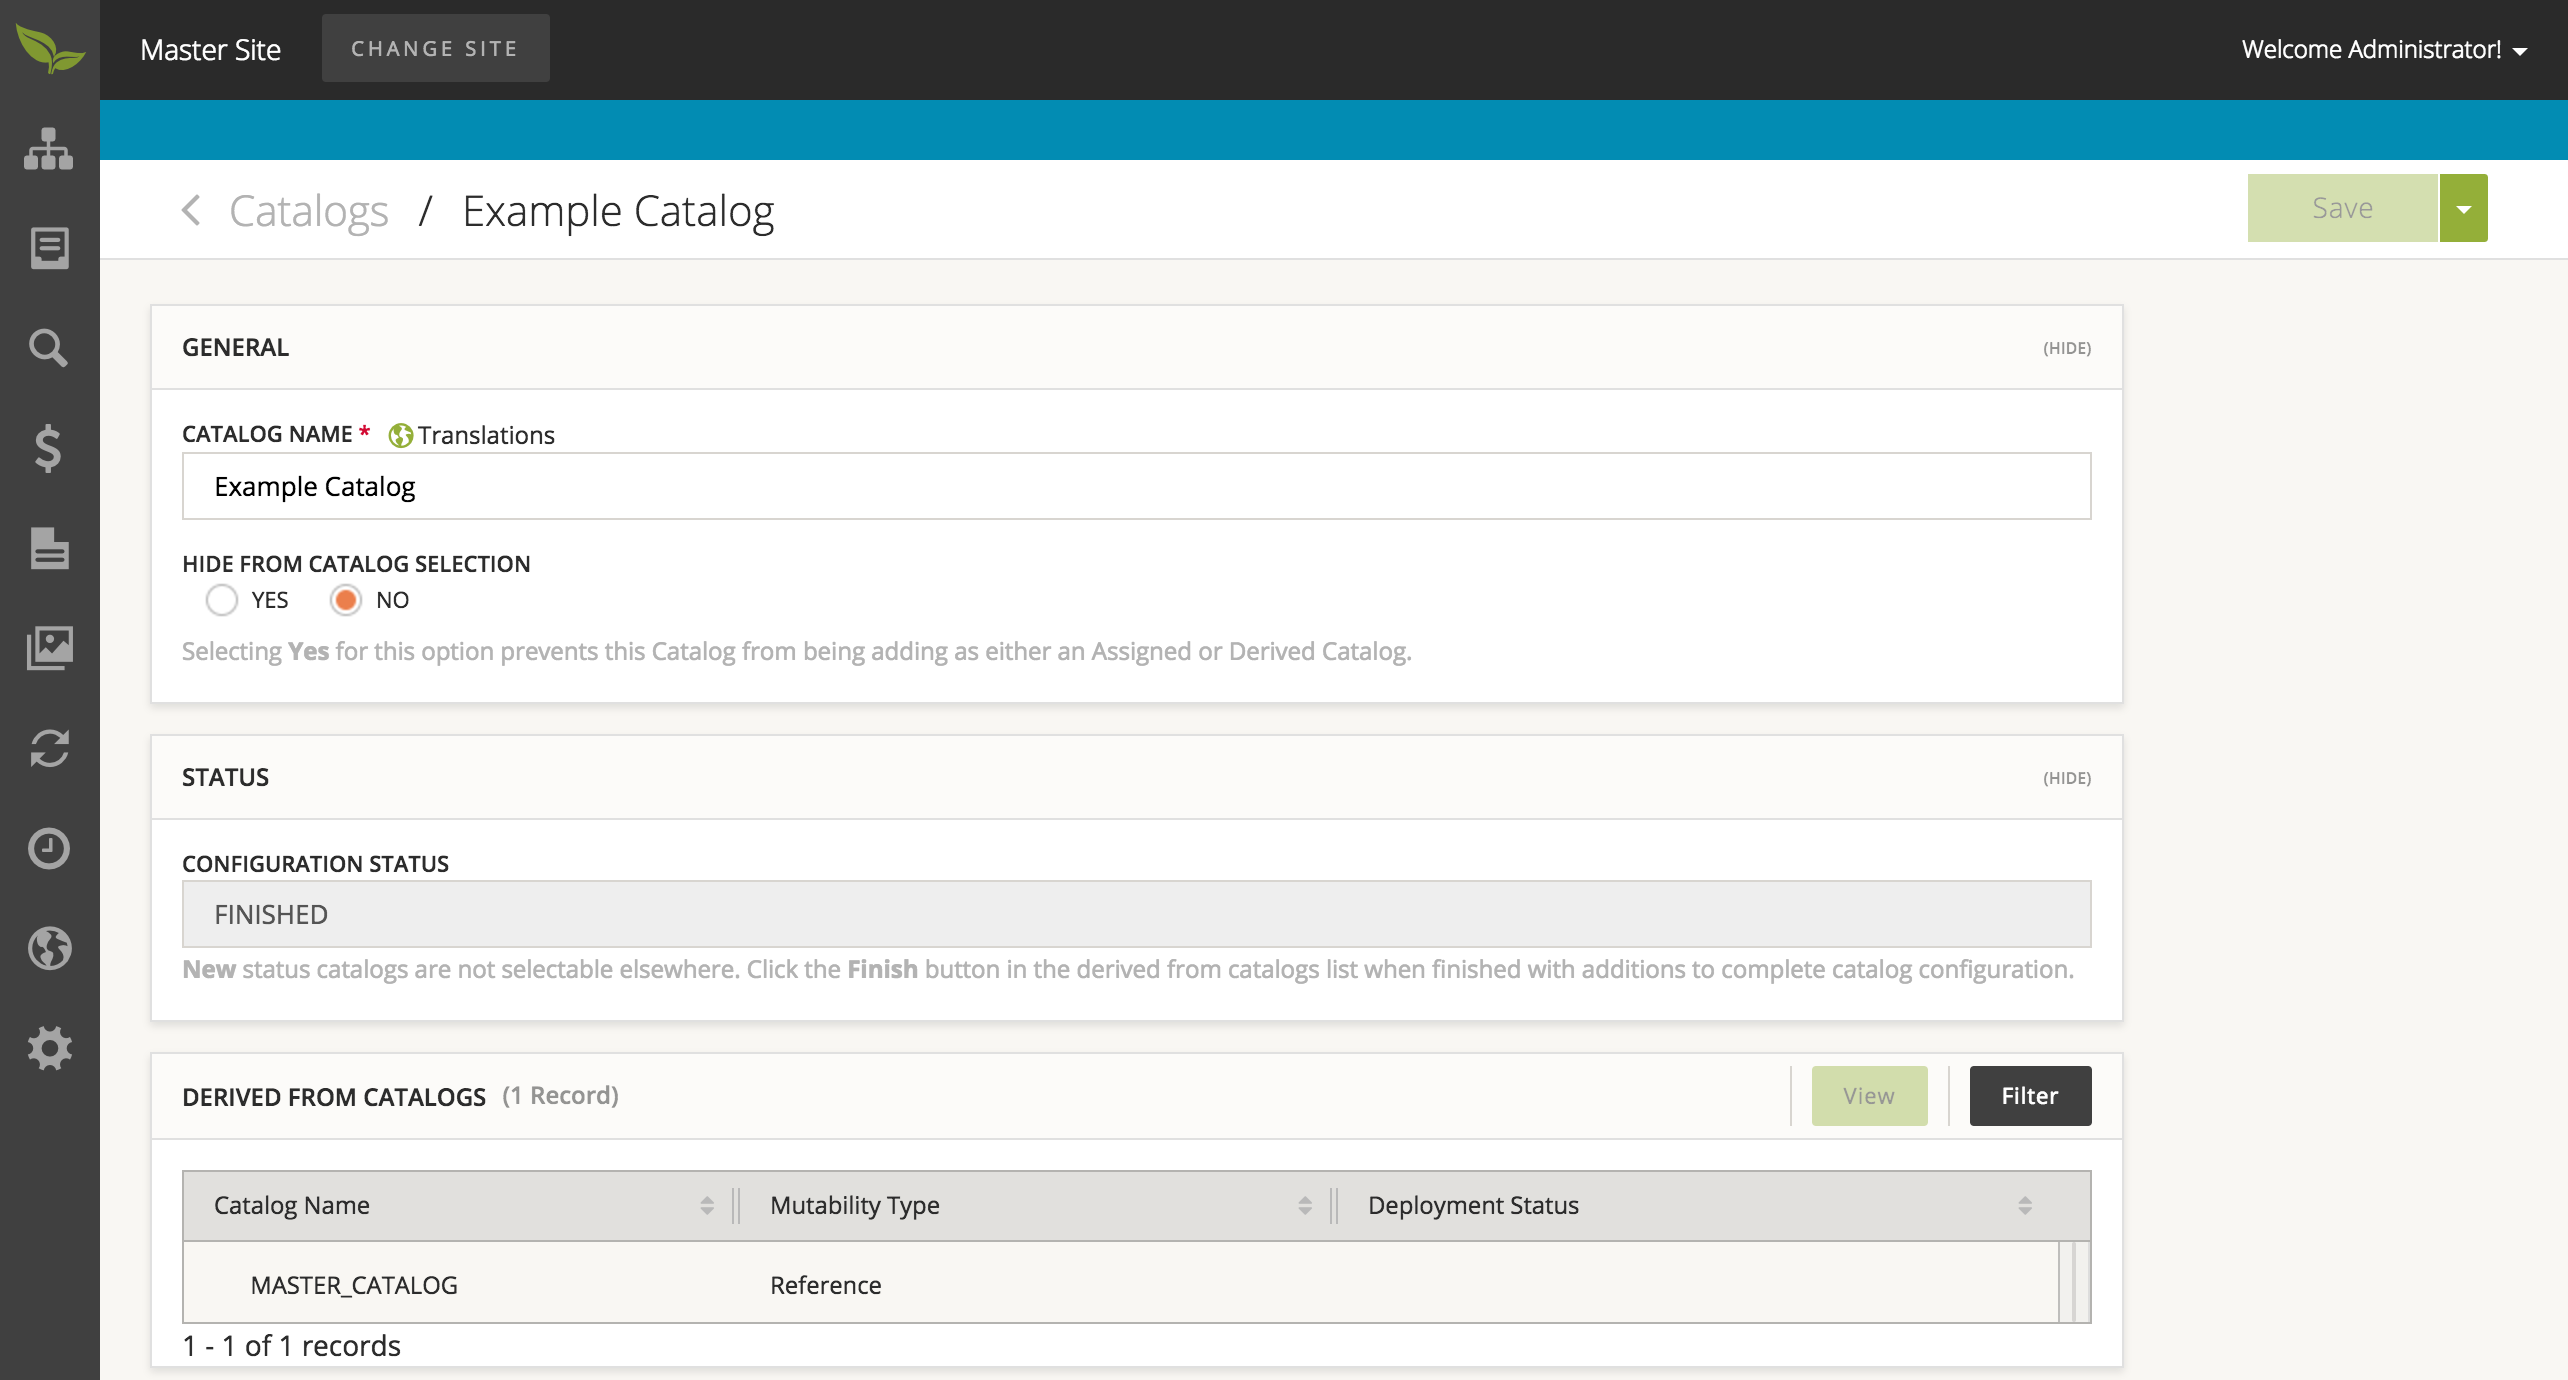
- After you have added any number of 'Derived from Catalogs', ensure that you hit the 'Finish' action on the collection.
To create a Site:
- Select 'Site Management' from the sidebar and then choose 'Sites'.
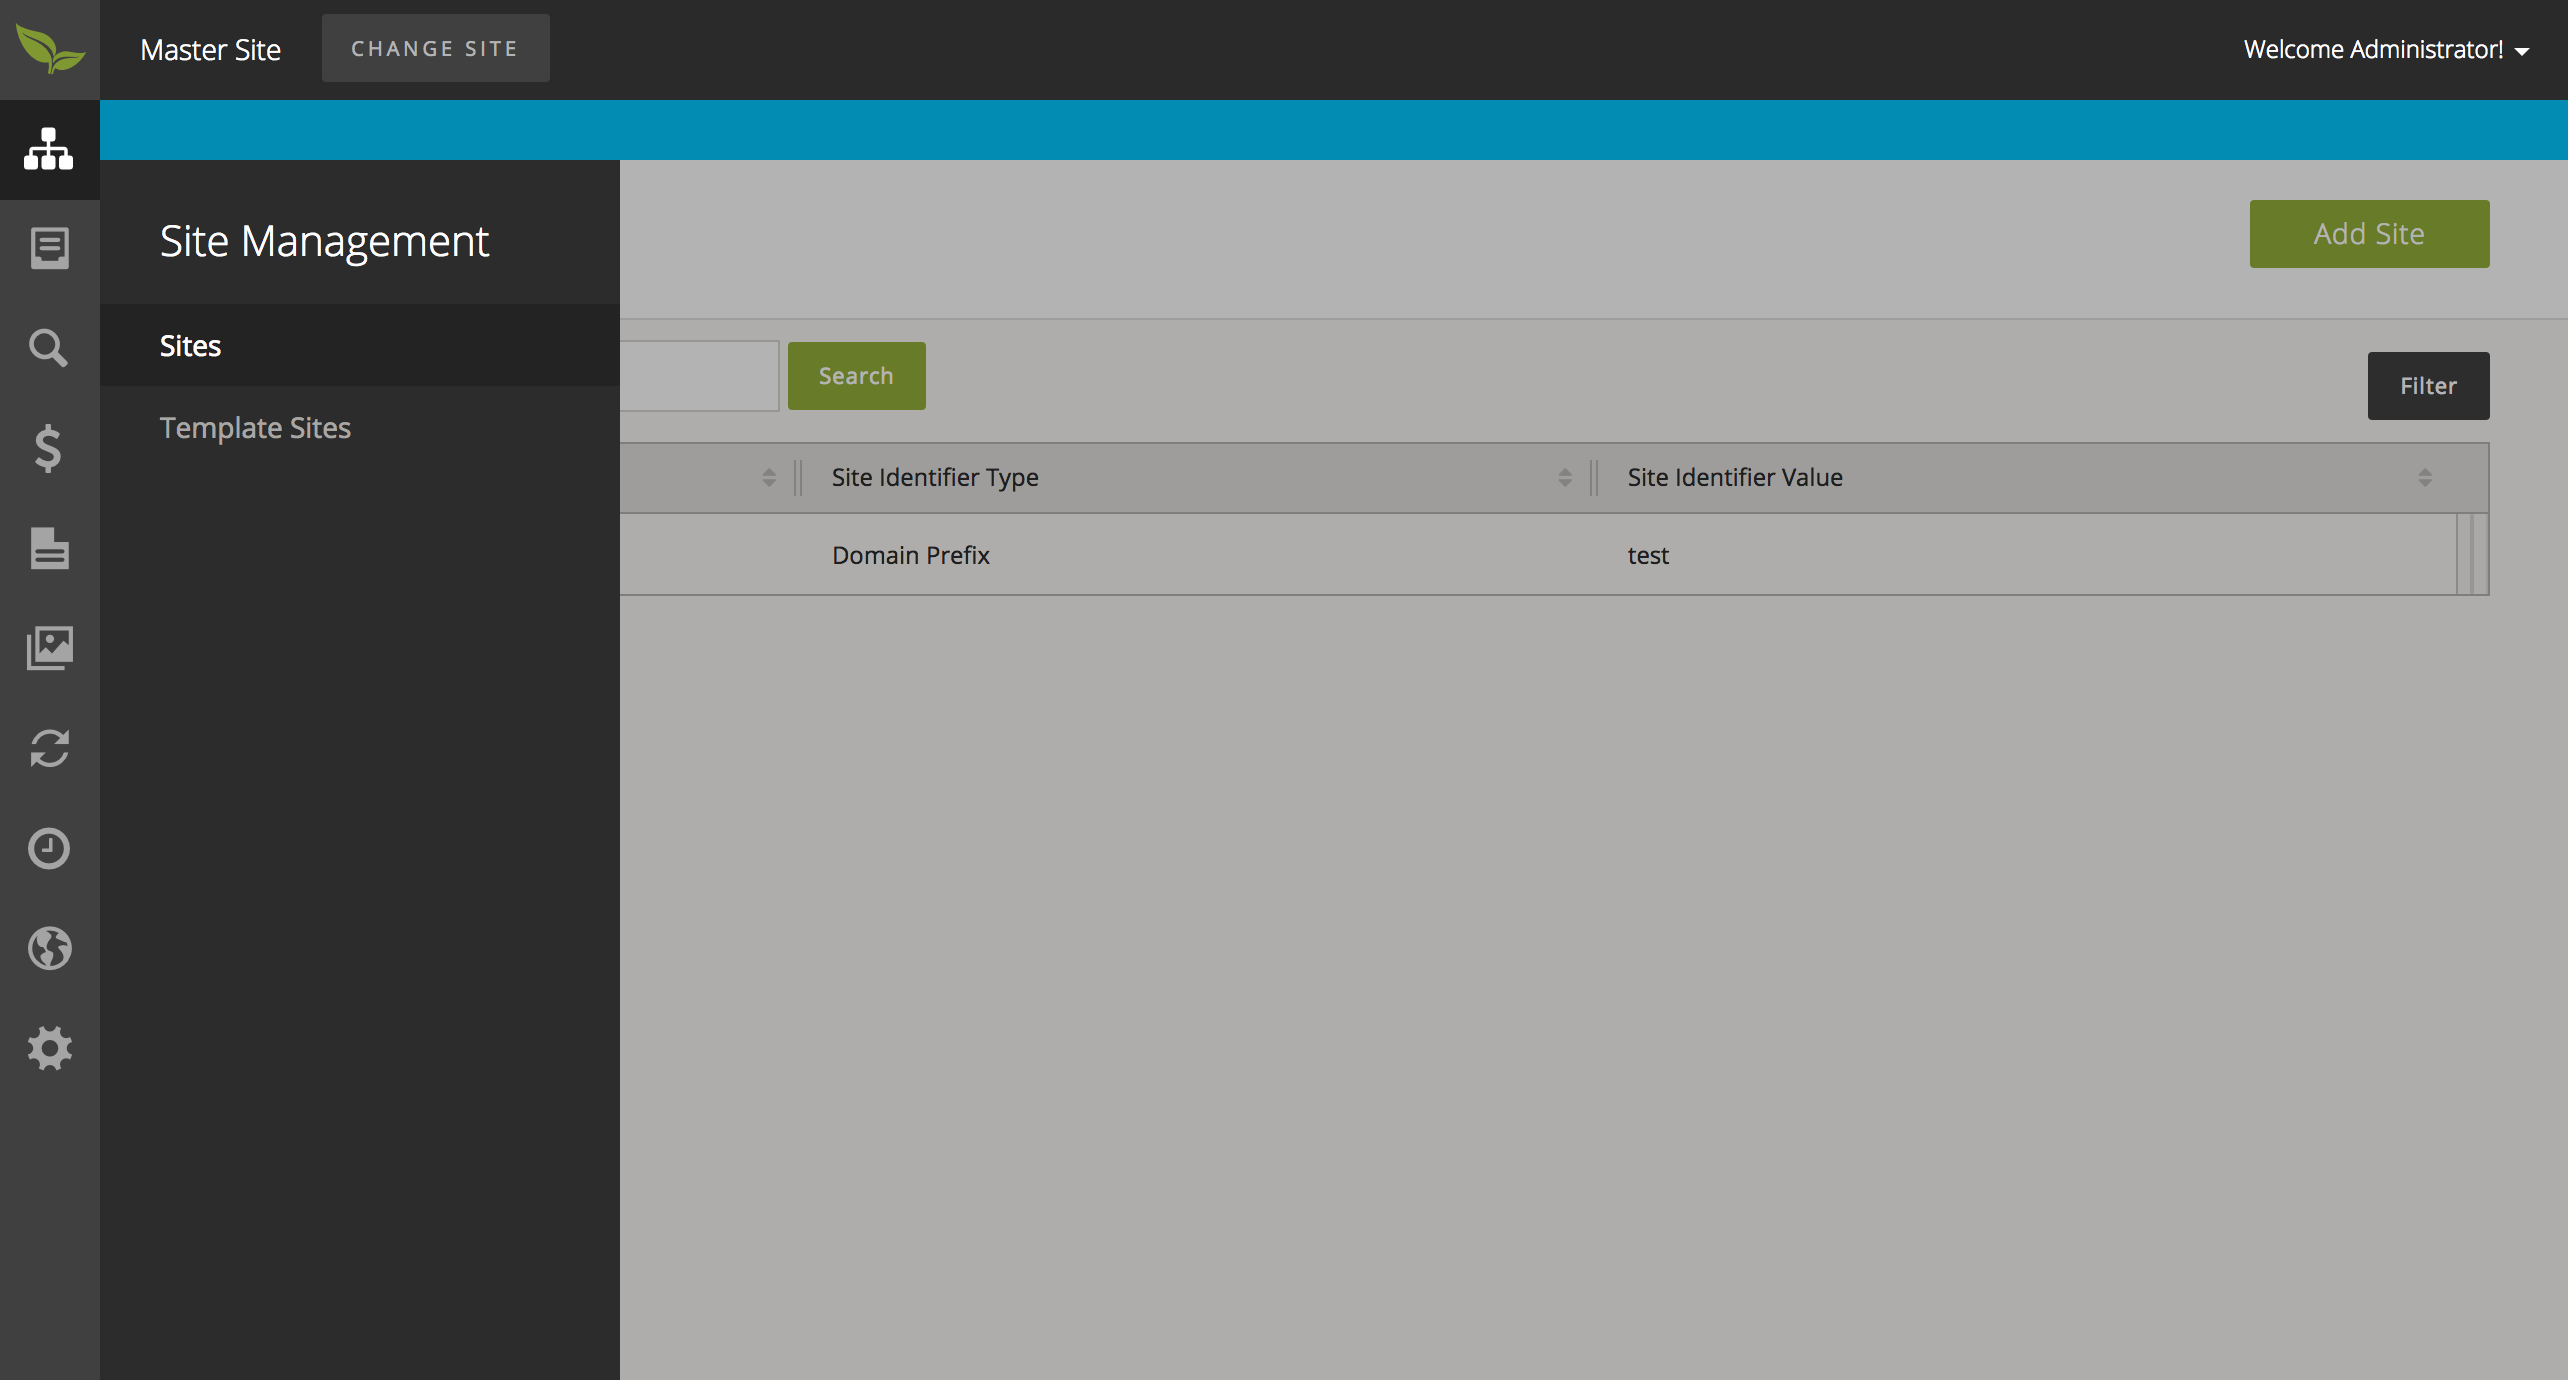
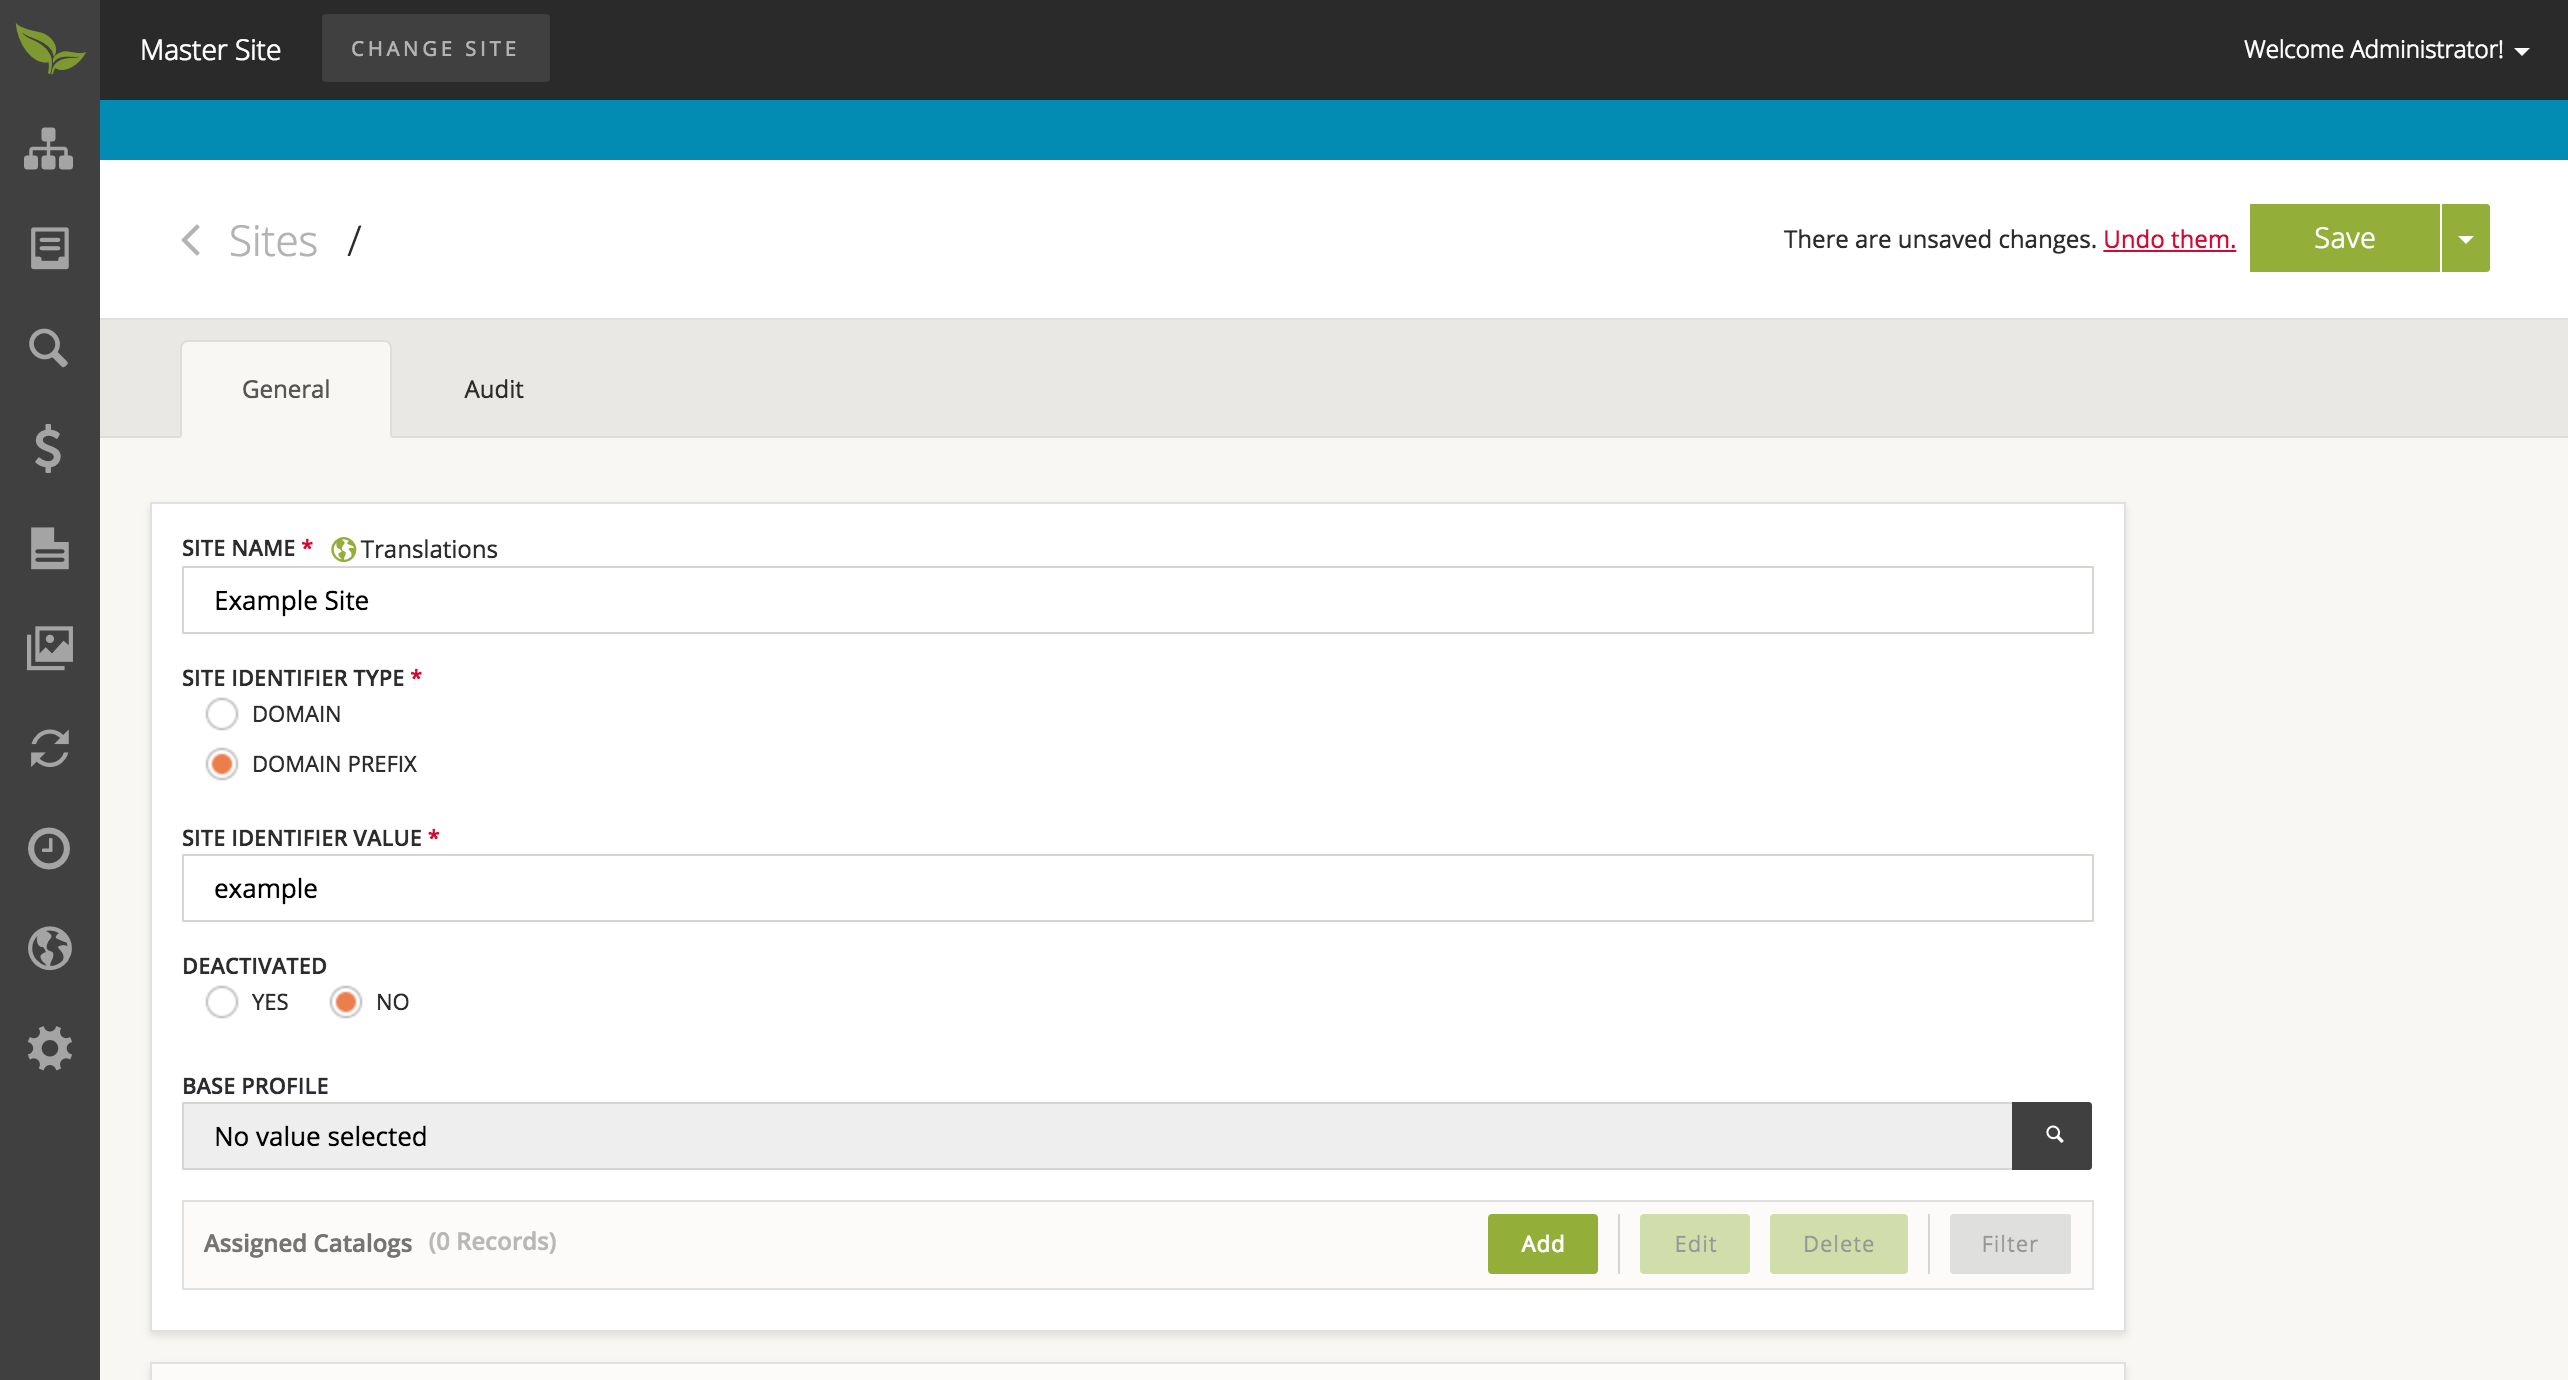
- From this page, select 'Add Site' in the upper right corner of the page. Please provide all necessary information, then select the 'Save' button.
To tie a Catalog to a Site:
- Select 'Site Management' from the sidebar and then choose 'Sites'.
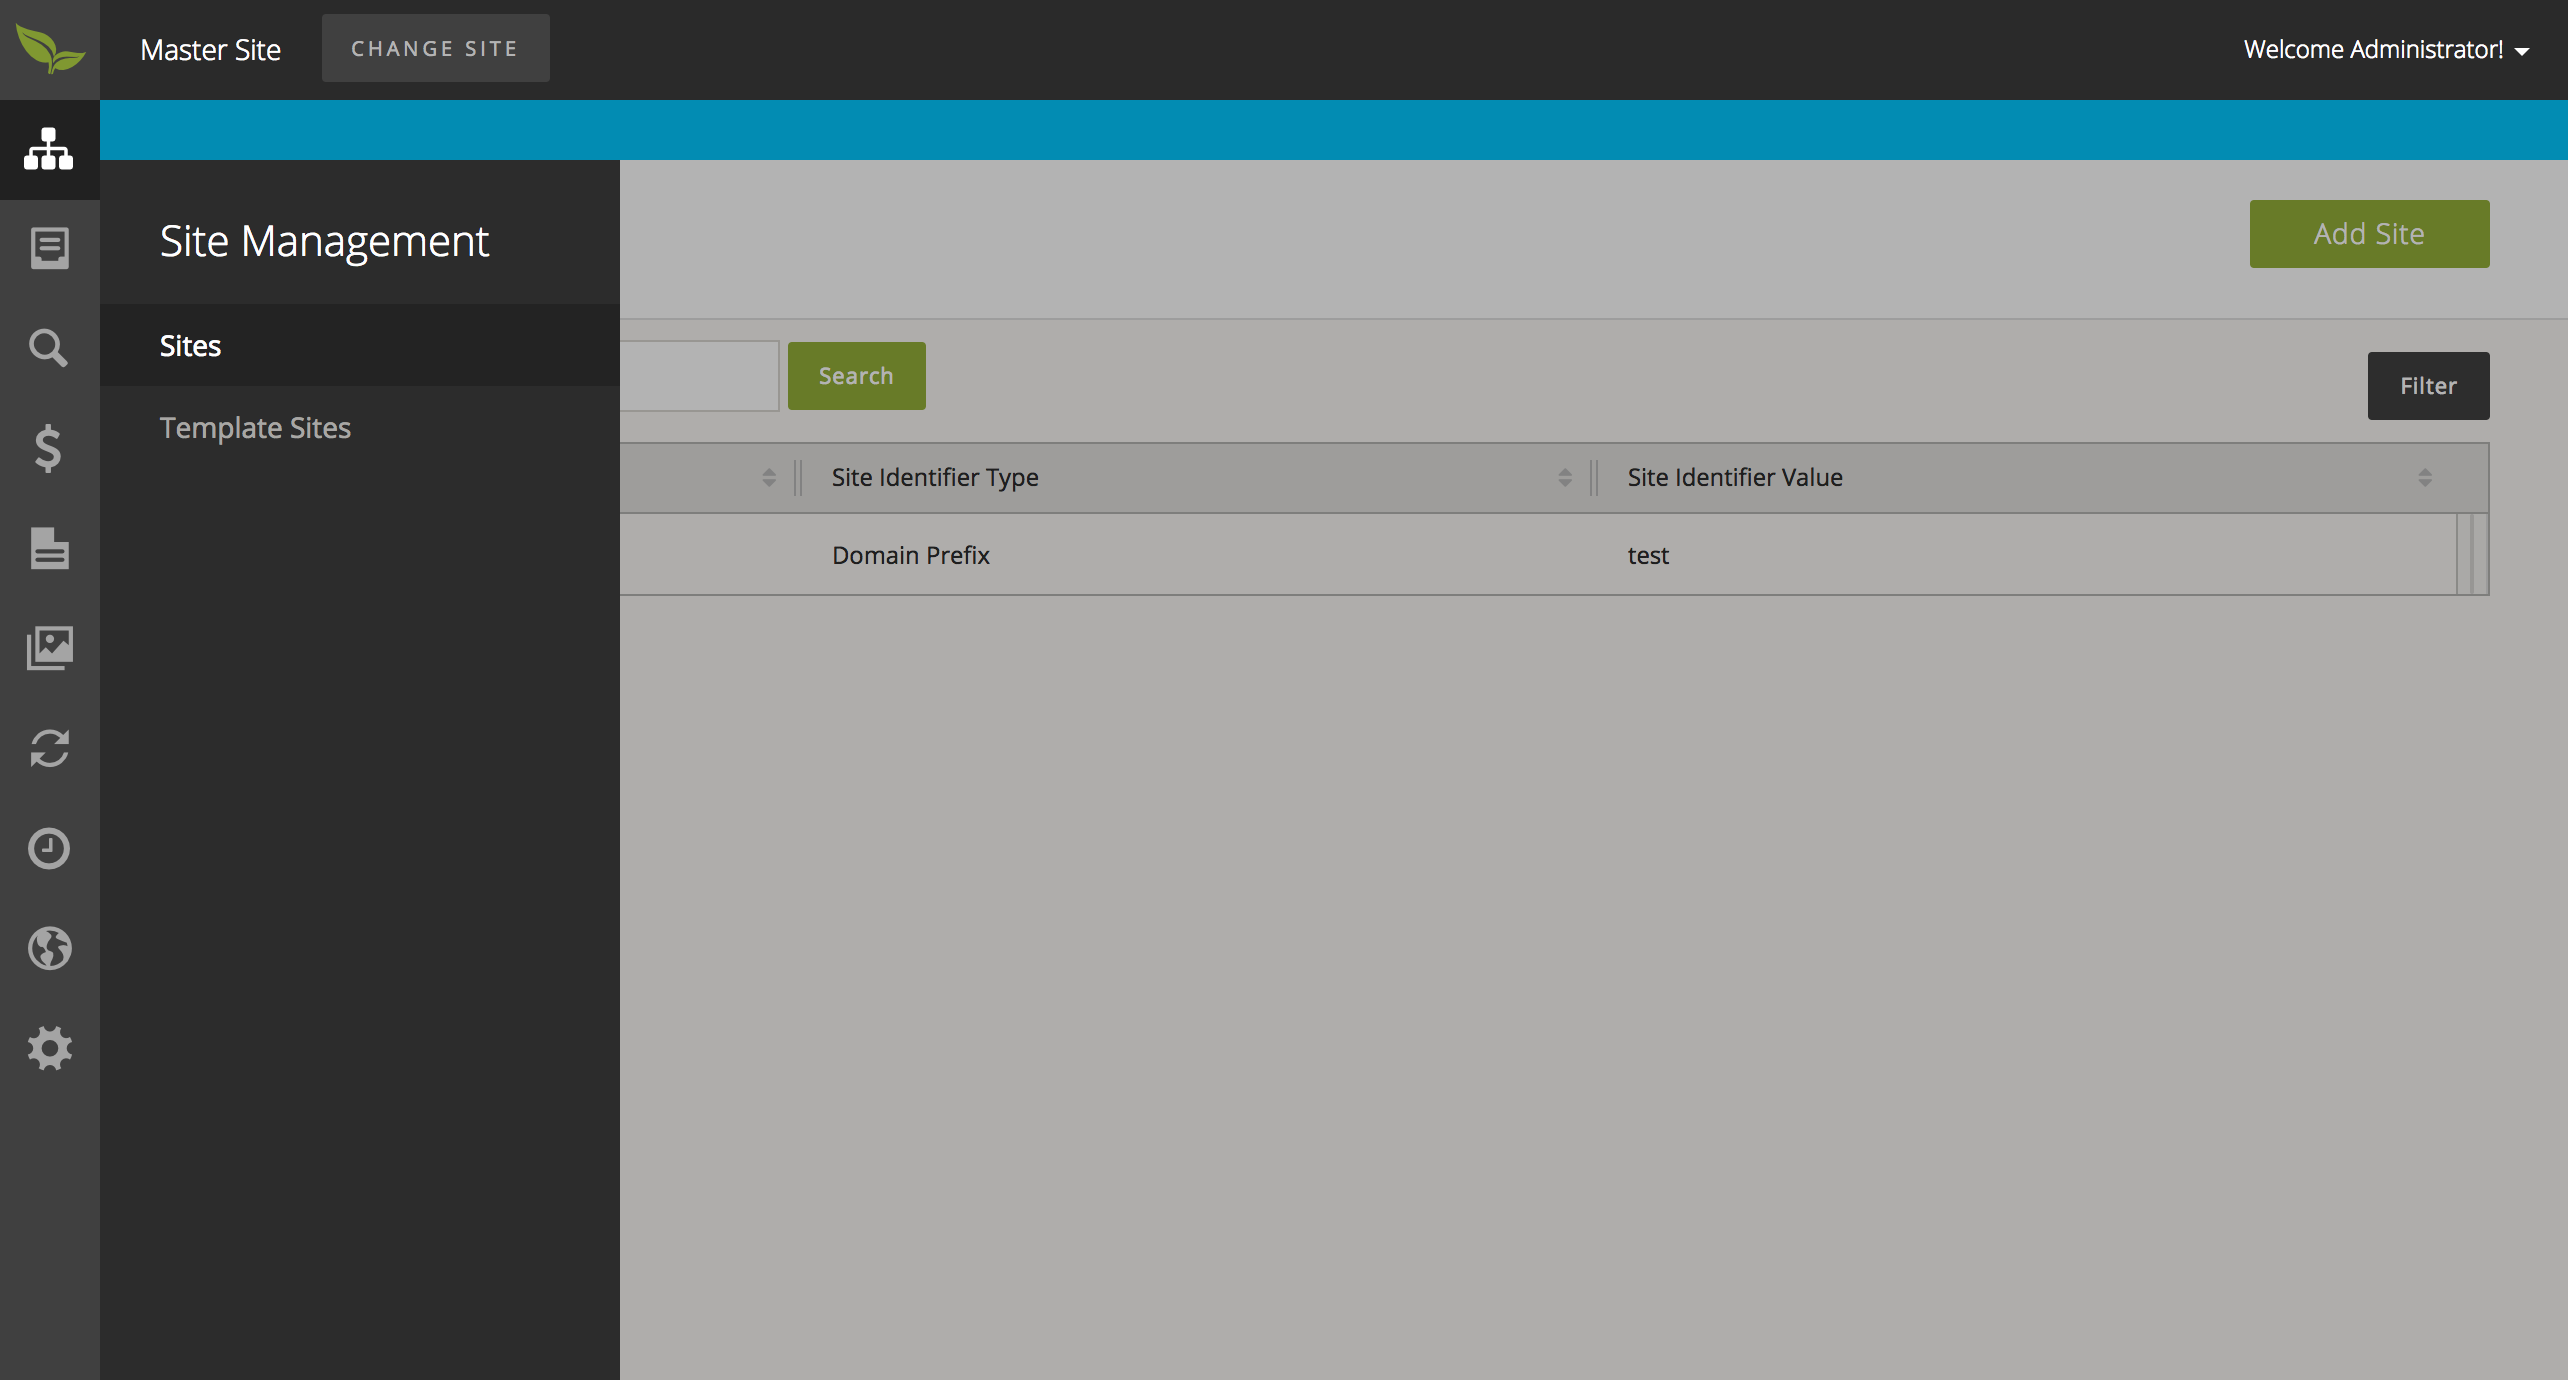
- From this page, select the Site the wish you tie a Catalog to. This will take you to the details page of the selected Site.
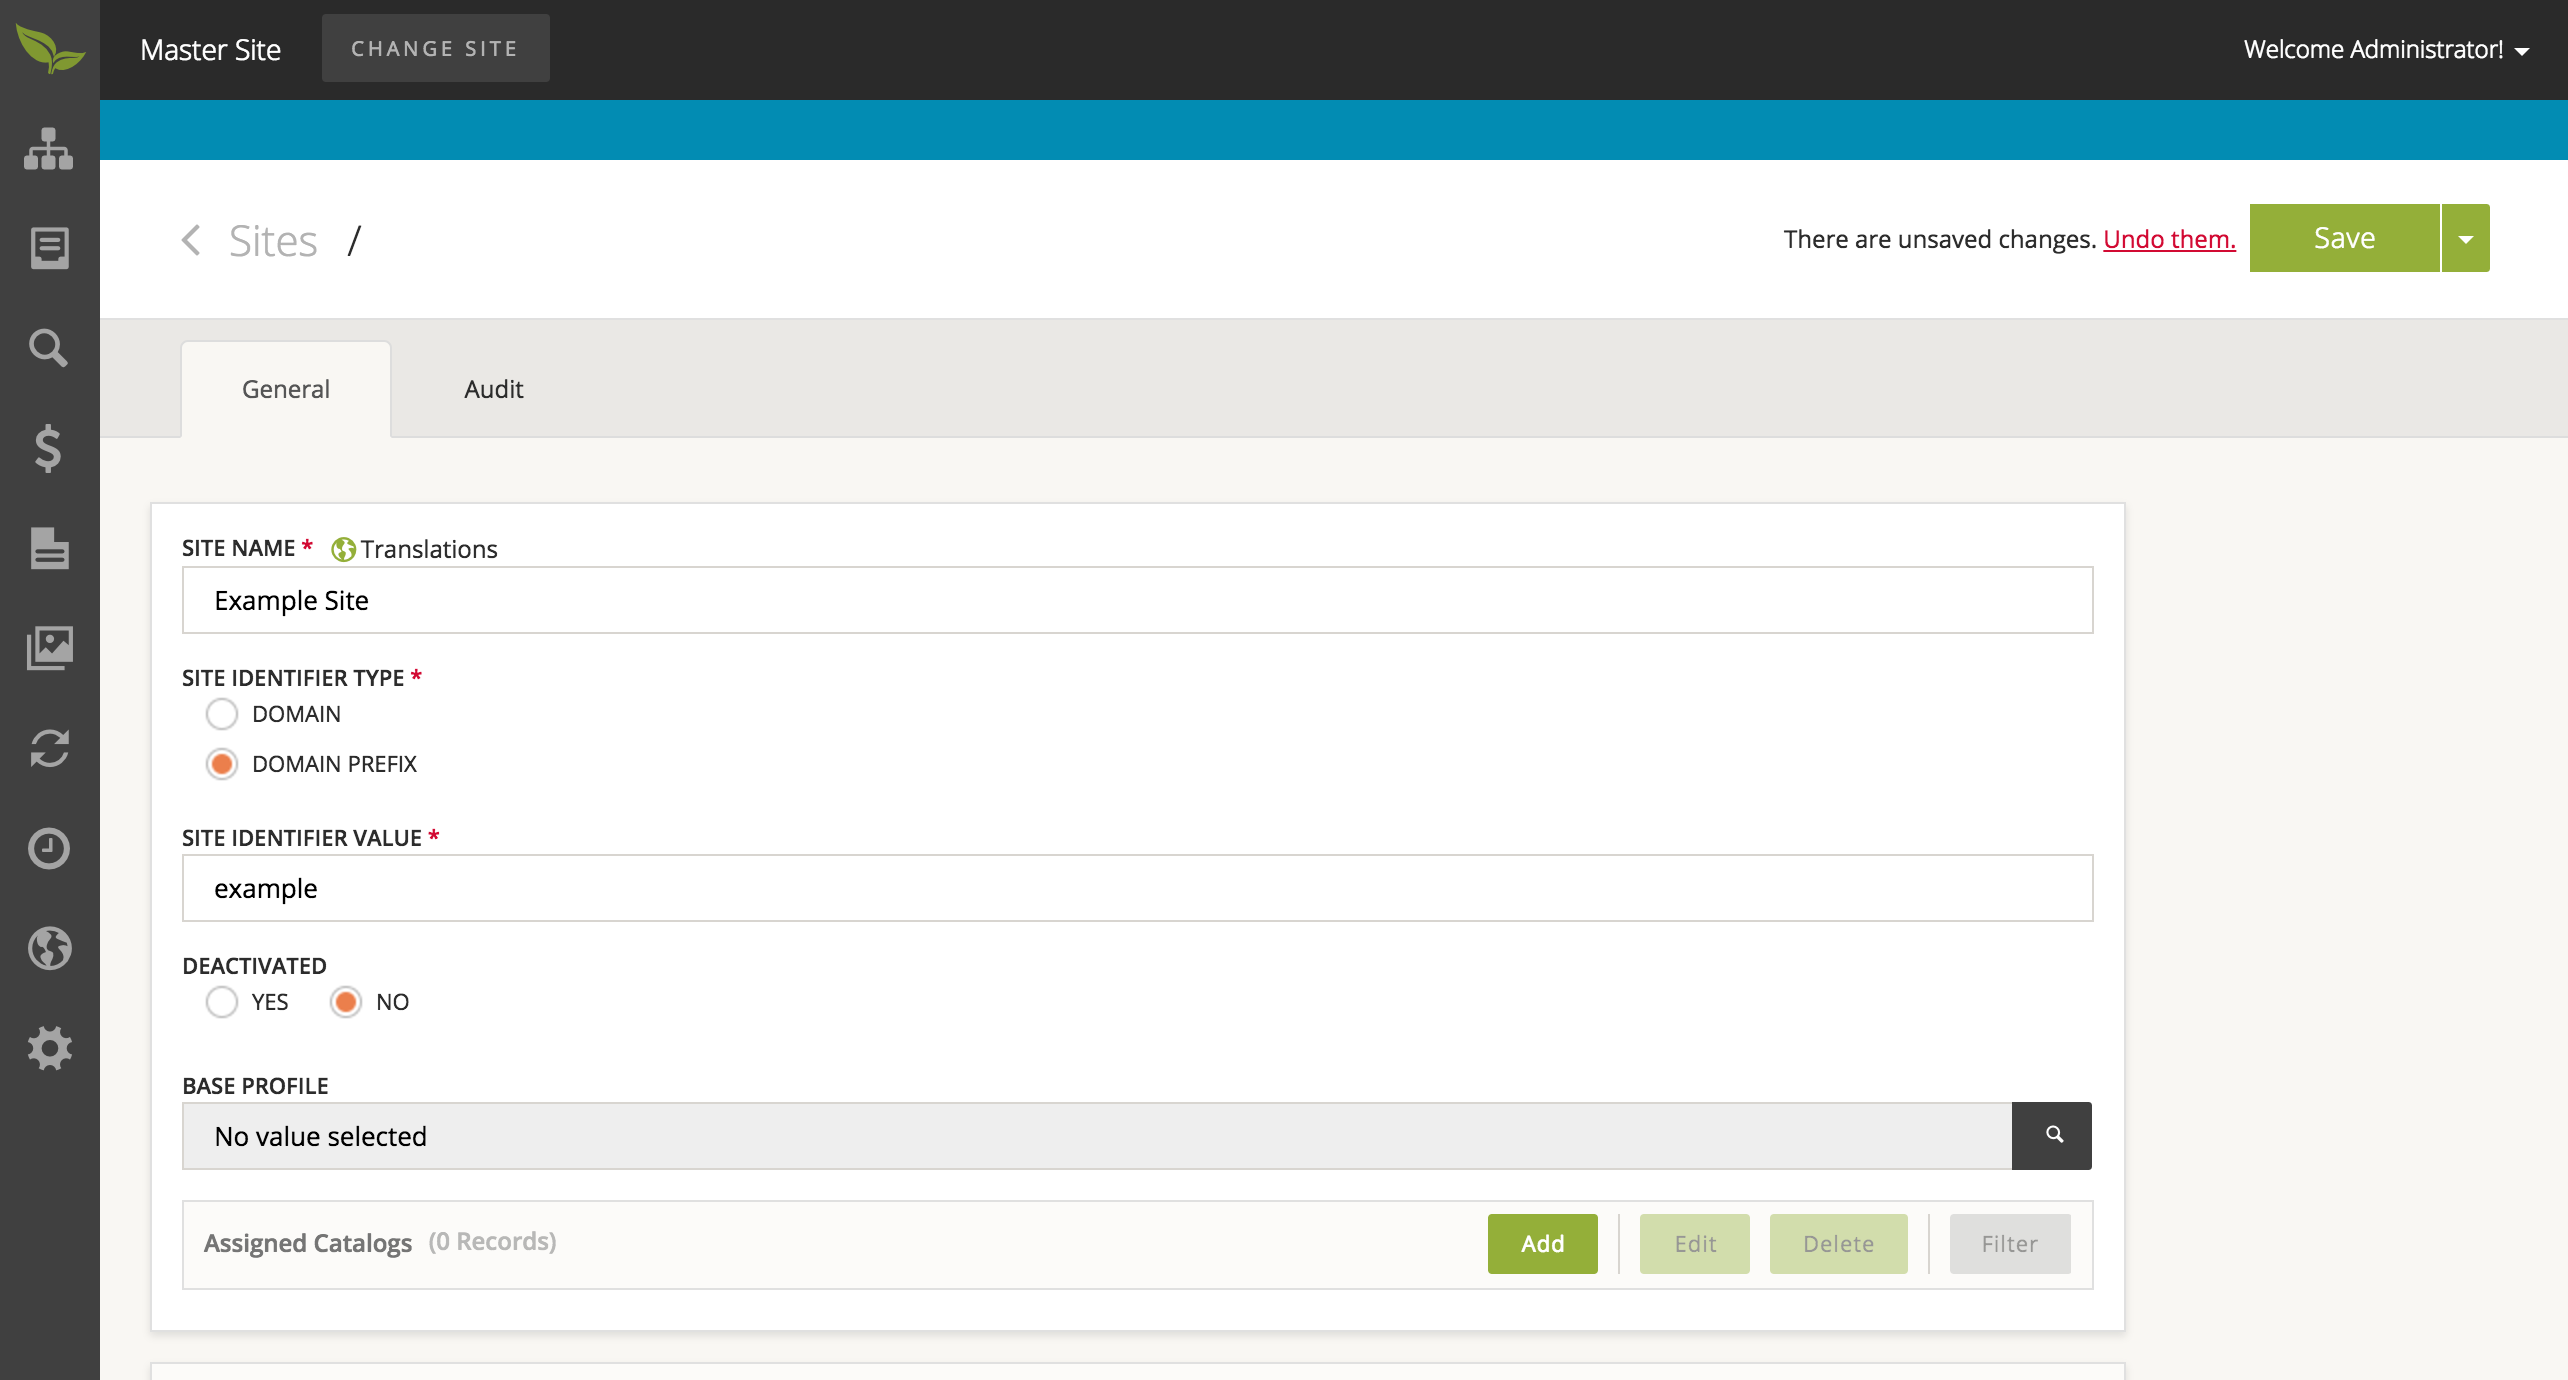
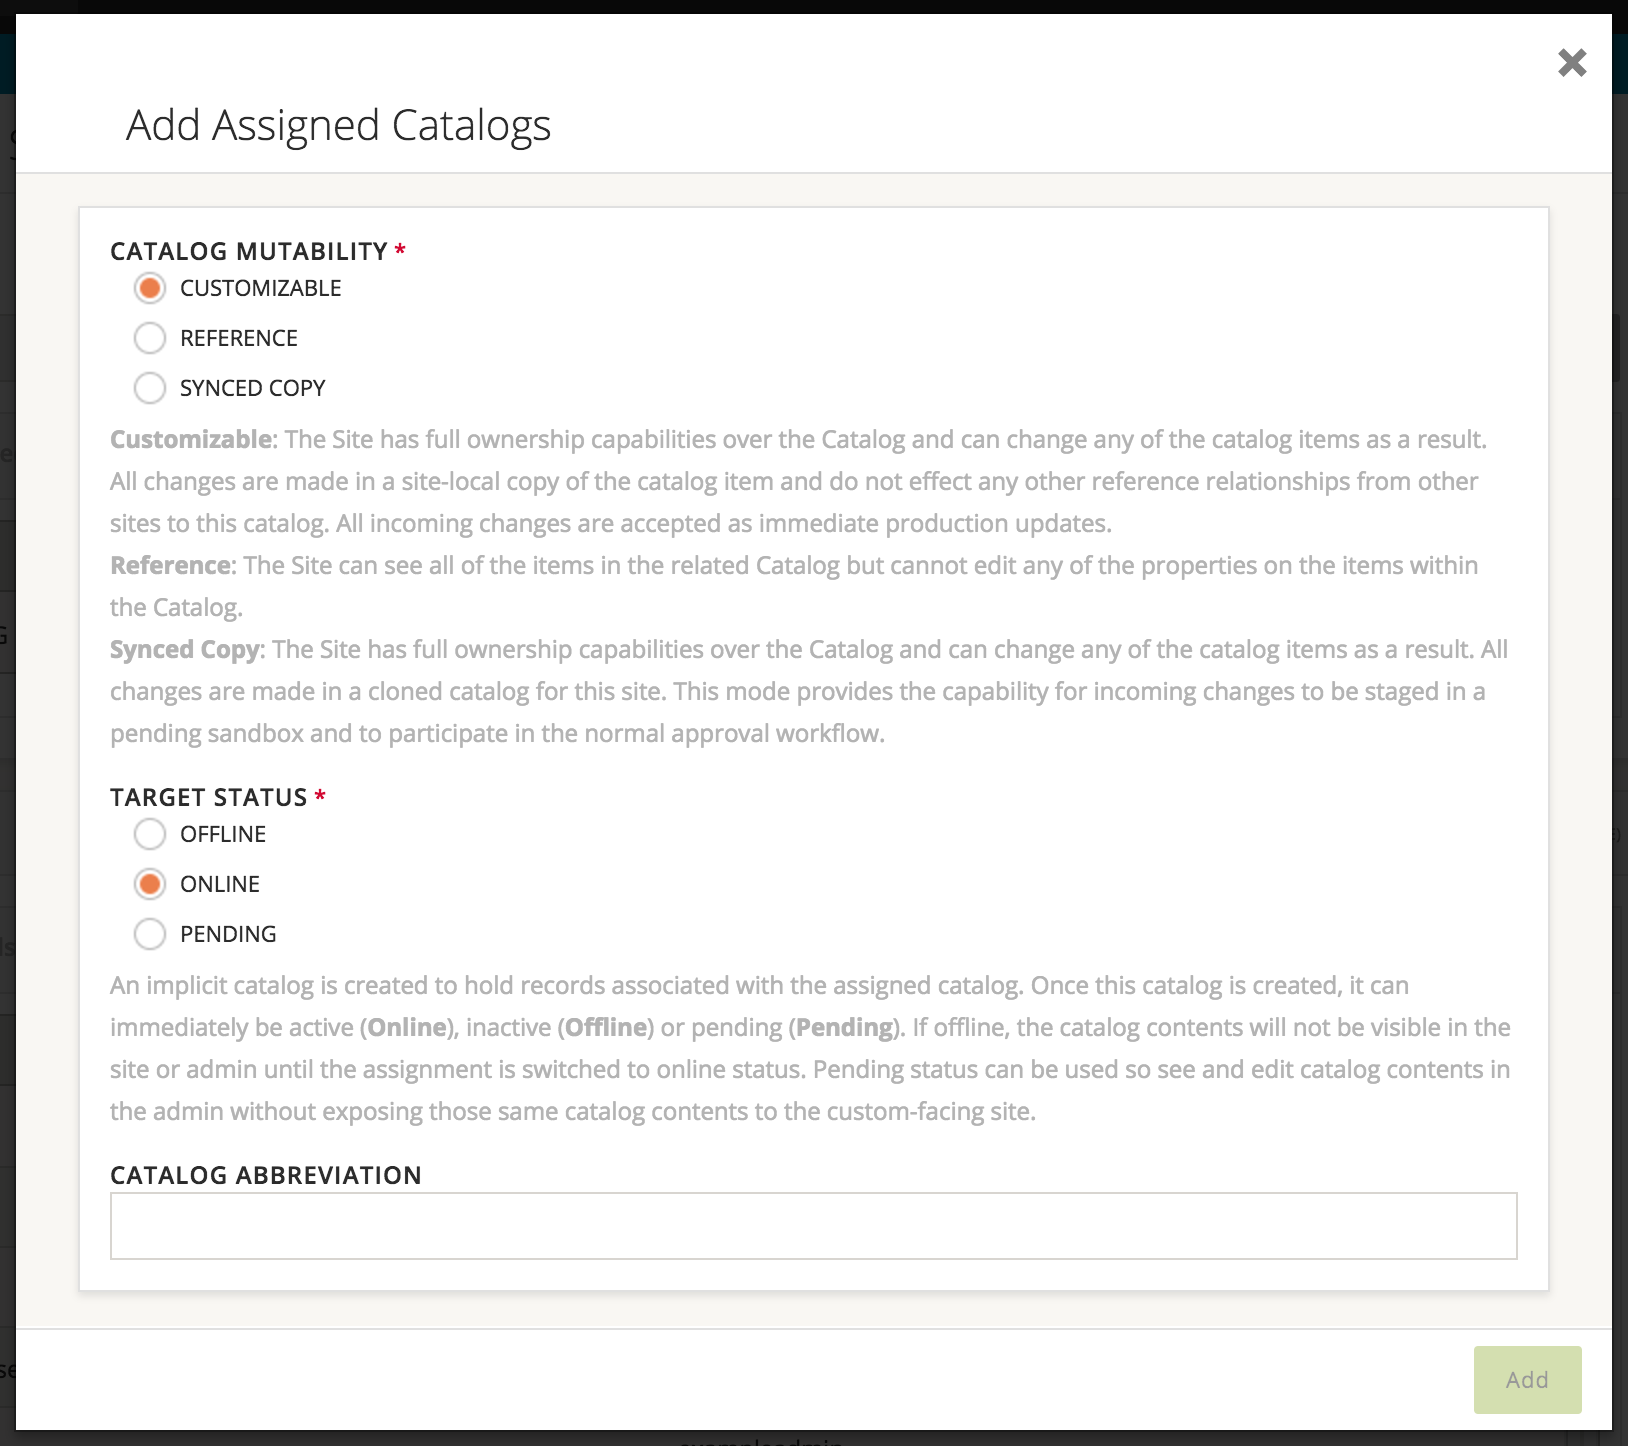
- Scroll down and select the 'Add' button on the Assigned Catalogs table, and select a Catalog from the list. You will also be asked to choose the level of editing permissions this Site will be allowed to edit the chosen Catalog. Additionally, you are asked to specify the status of the catalog - i.e. online, offline, or pending
- When you are satisfied with your changes, please select the 'Save' button in the bottom right corner of the window.
To create an Admin for a Site:
- Select 'Site Management' from the sidebar and then choose 'Sites'.
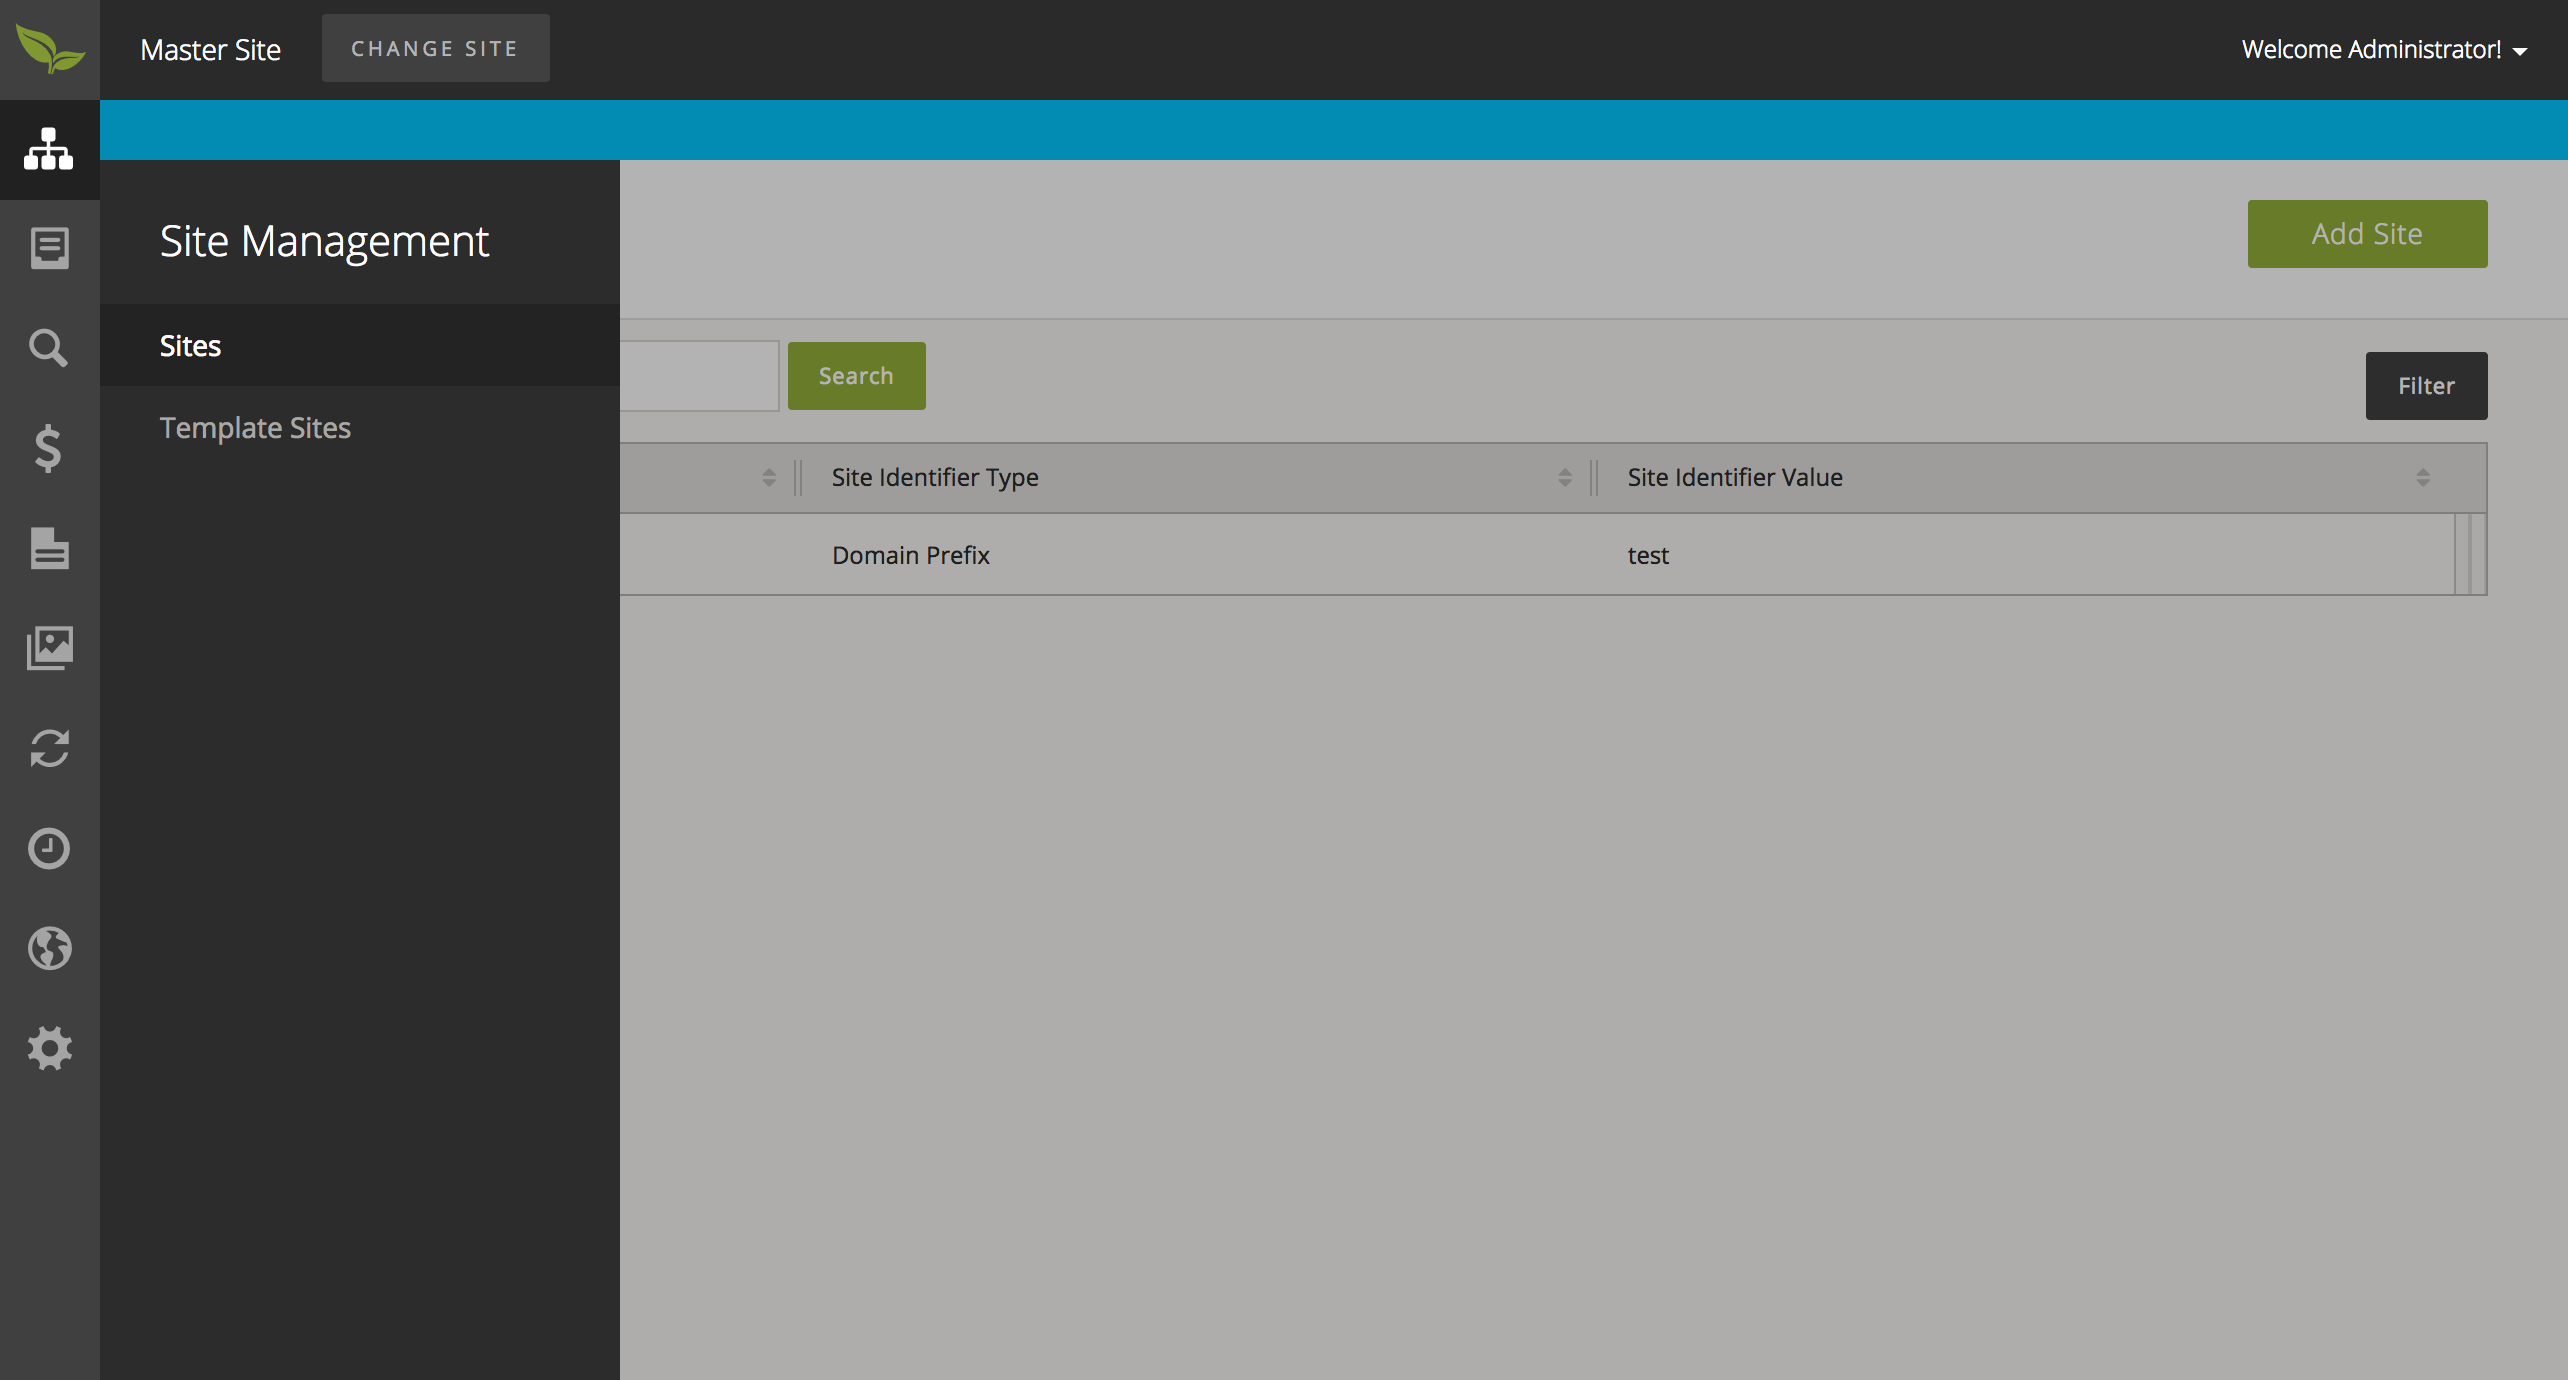
- From this page, select the Site you wish to create an Admin User for. This will take you to the details page of the selected Site.
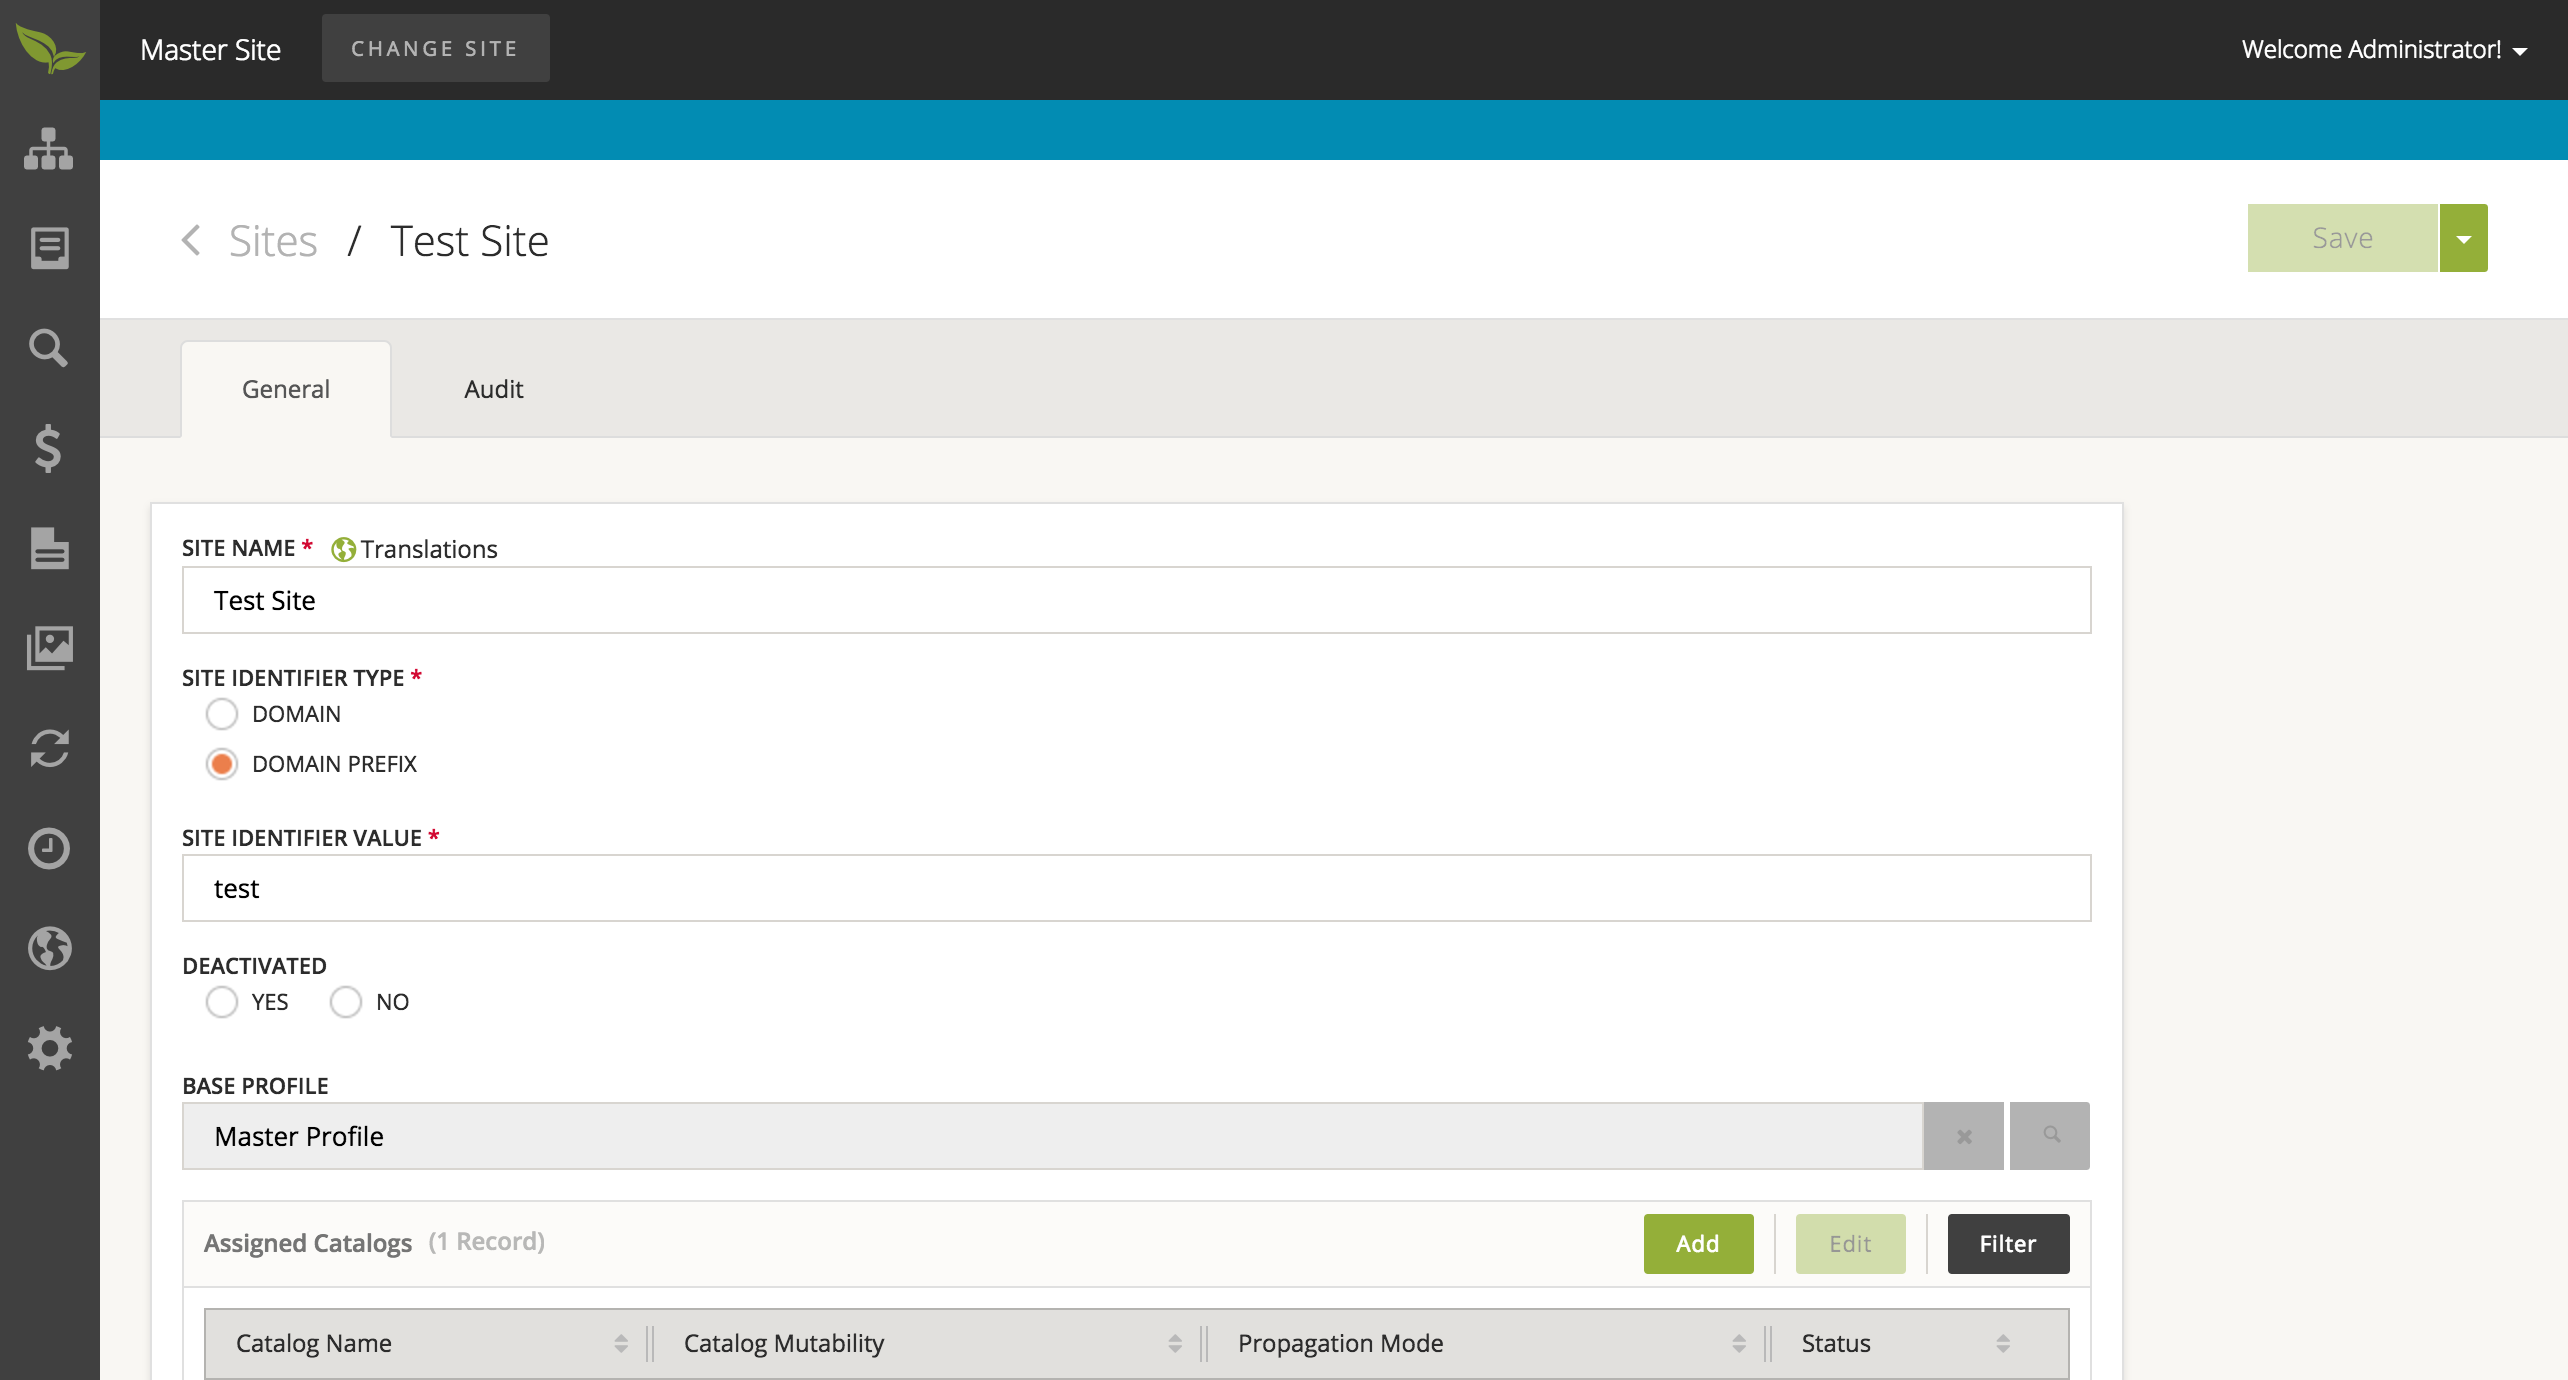
- On the details page, please scroll down to see the Admin User collection.
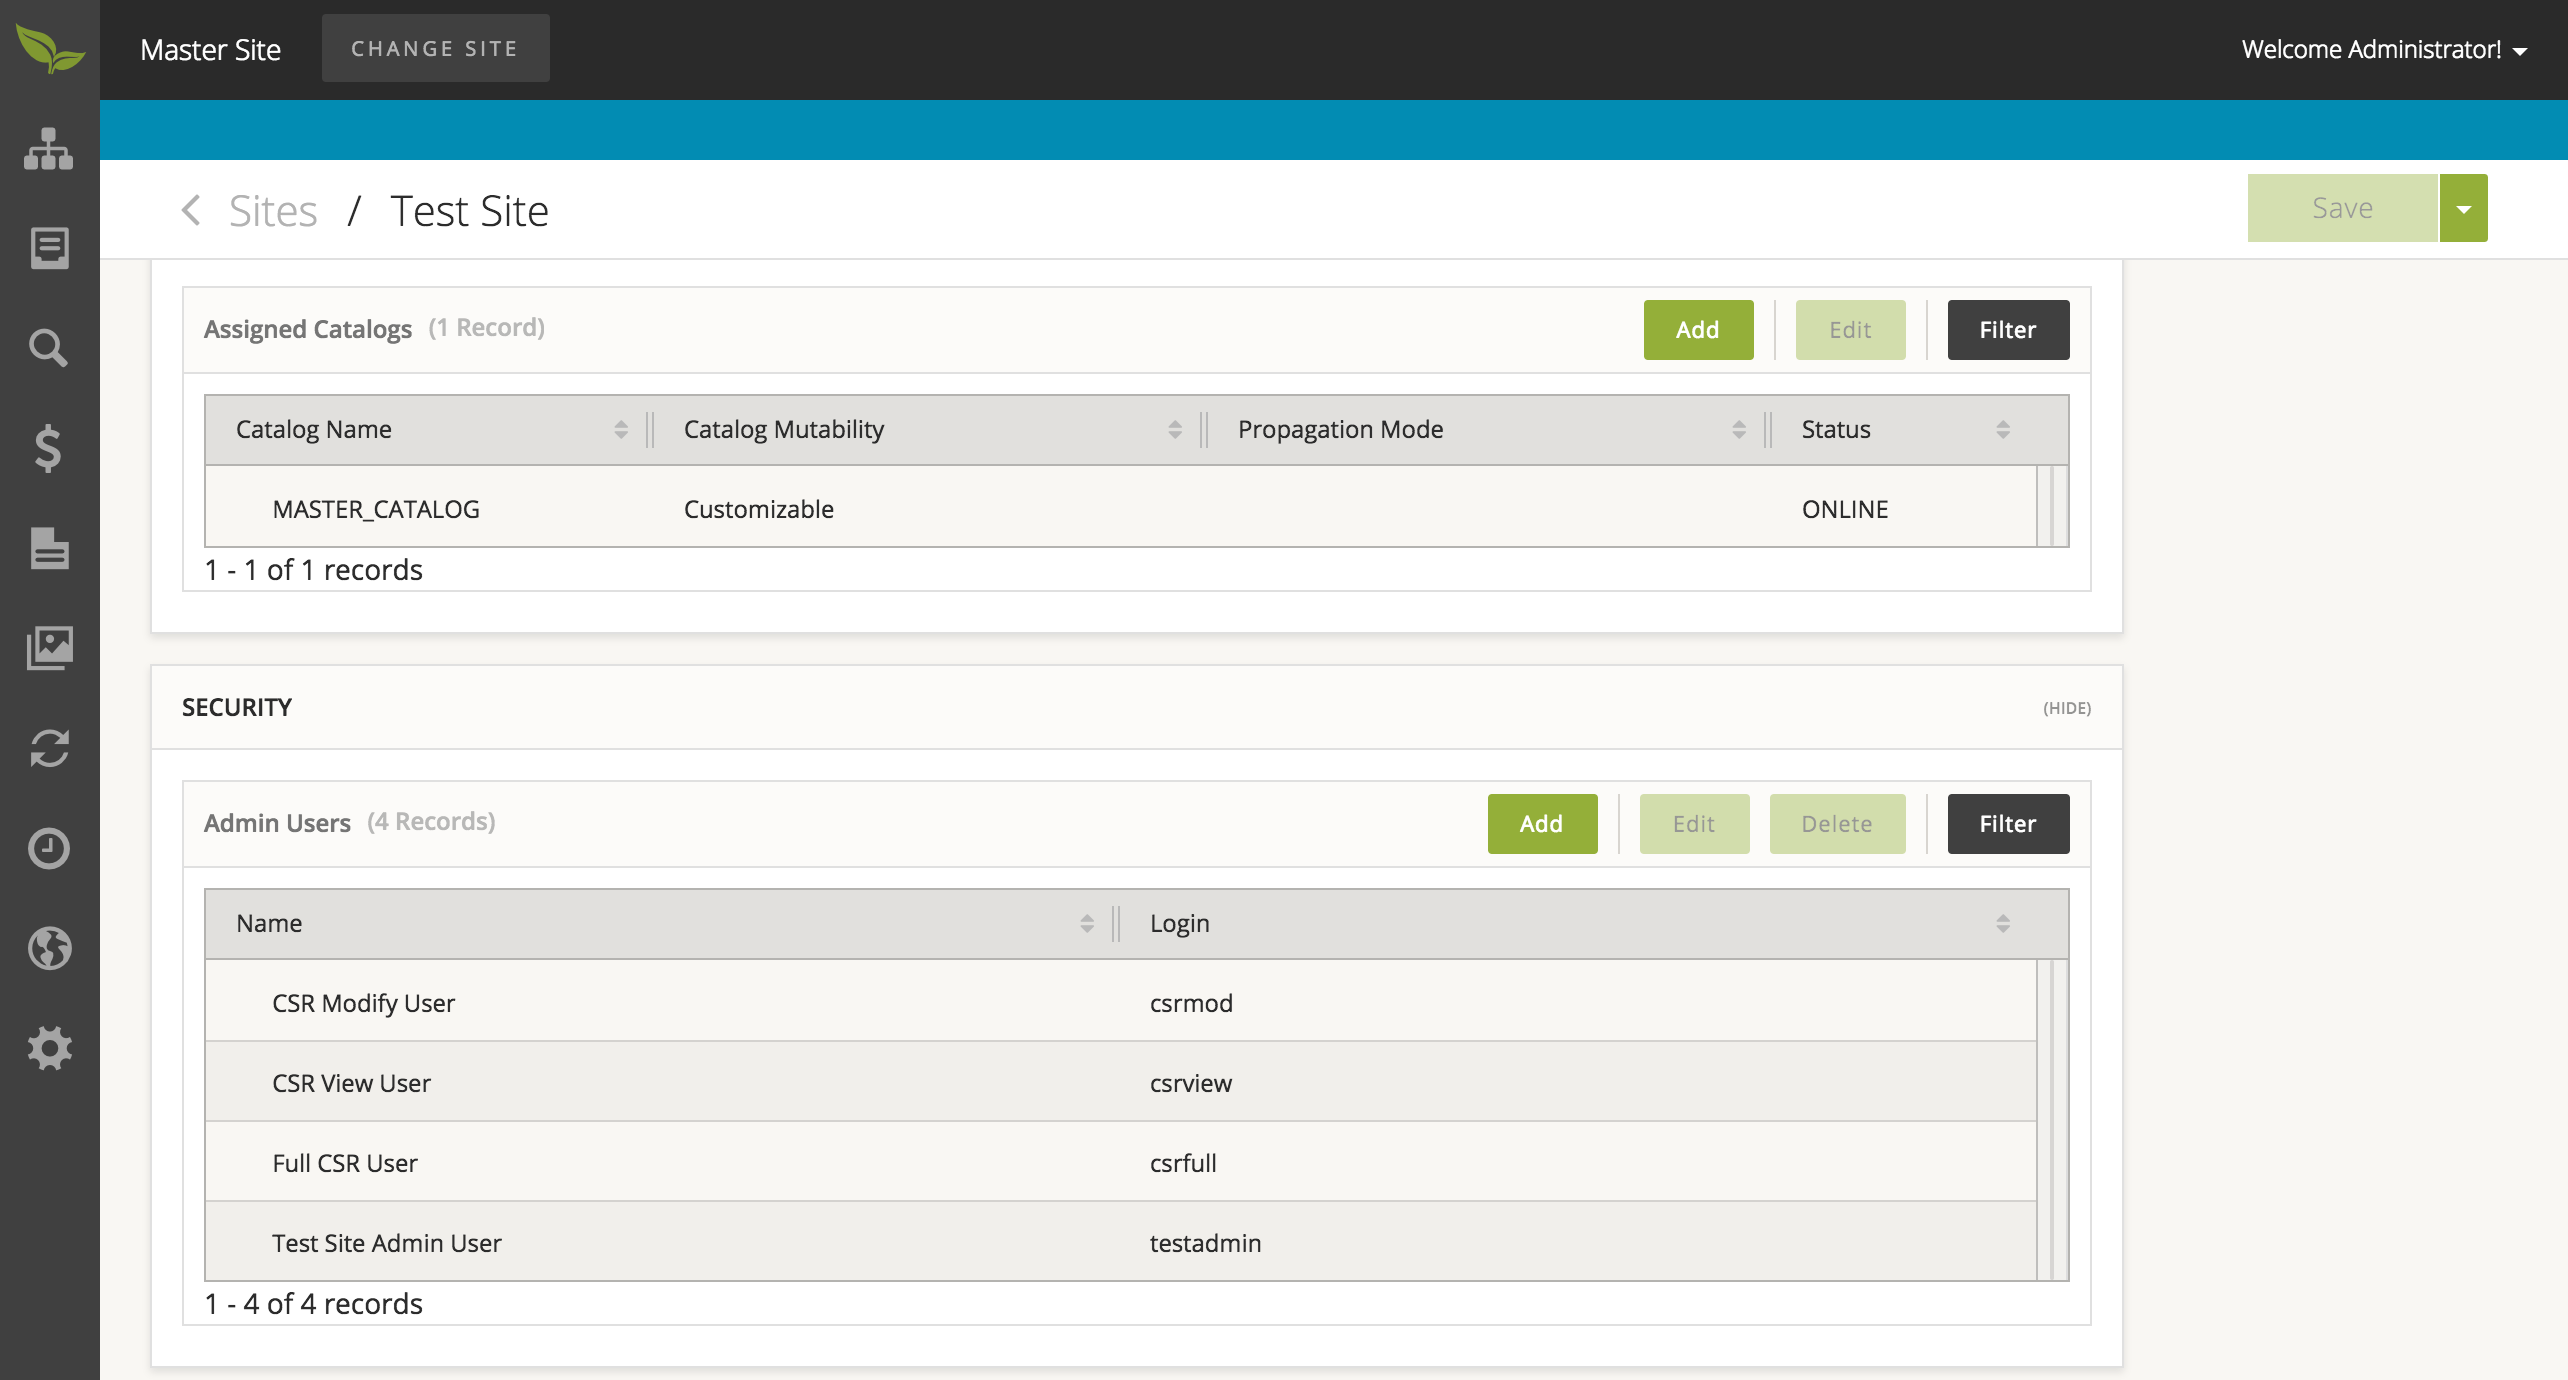
- Select the 'Add' button on this table and provide information to the window that opens up.
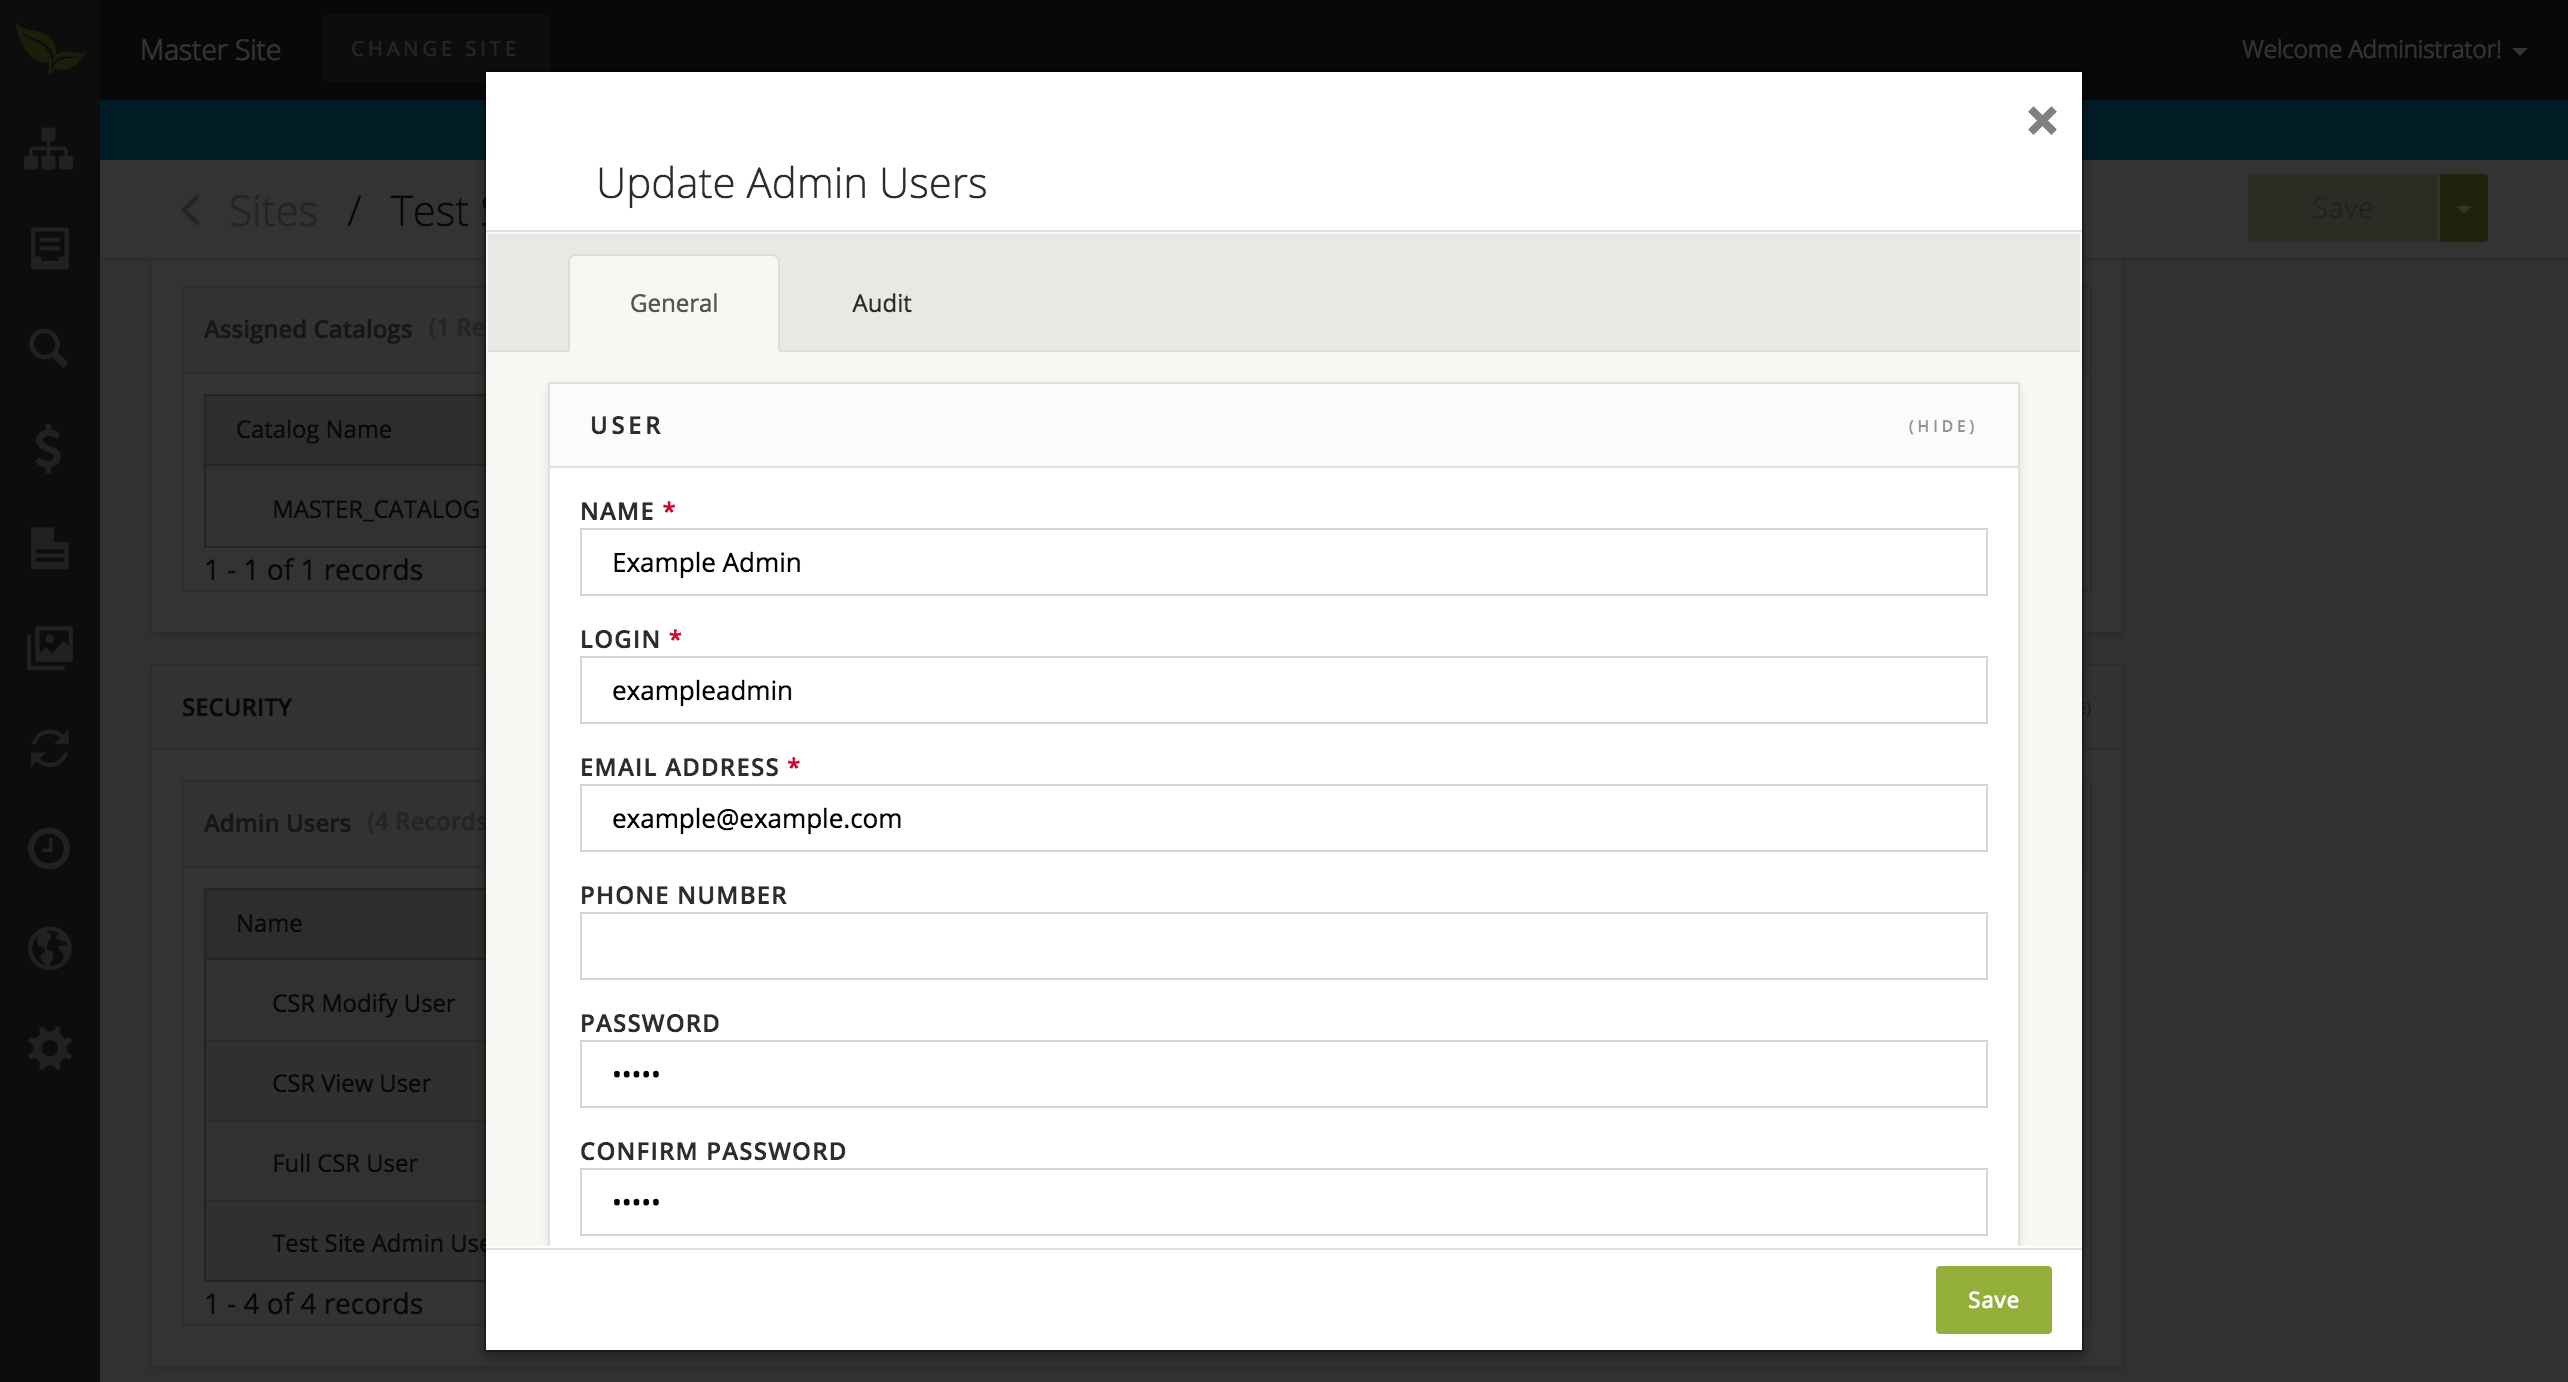
- You will now need to assign Roles or Permissions to this Admin User. Scroll down in this window until you see the 'Permissions' and 'Roles' collections. At this point, you may select the Permissions and Roles you wish this Admin User to have.
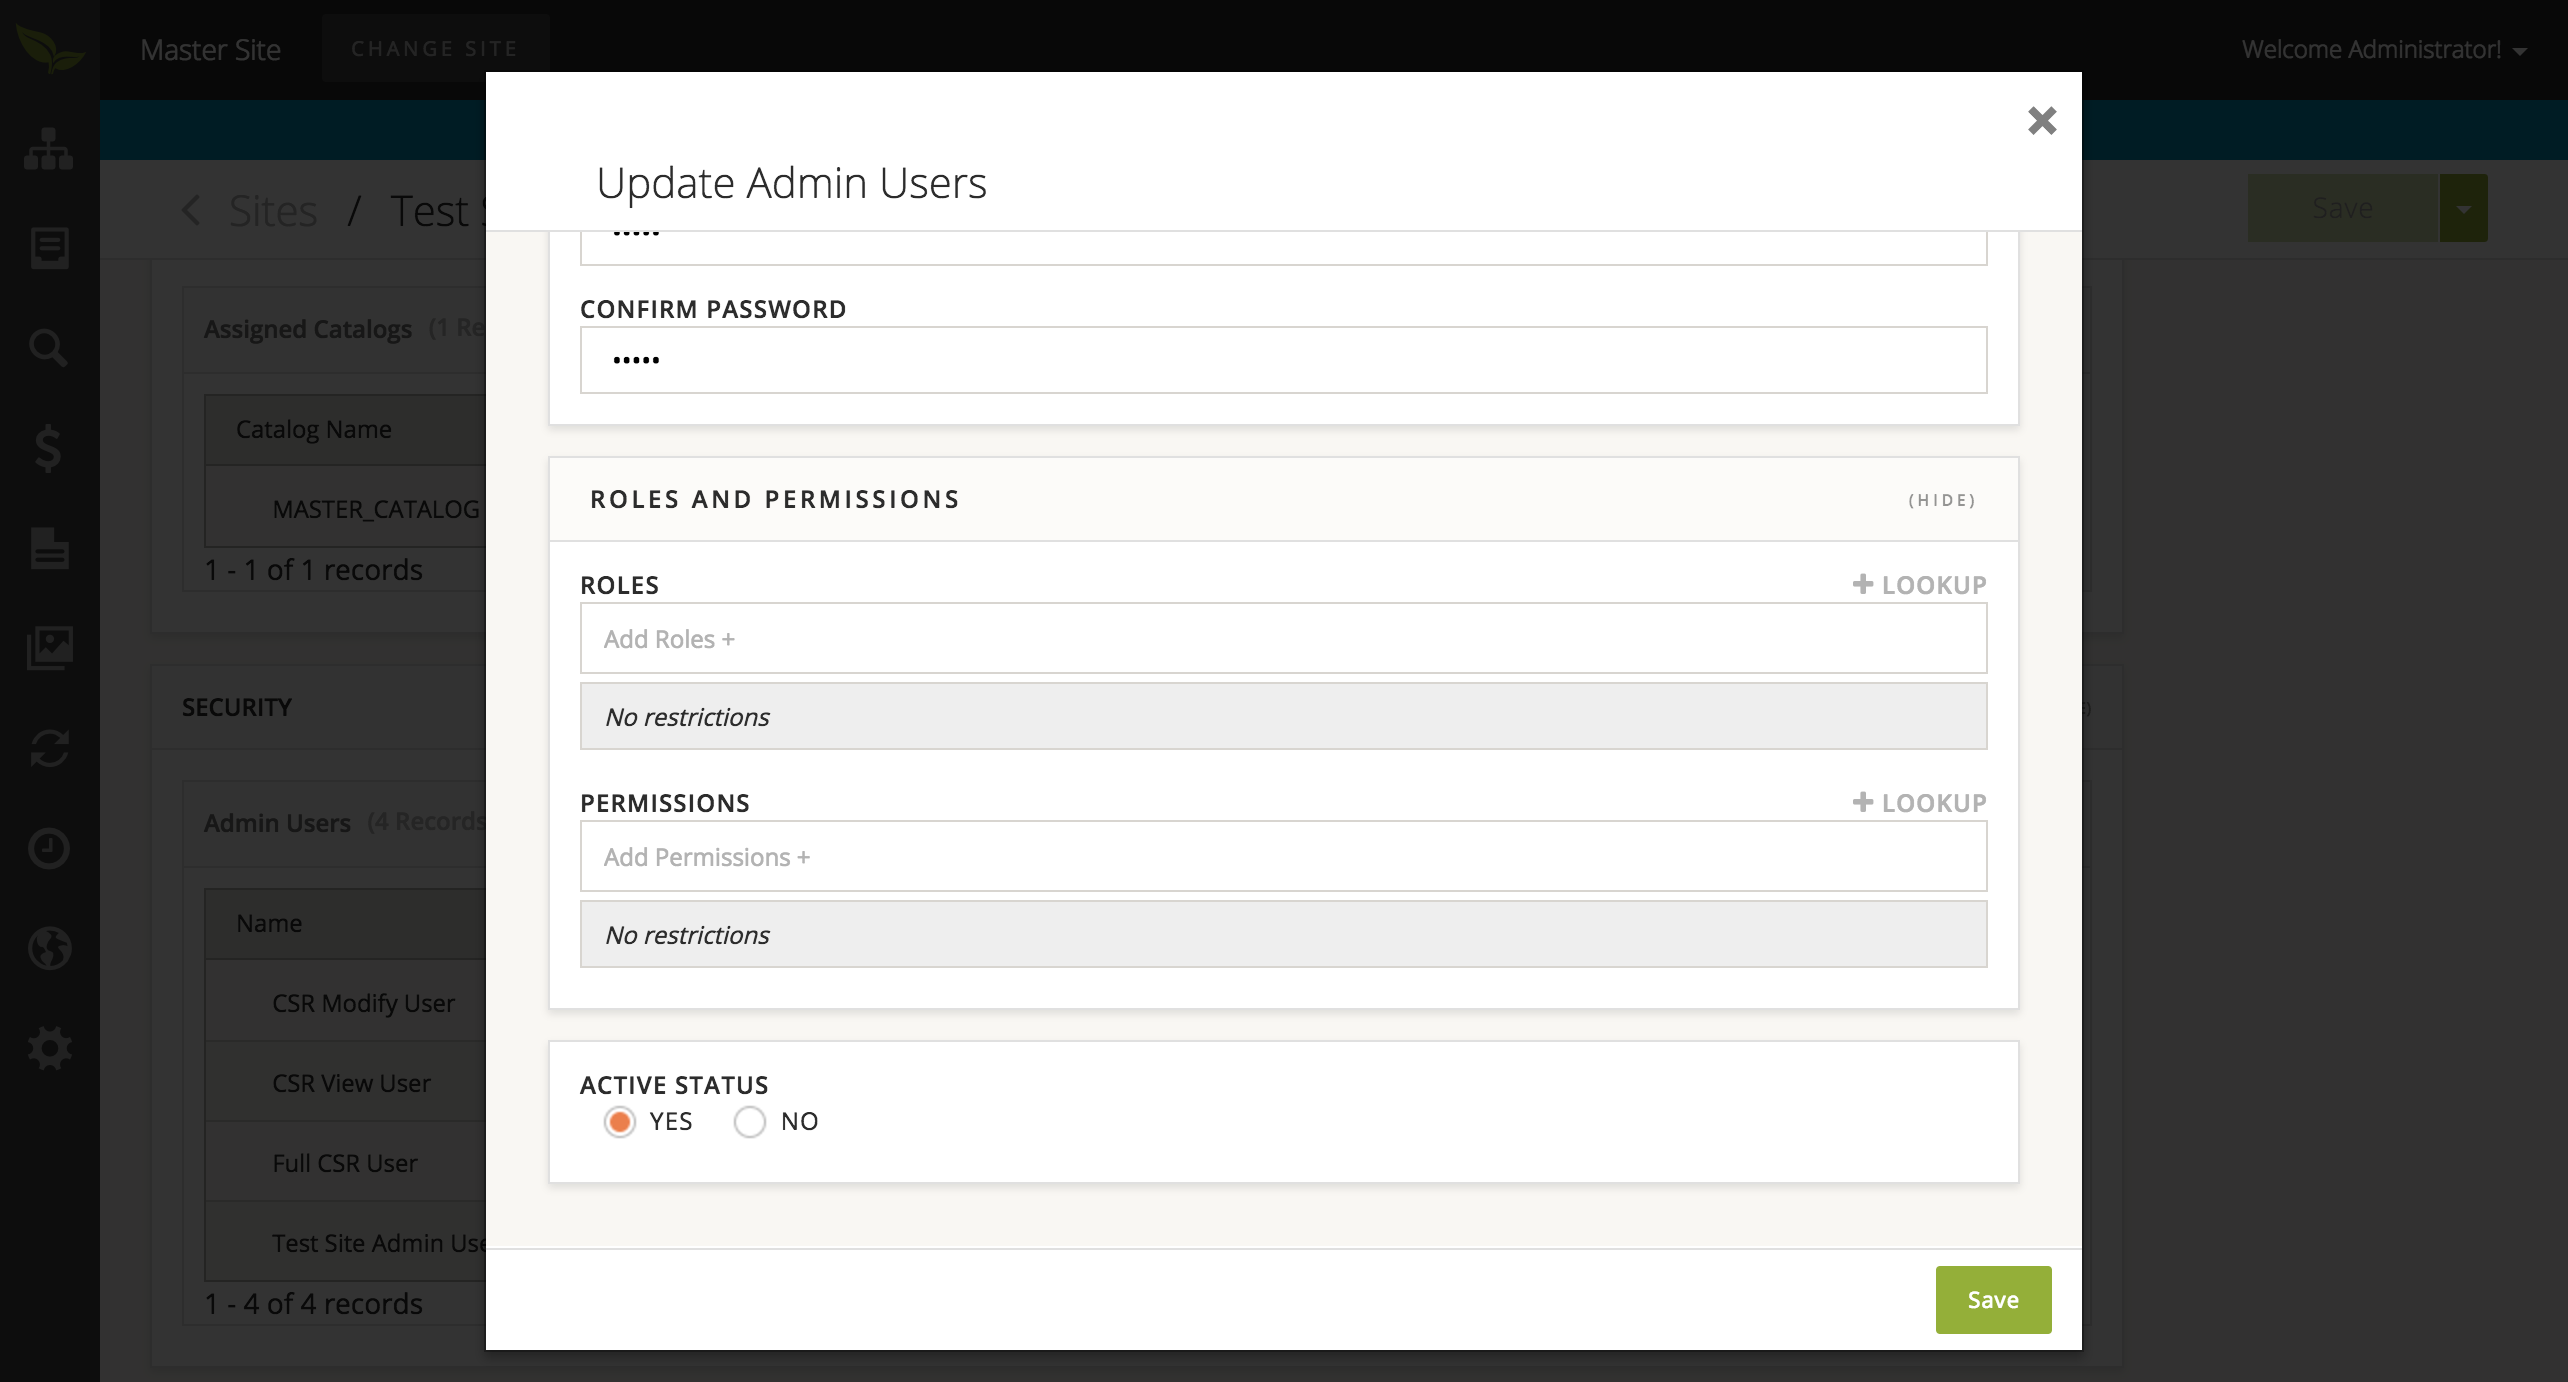
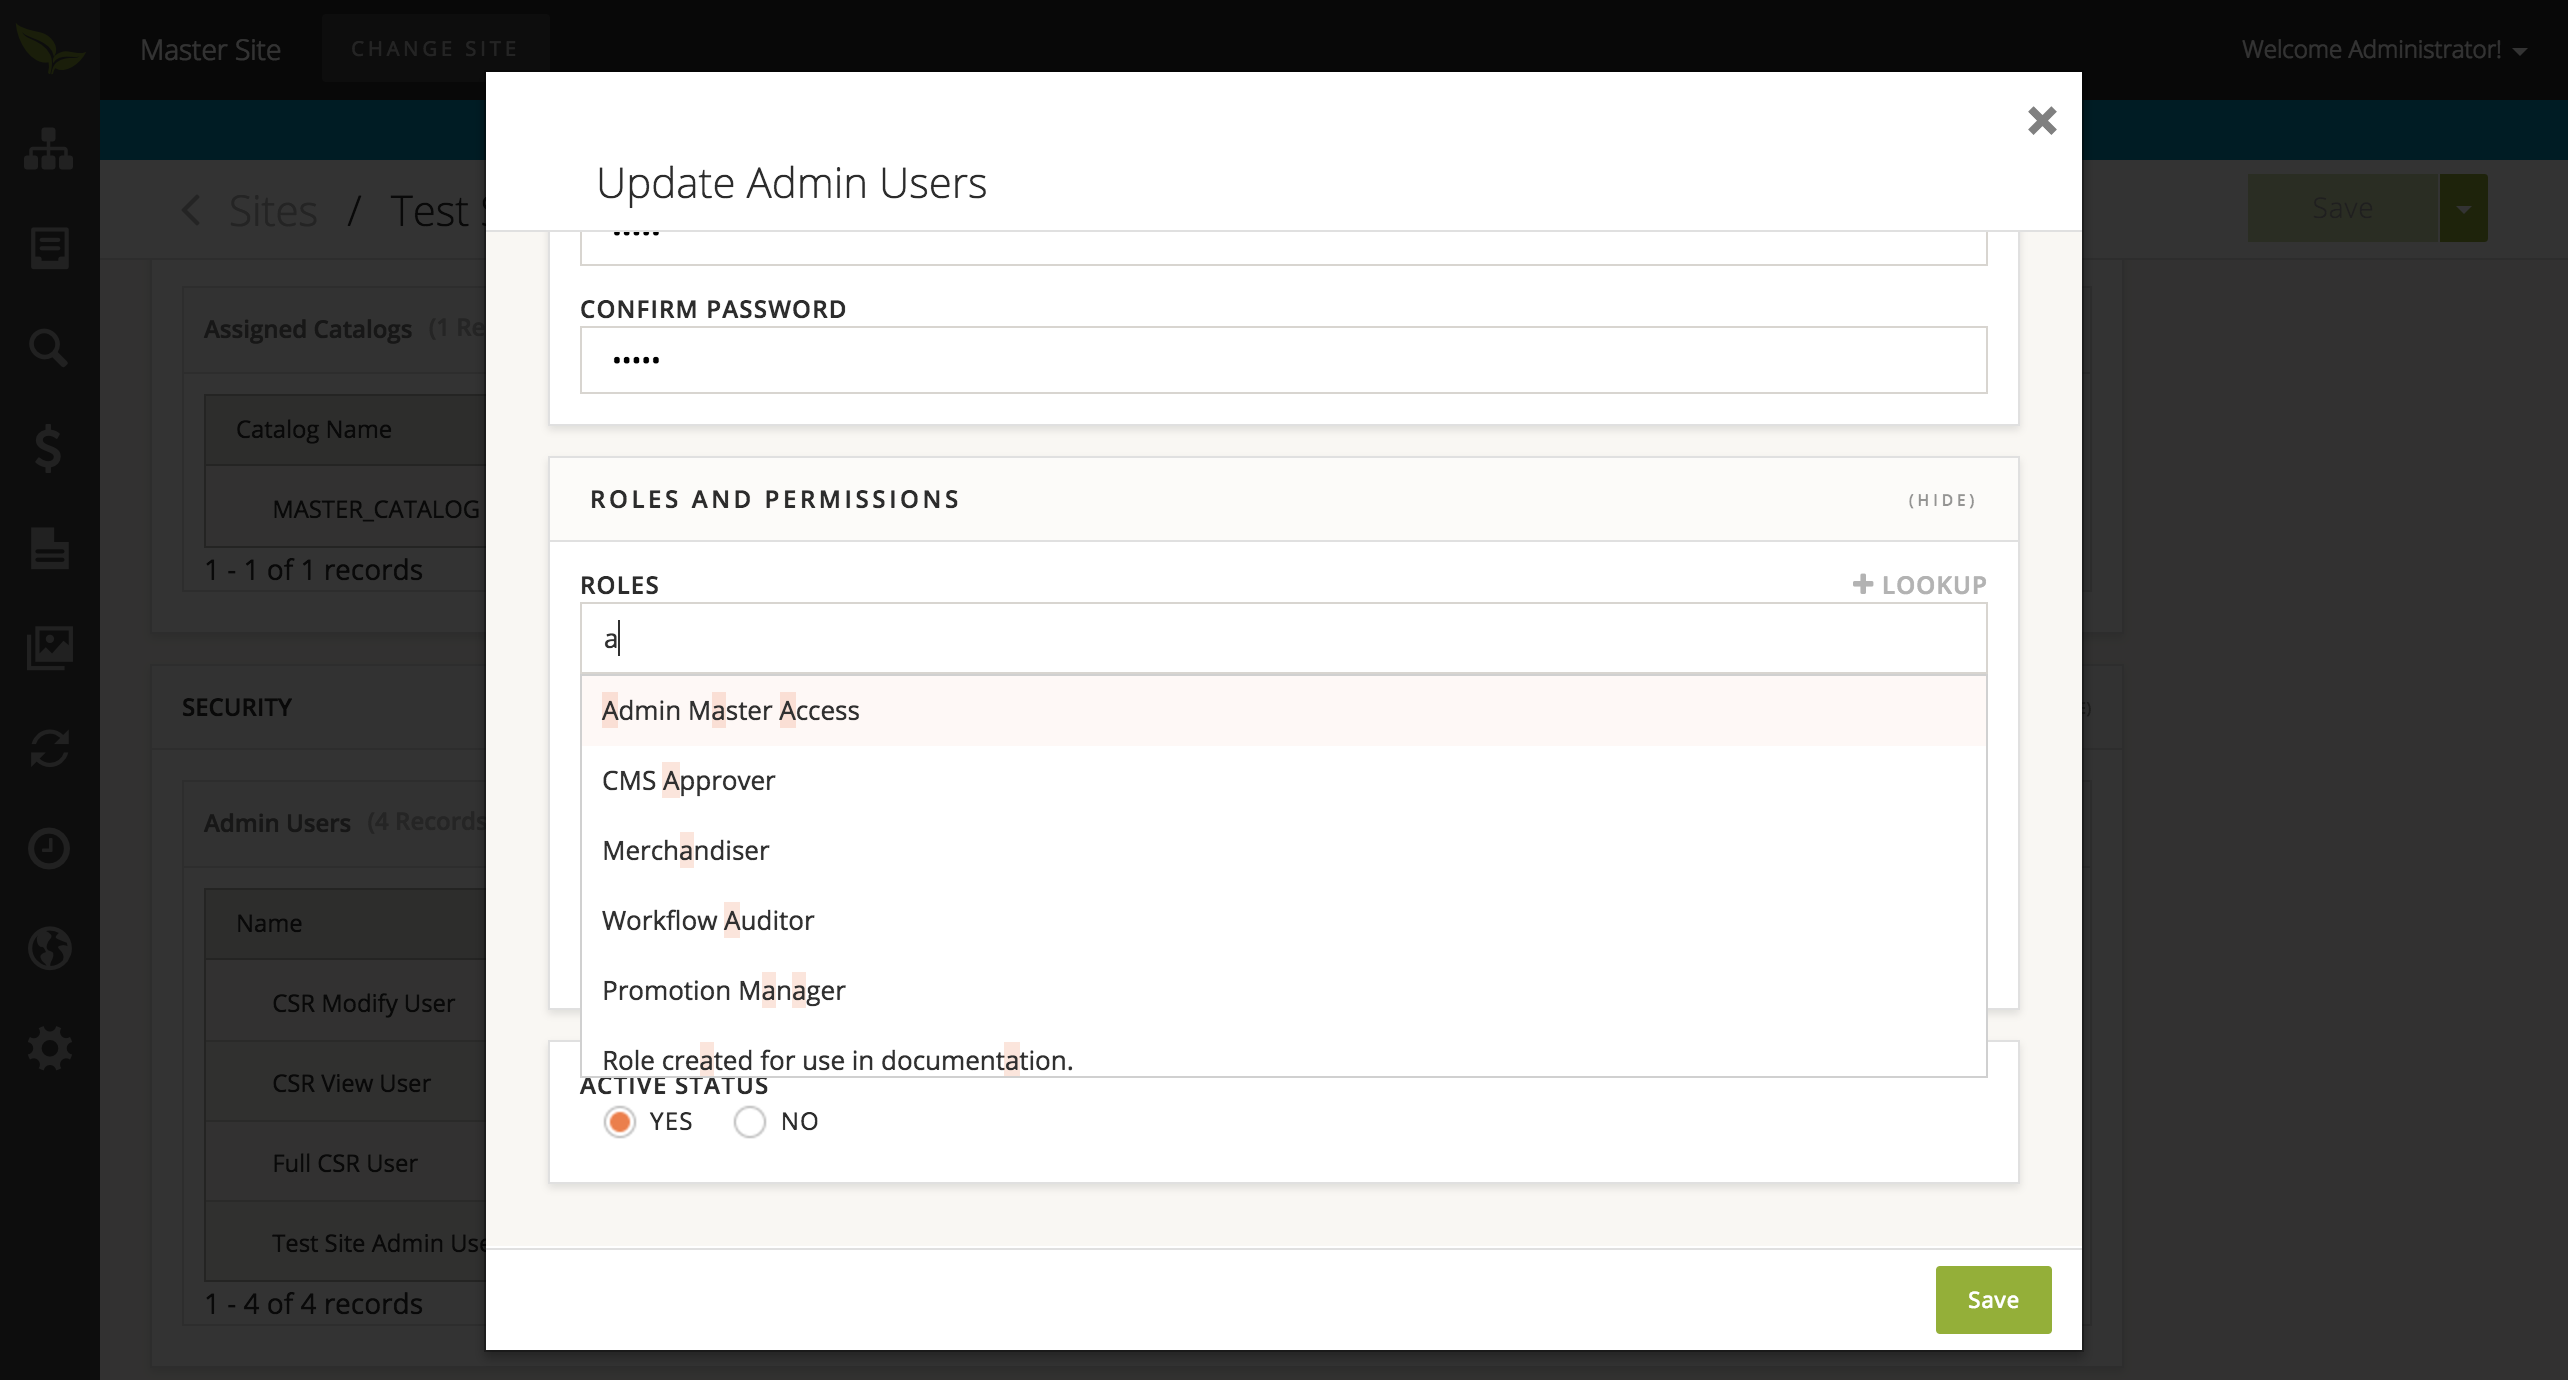
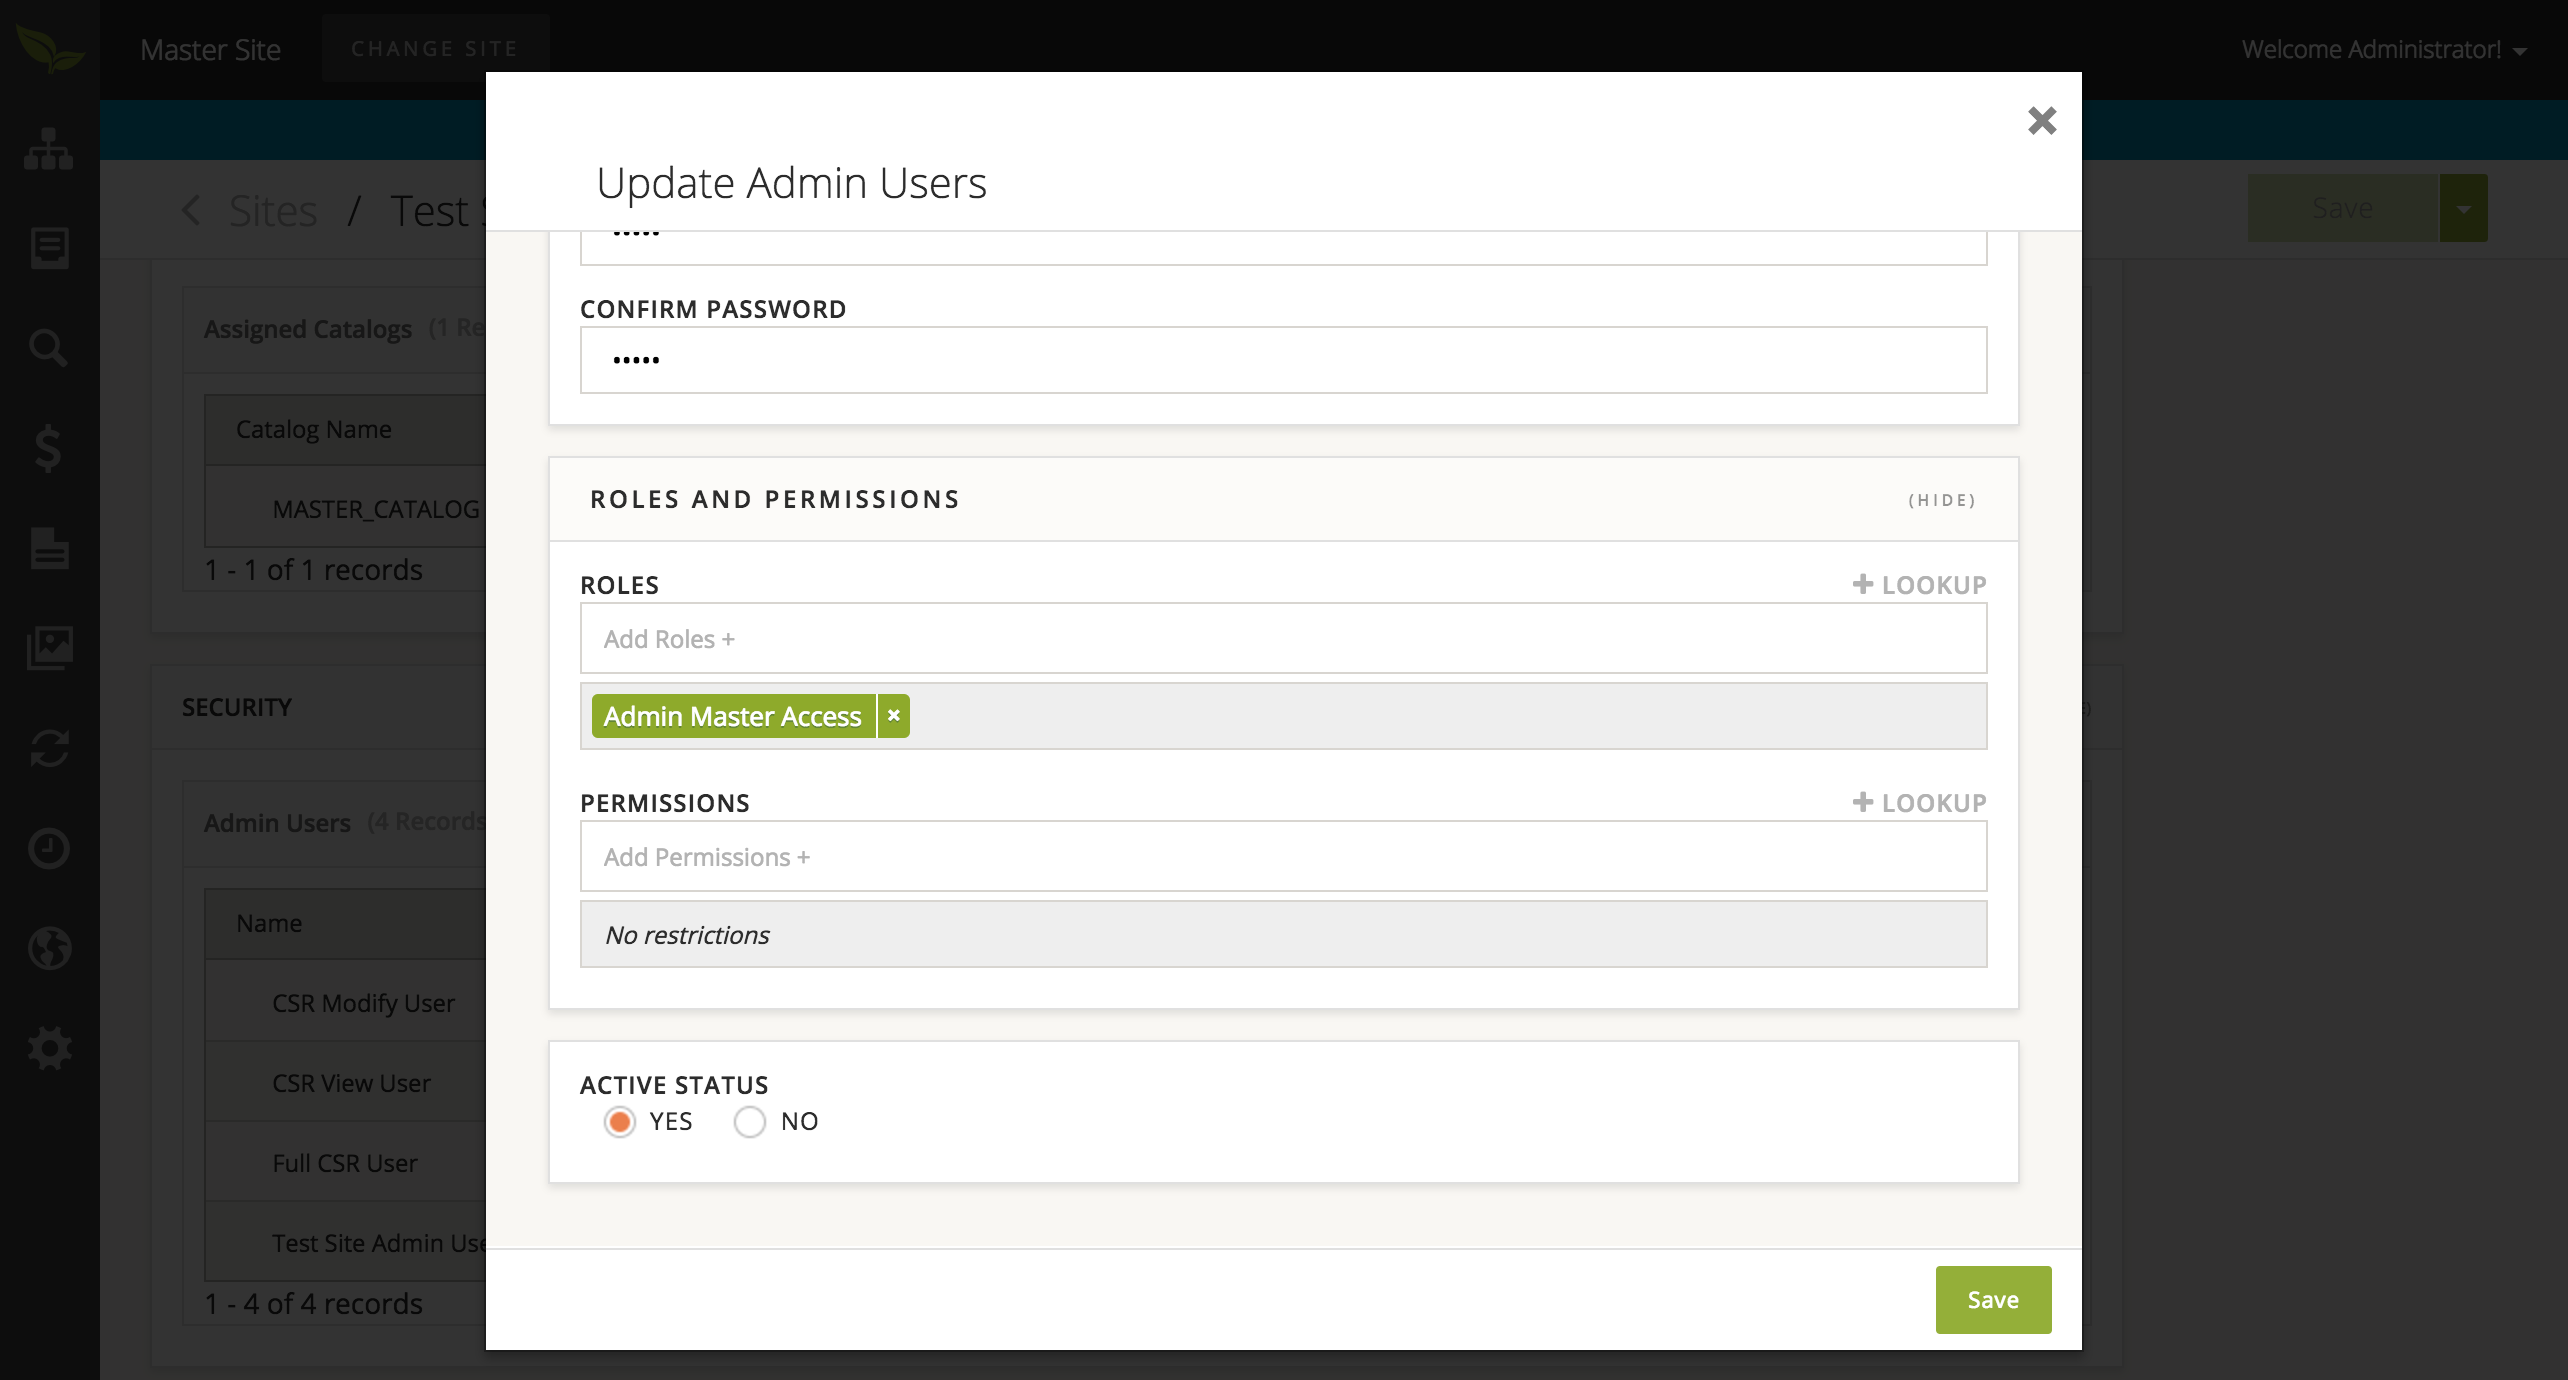
- For the rest of this example, we will be adding a Role to this User.
- Once you have finished defining the properties, roles, and permissions for this Admin User, please select the 'Save' button in the bottom right corner of the page.
To create an Admin Role:
- Select 'Settings' from the sidebar and then choose 'Roles'.
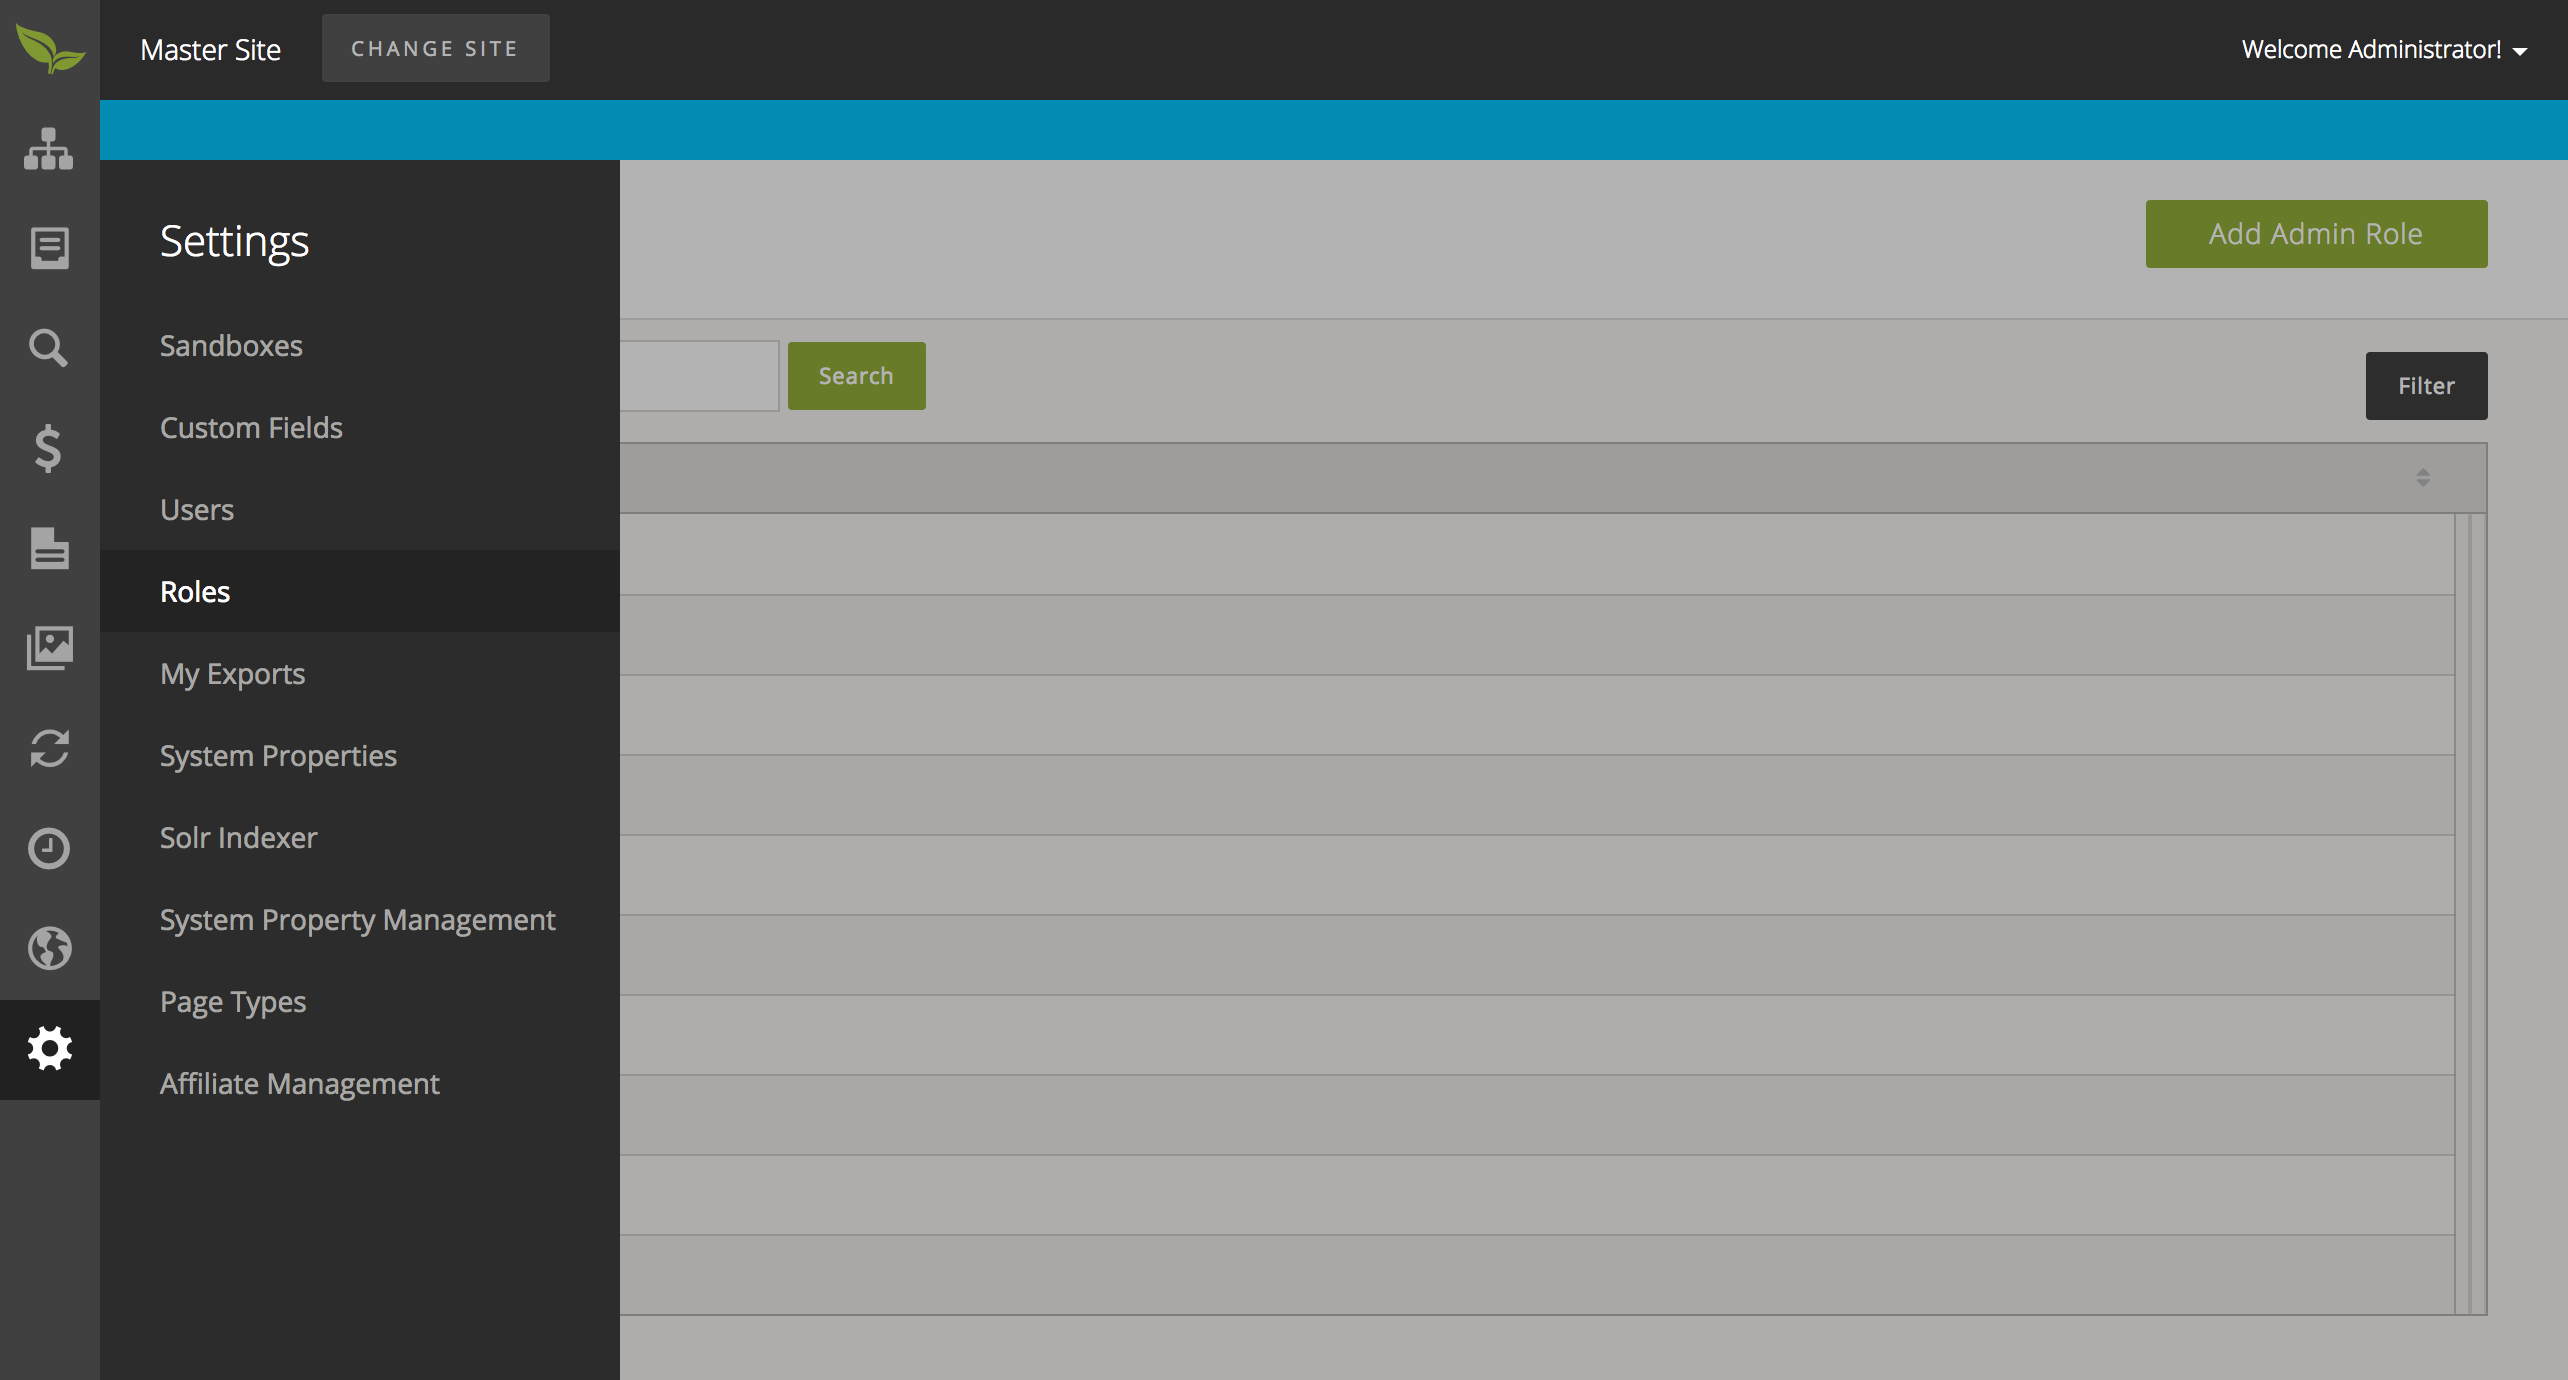
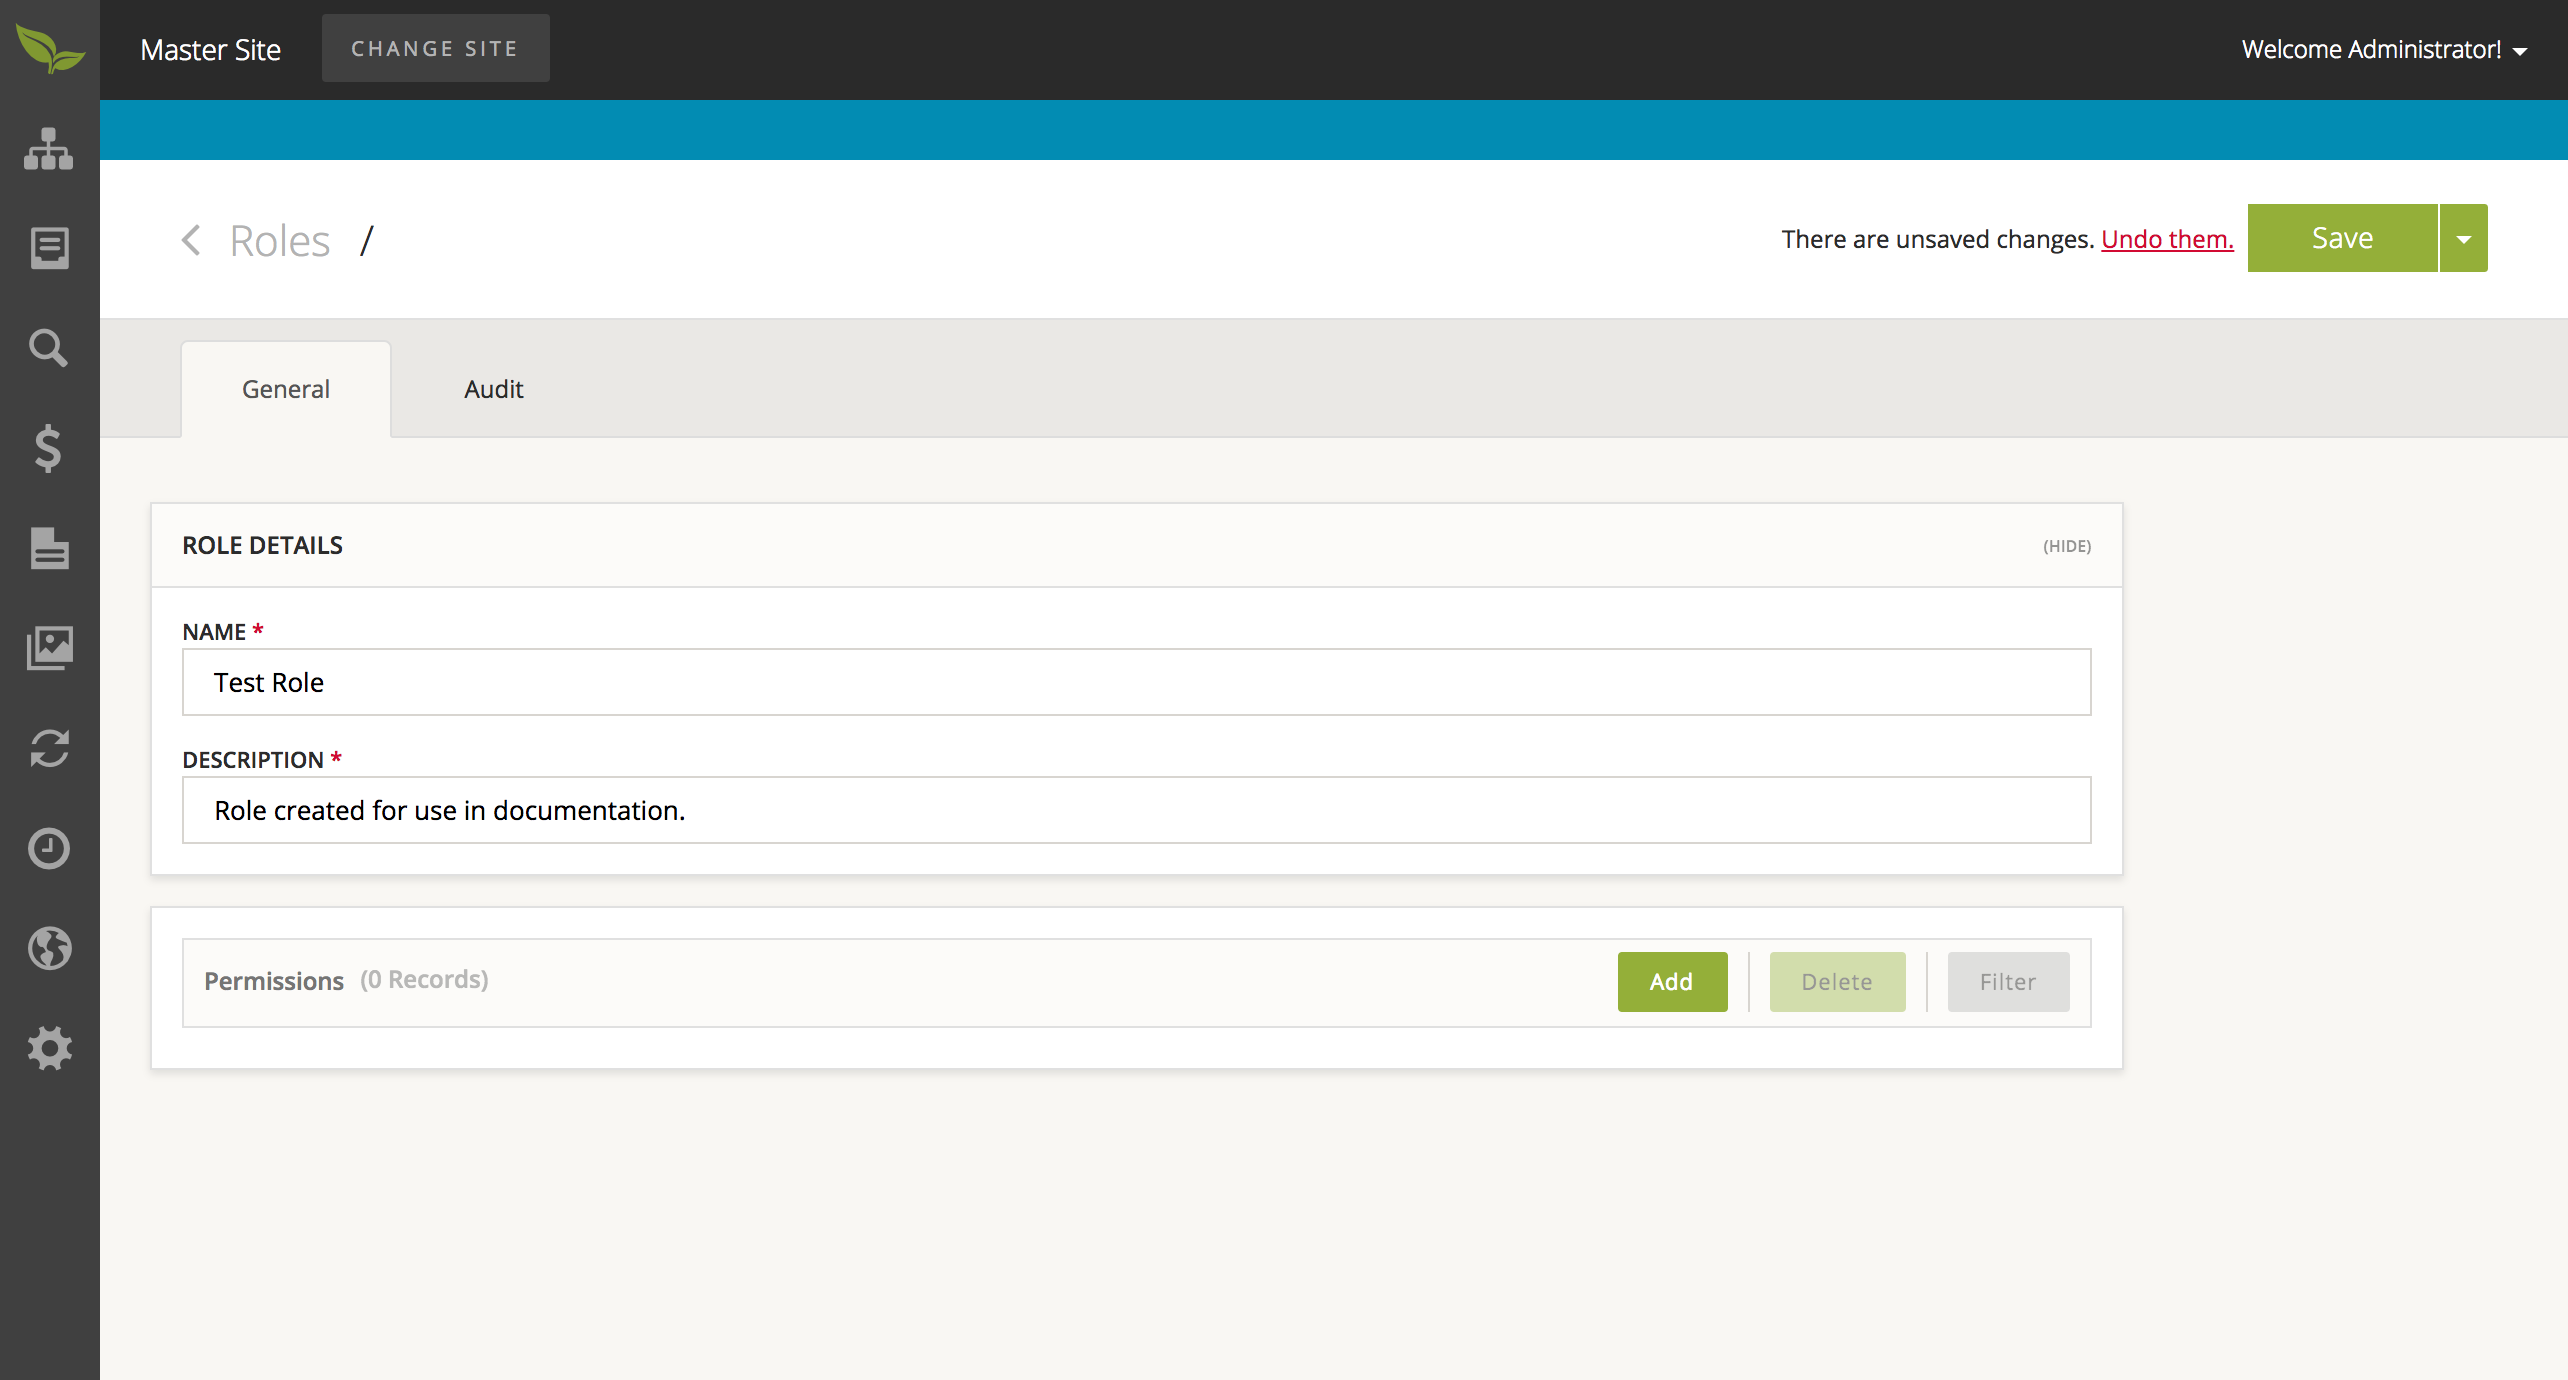
- From this page, select 'Add Admin Role' in the upper right corner of the page. Please provide all required information and select the 'Save' button.
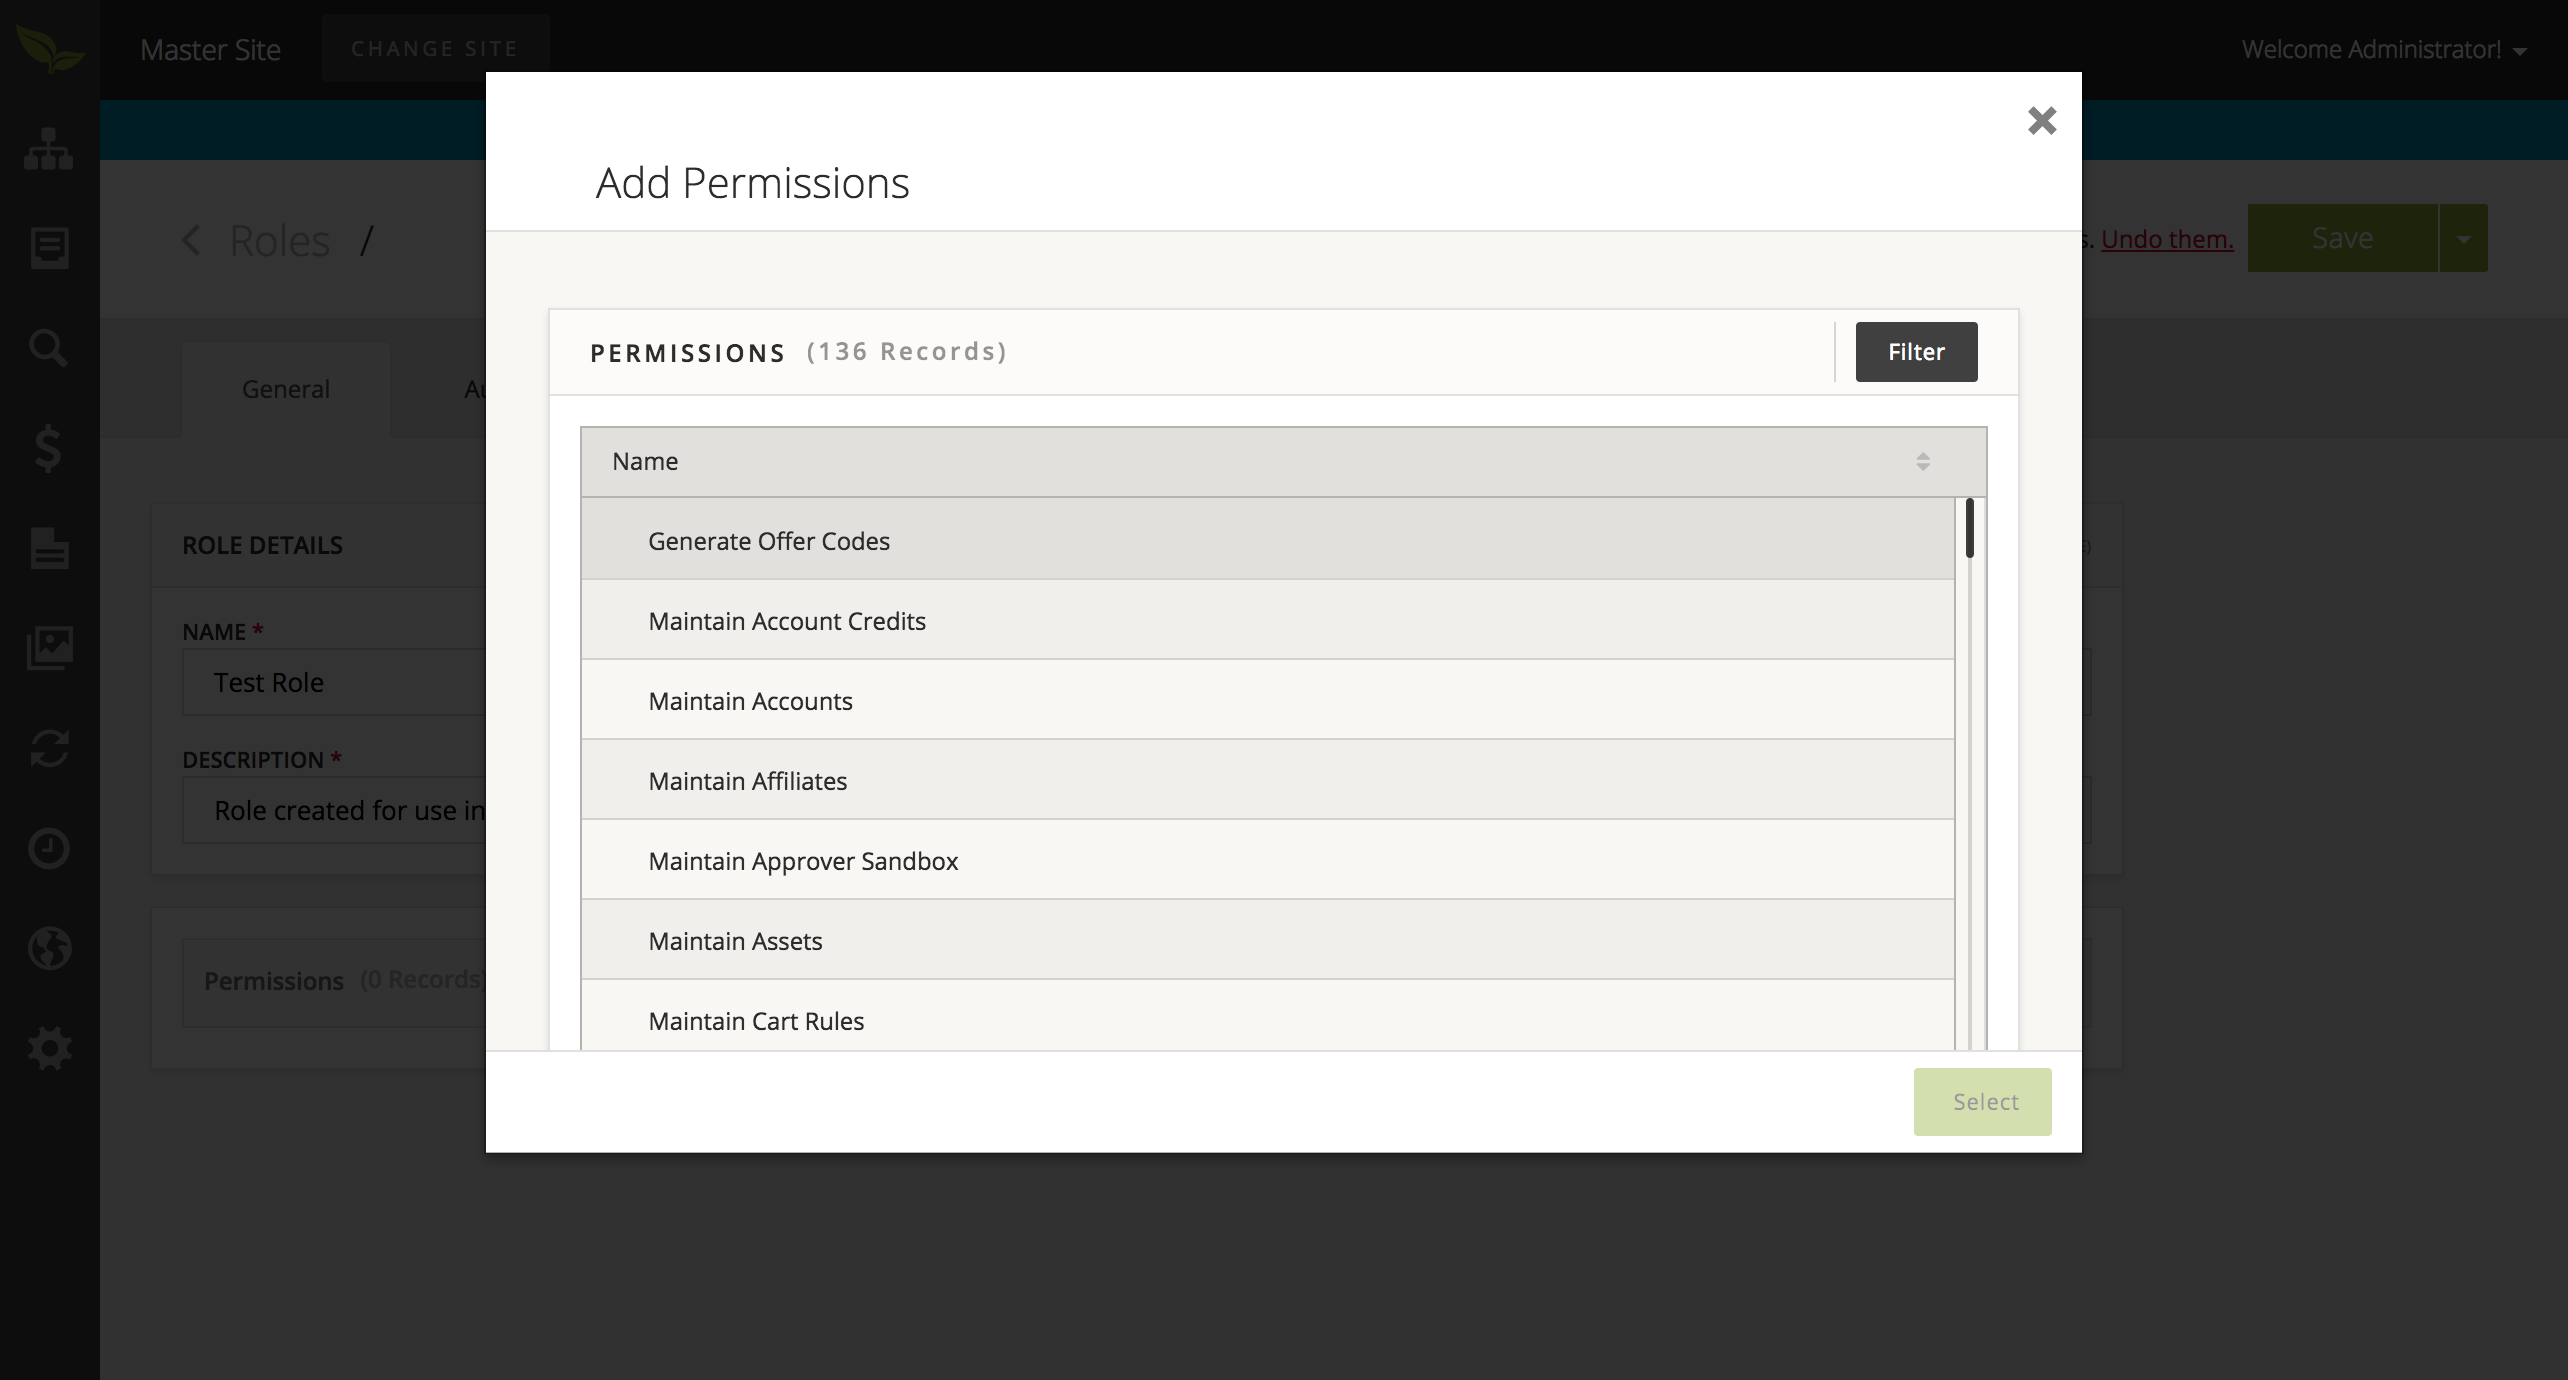
- To add permissions to this Admin Role, select the 'Add' button on the Permissions table, and select a permission from this list for this Admin Role.
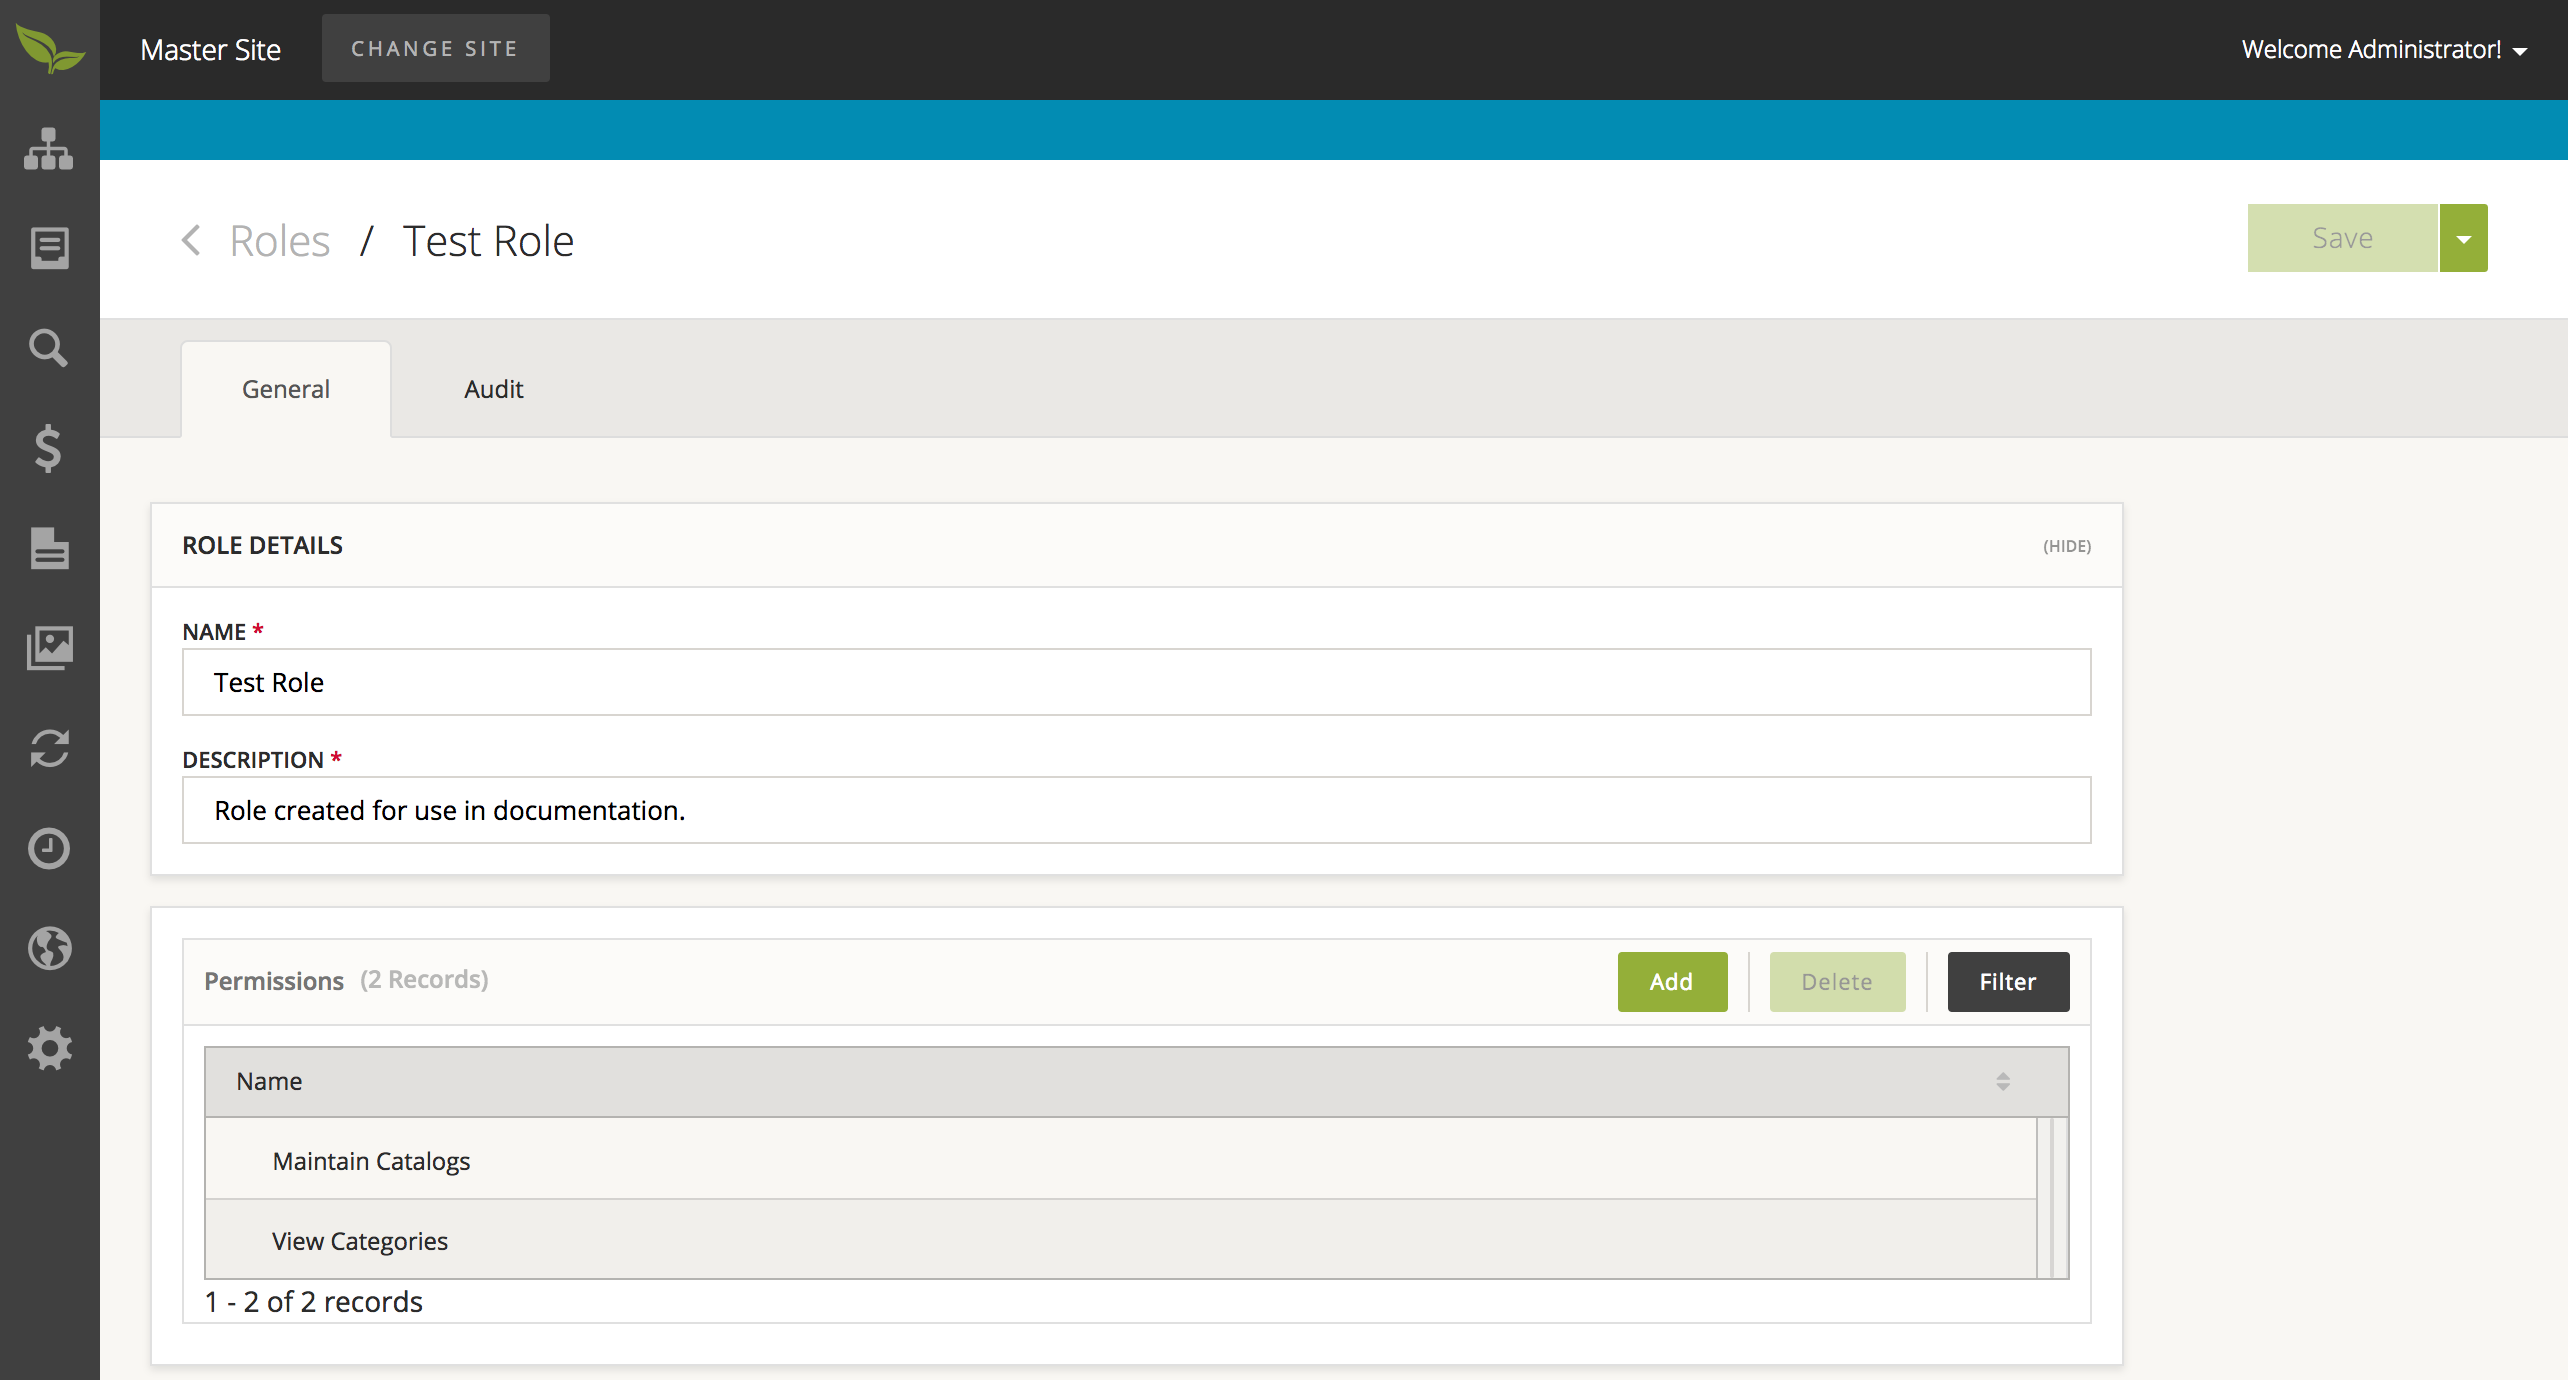
- When you are satisfied with your selections, please select the 'Save' button in the upper right corner of the window.
The following procedures need not be done on the template site, and can instead be done on the Admin for that specifc site.
To perform the following action, you must have set up a Theme Definition via database imports. Please look in the 'Database Only Proccesses' section of this document to see how you could do this.
To create a Theme Configuration:
- Select 'Design' from the sidebar and then choose 'Theme Configurations'.
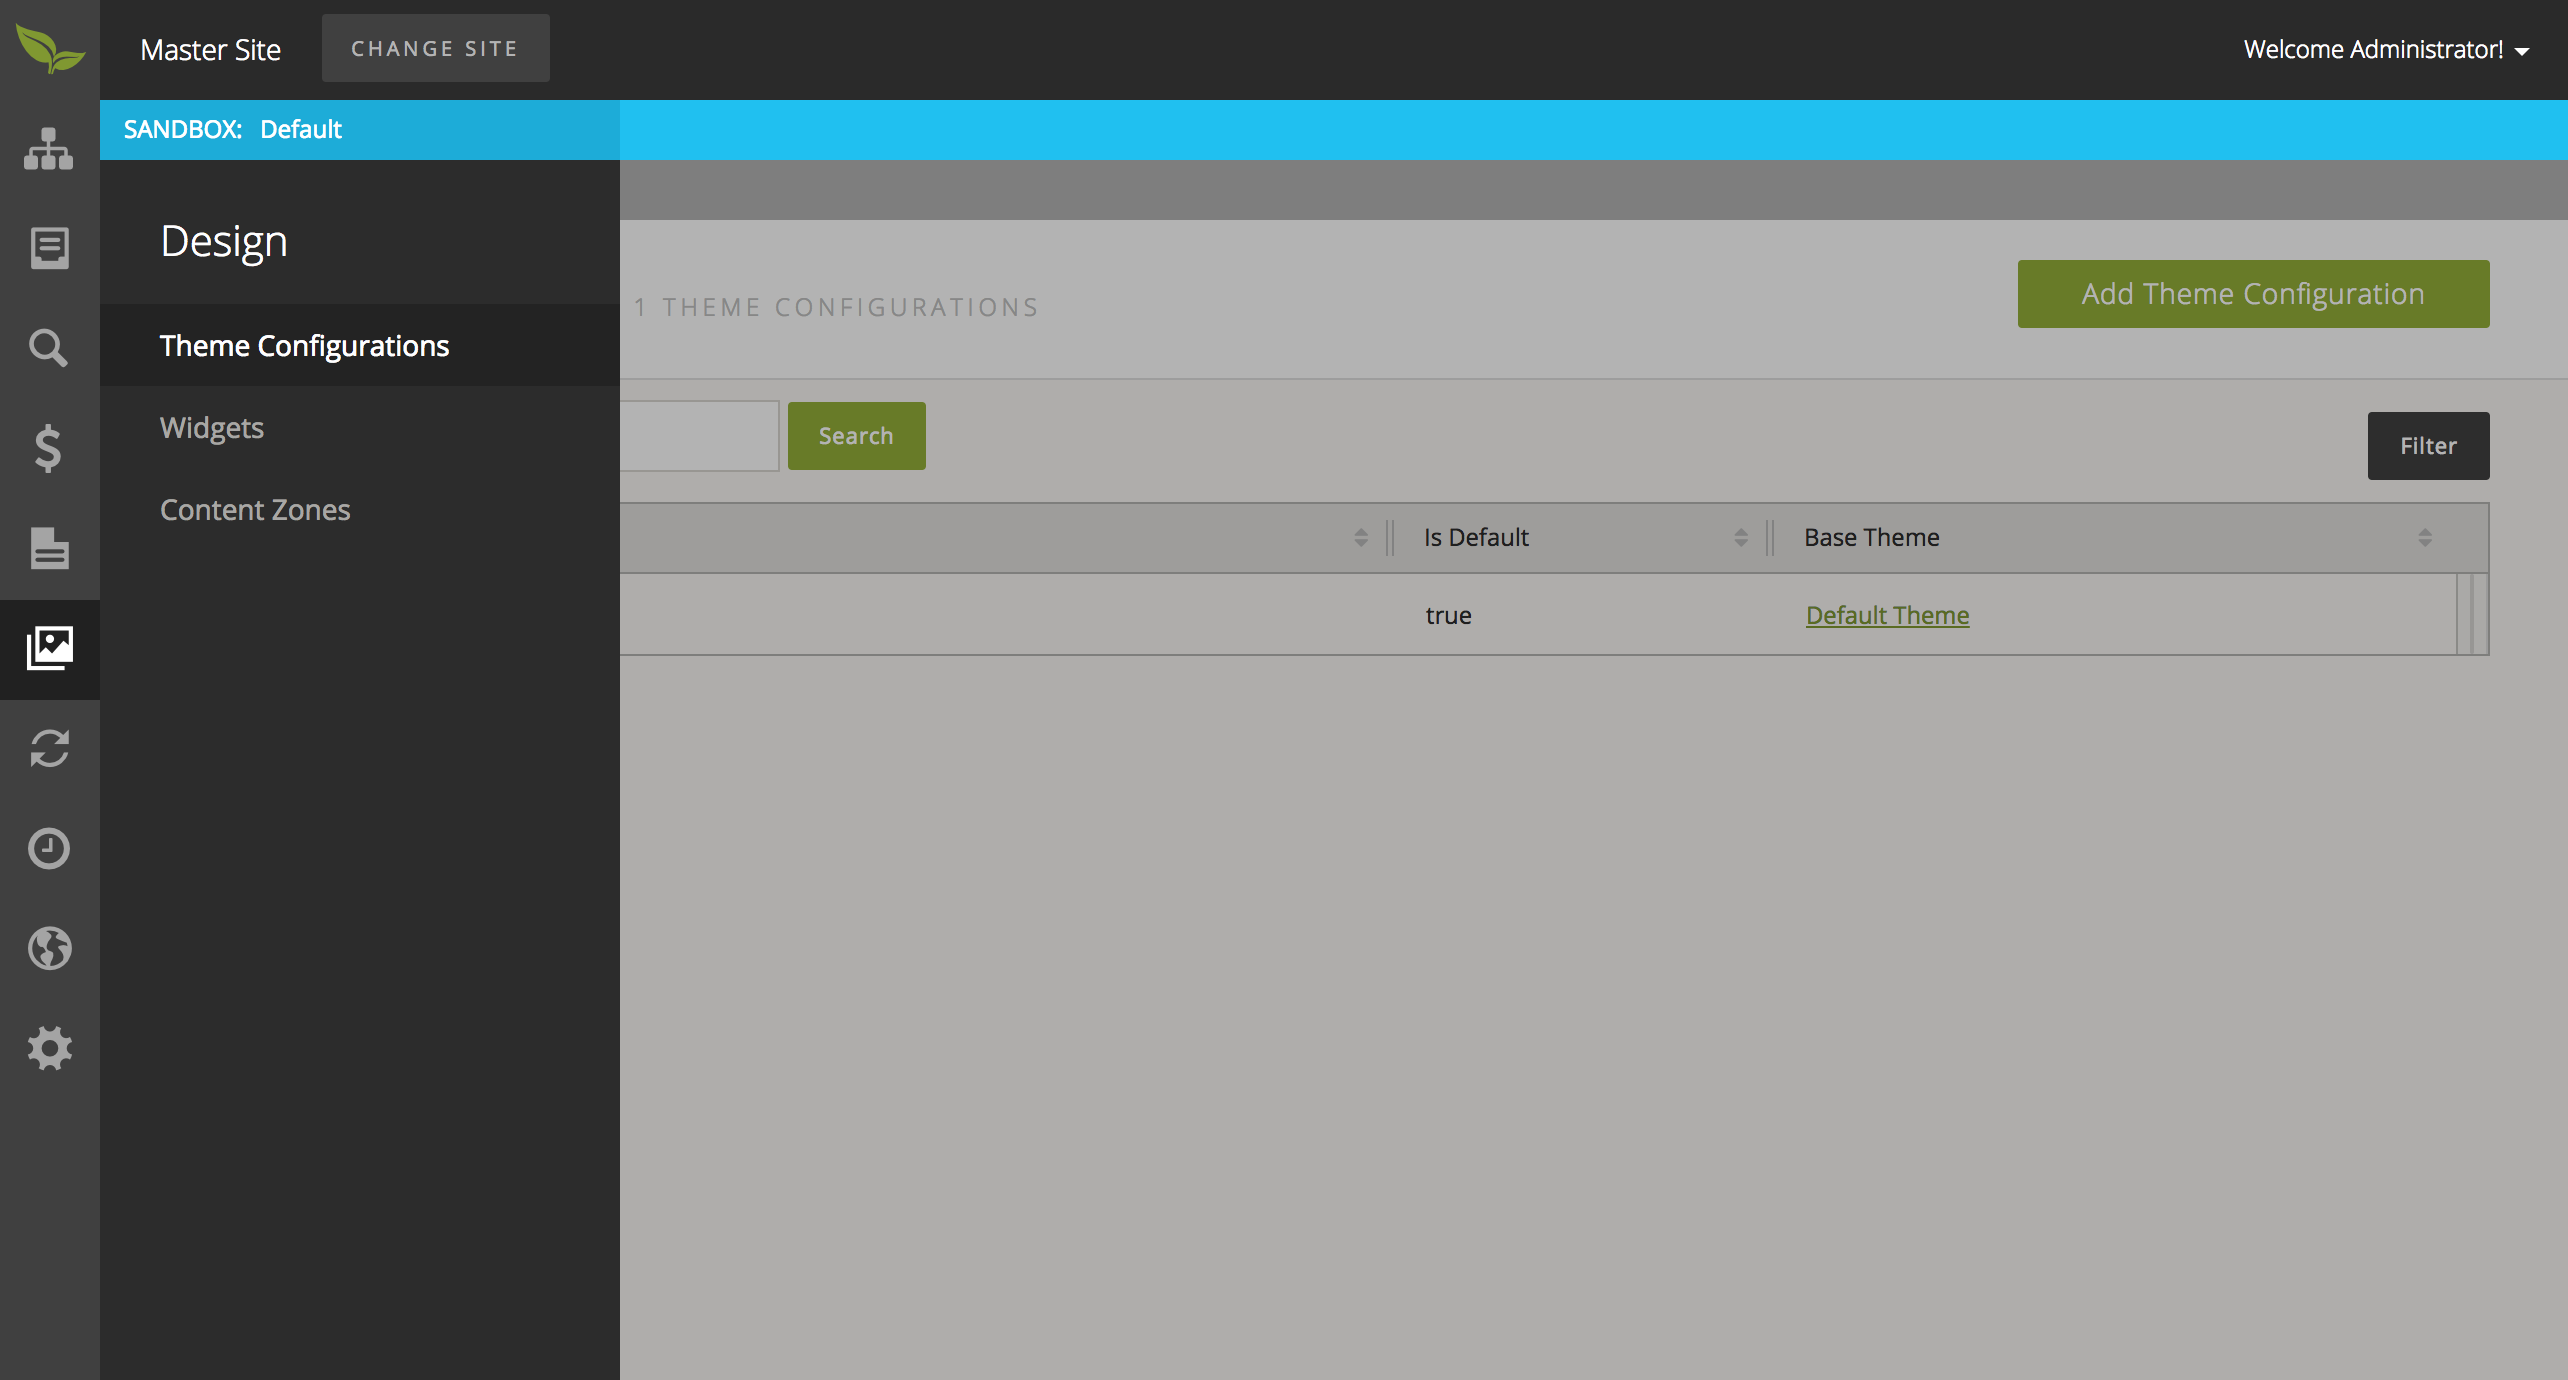
- From this page, select 'Add Theme Configuration' button in the upper right corner of the page. Please provide all required information and select the 'Save' button. You will be required to provide a Base Theme for this Theme Configuration. To do so, select the lookup button.
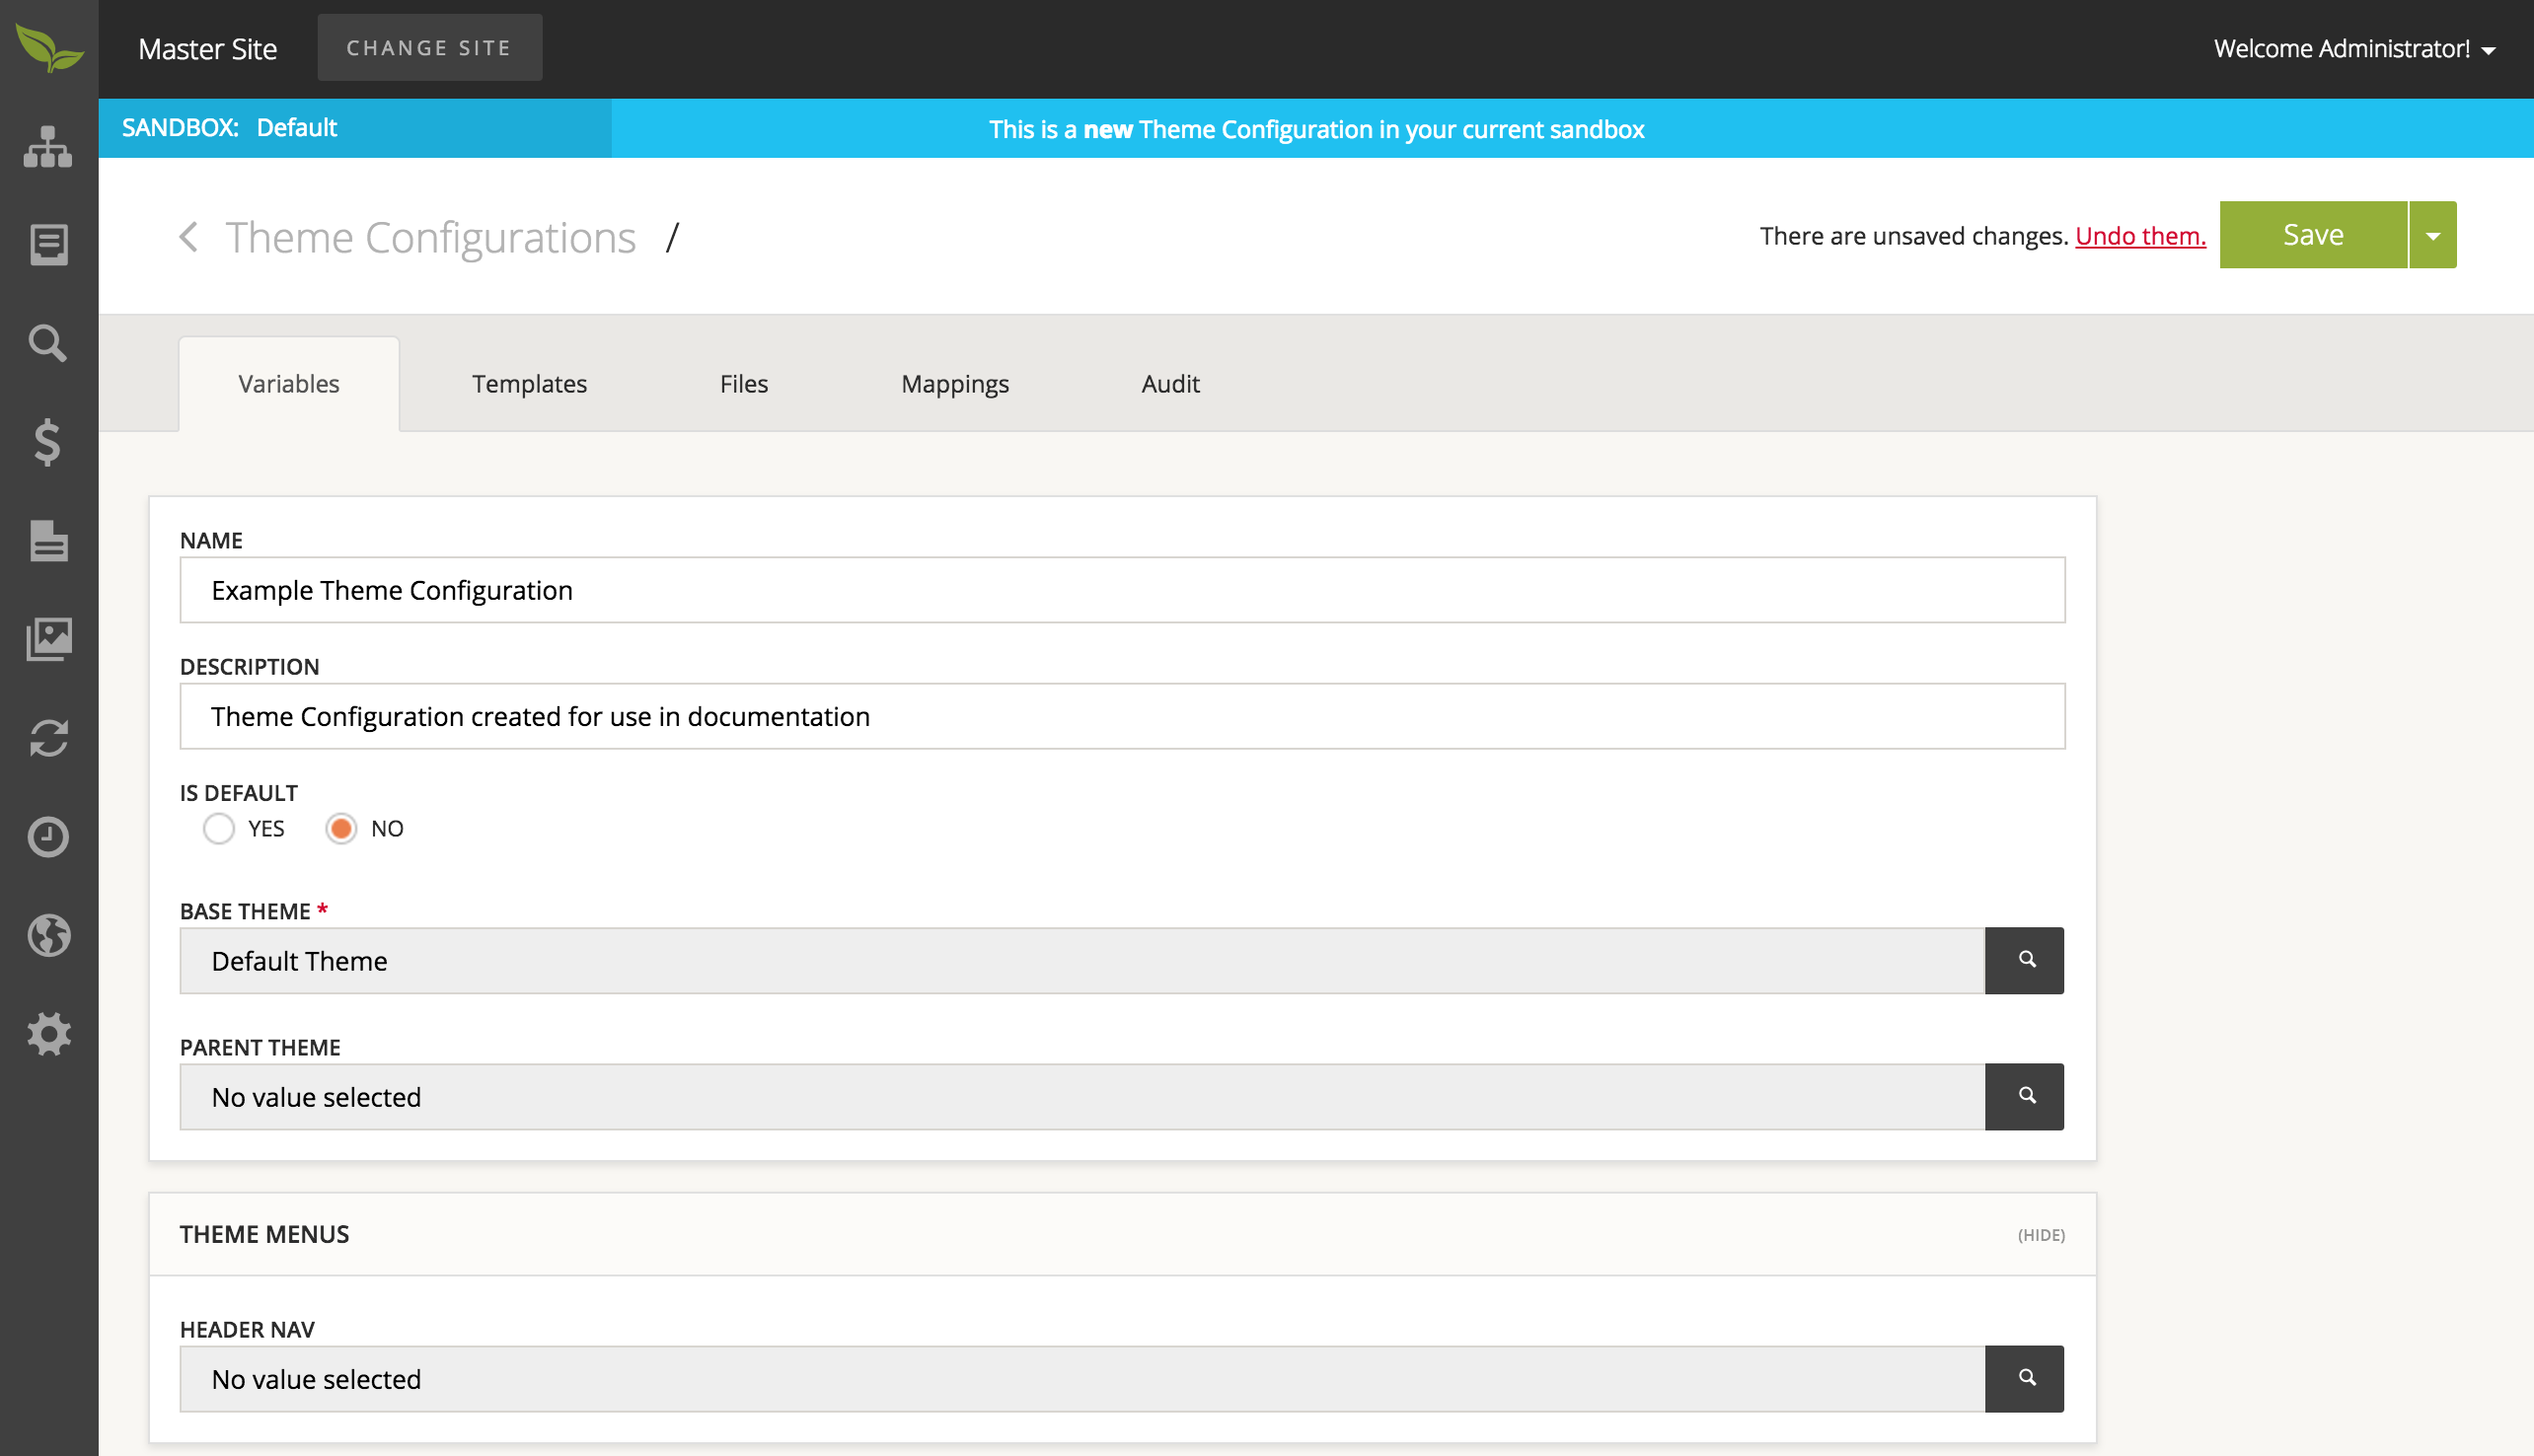
- From this window, please select the Theme Definition you wish to use.
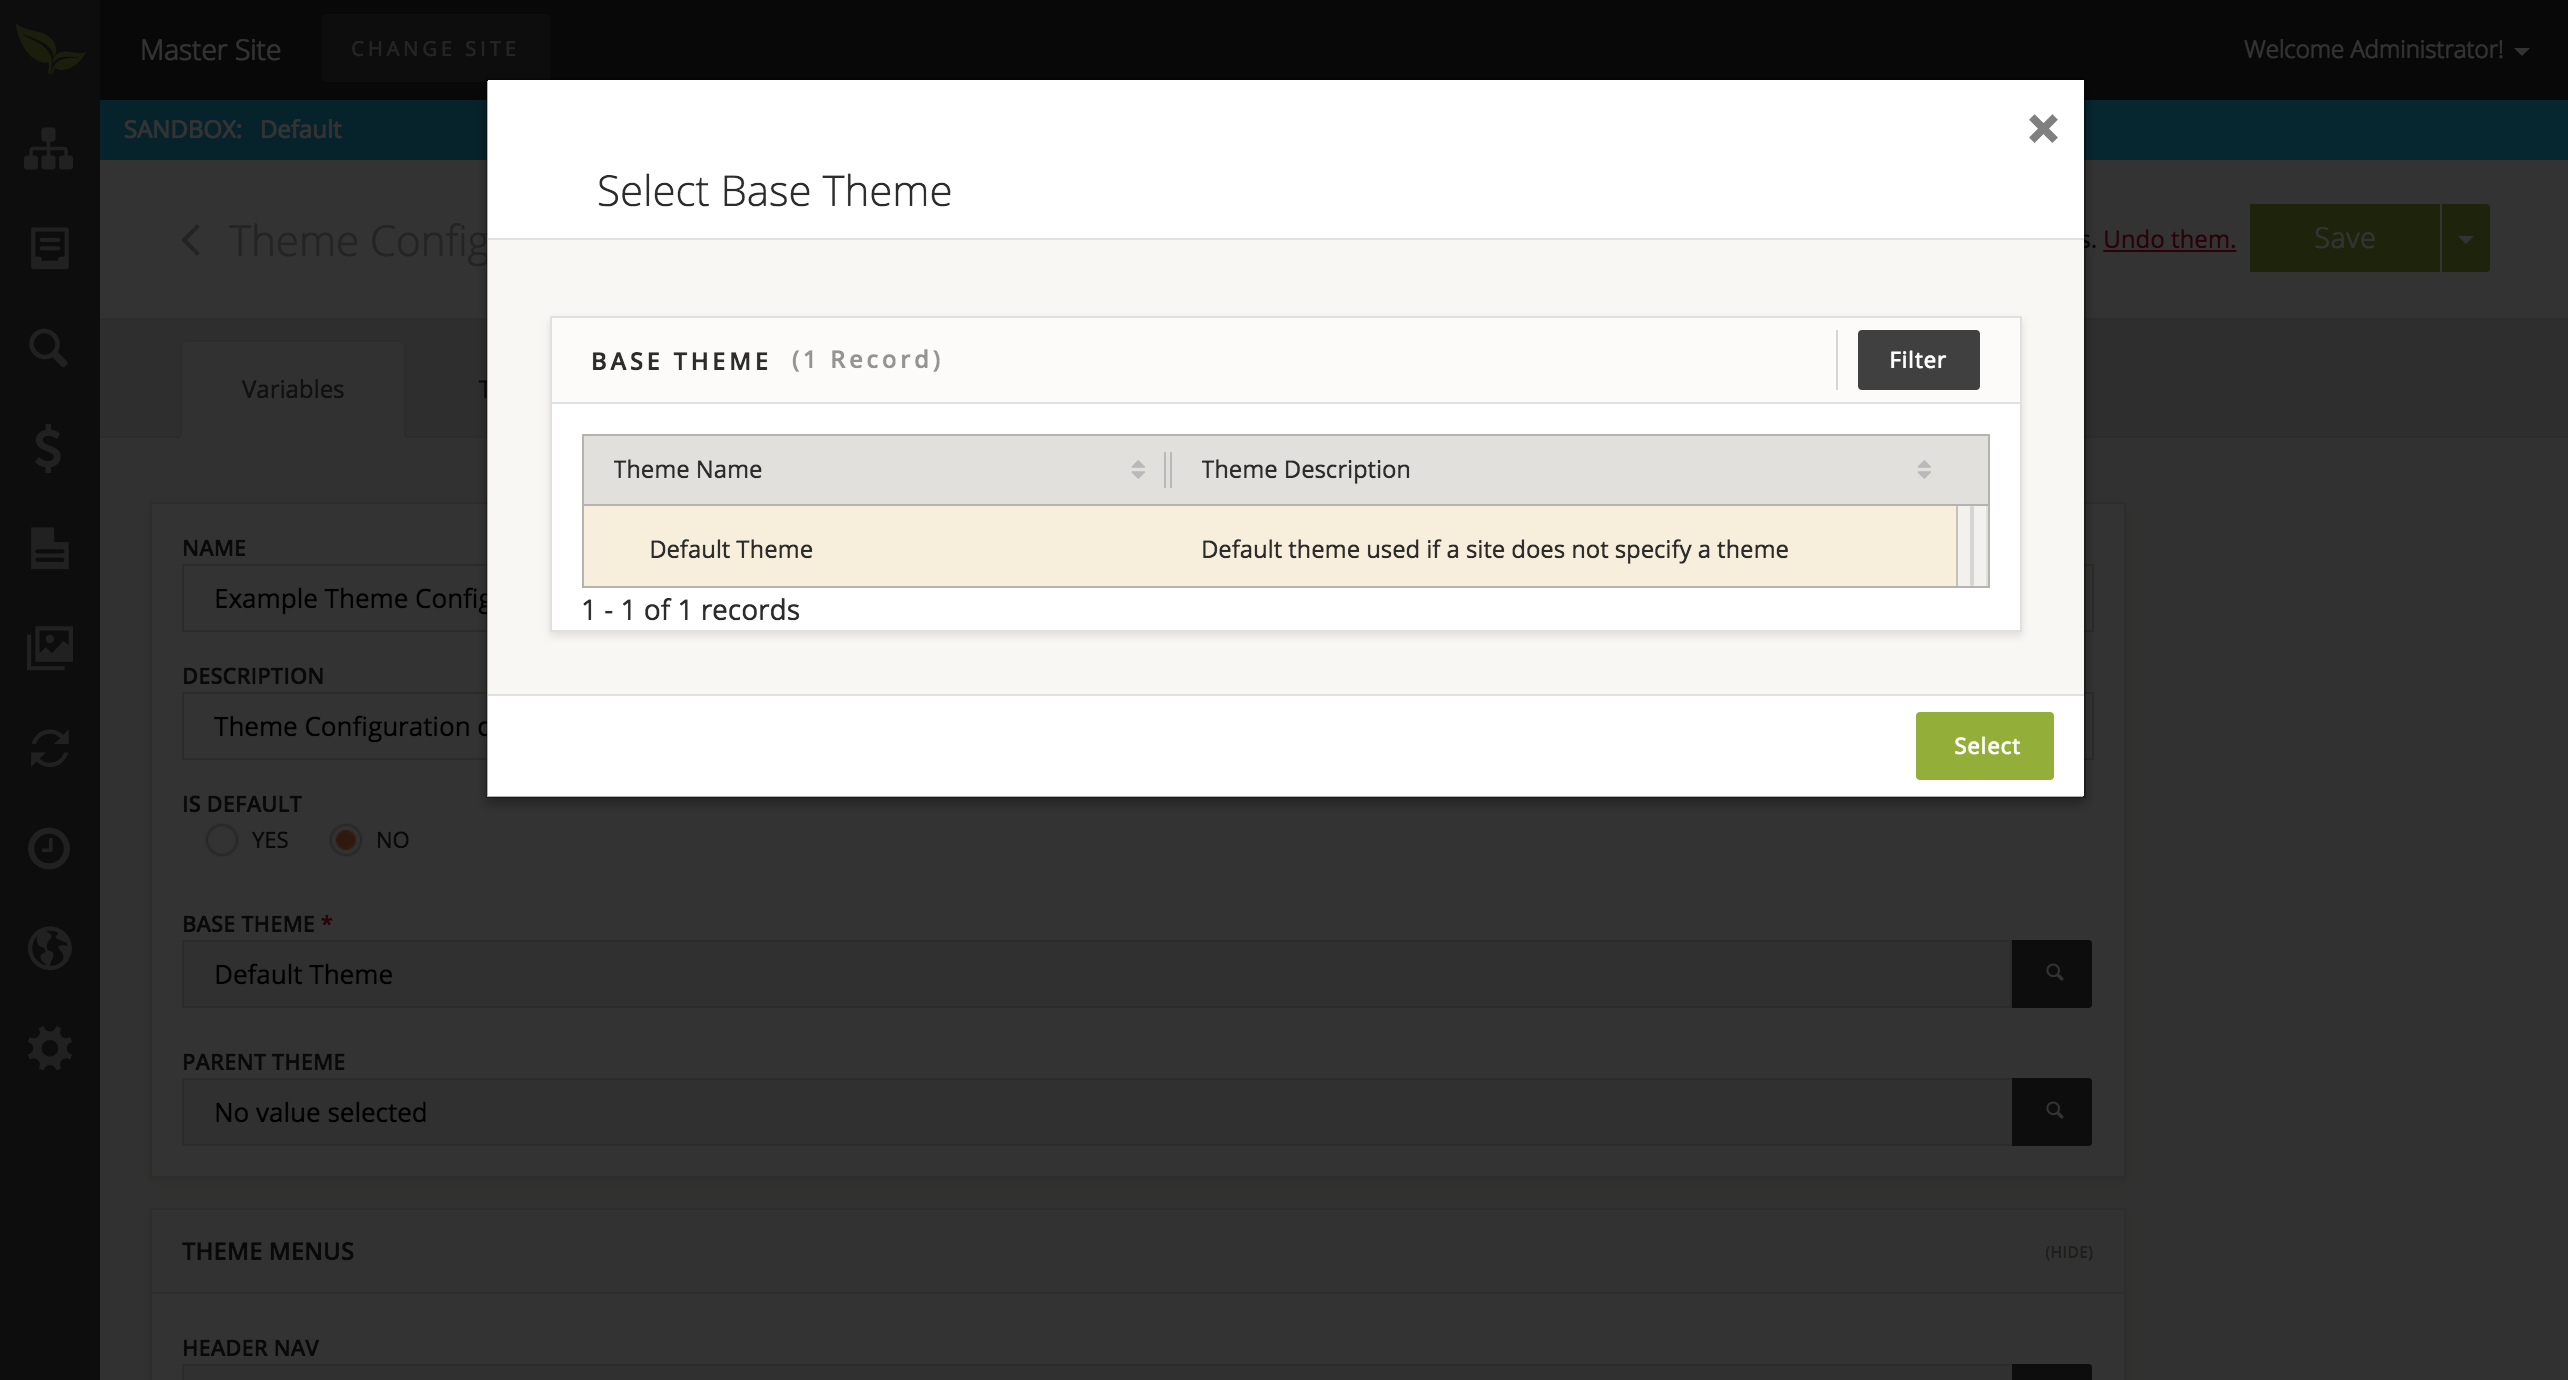
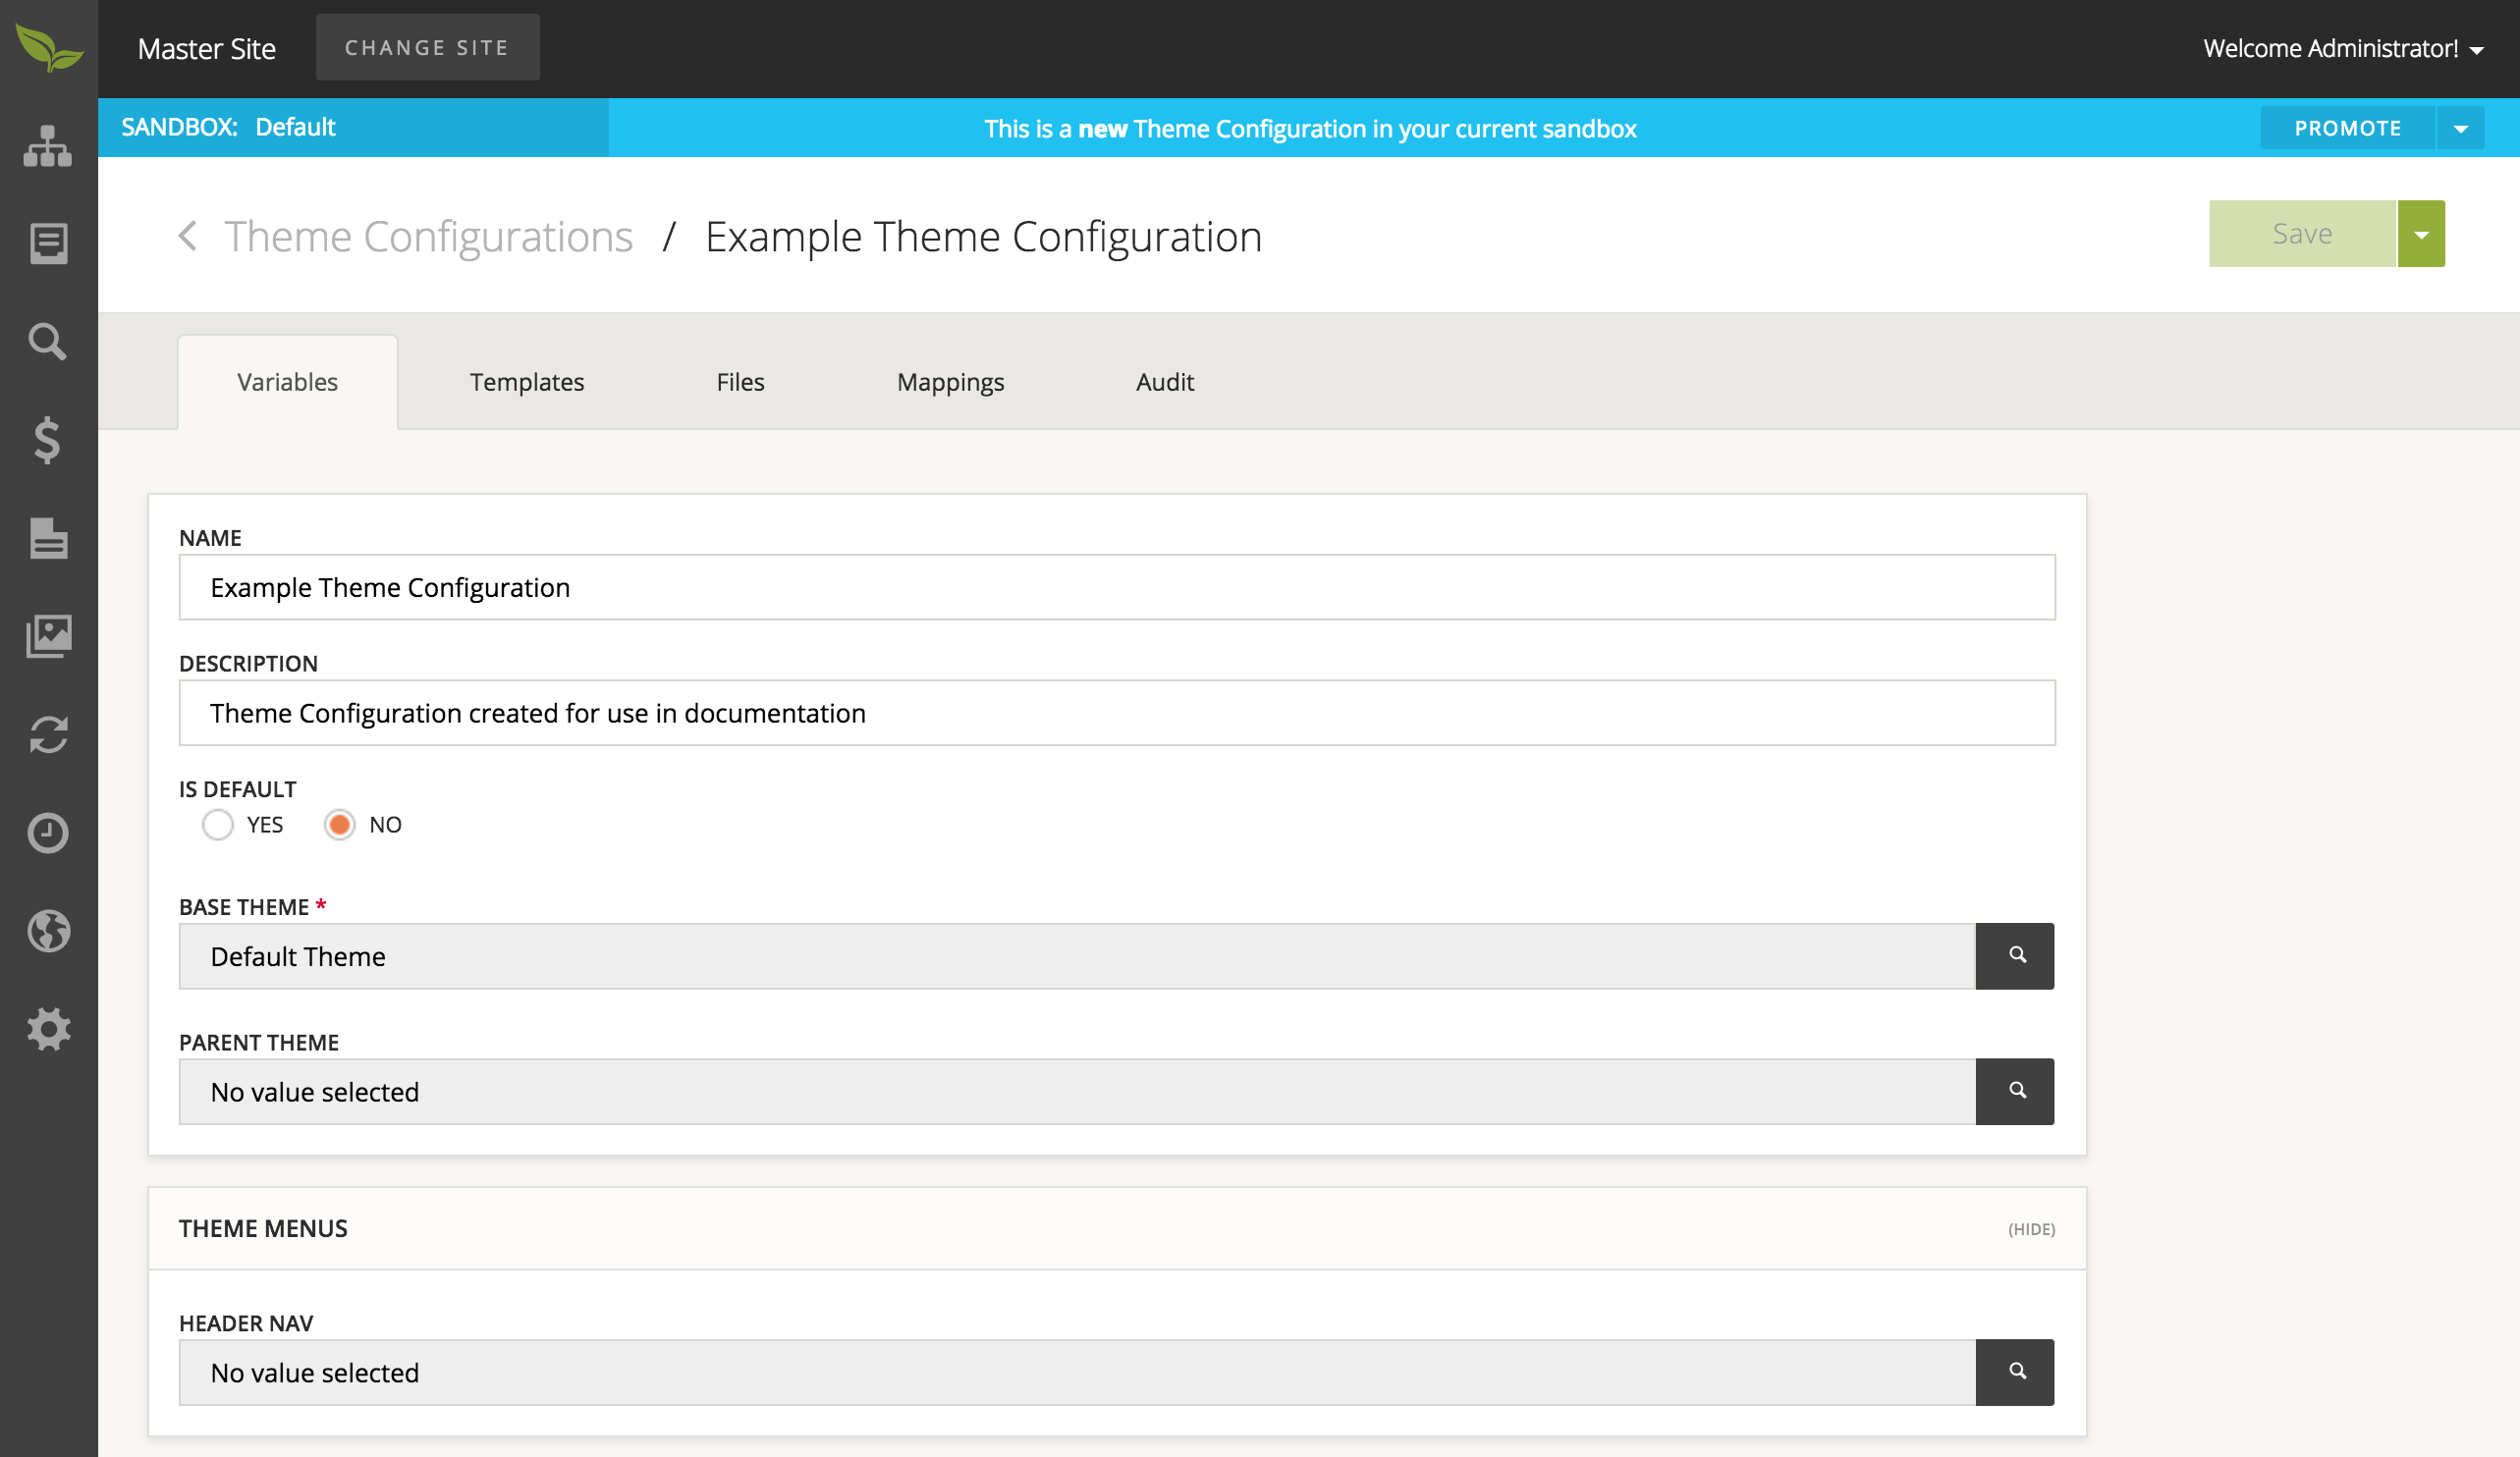
- When you are satisfied with the information provided, please select the 'Save' button. This will take you to the details page of your newly created Theme Configuration.
To create a Theme File:
- Select 'Design' from the sidebar and then choose 'Theme Configurations'.
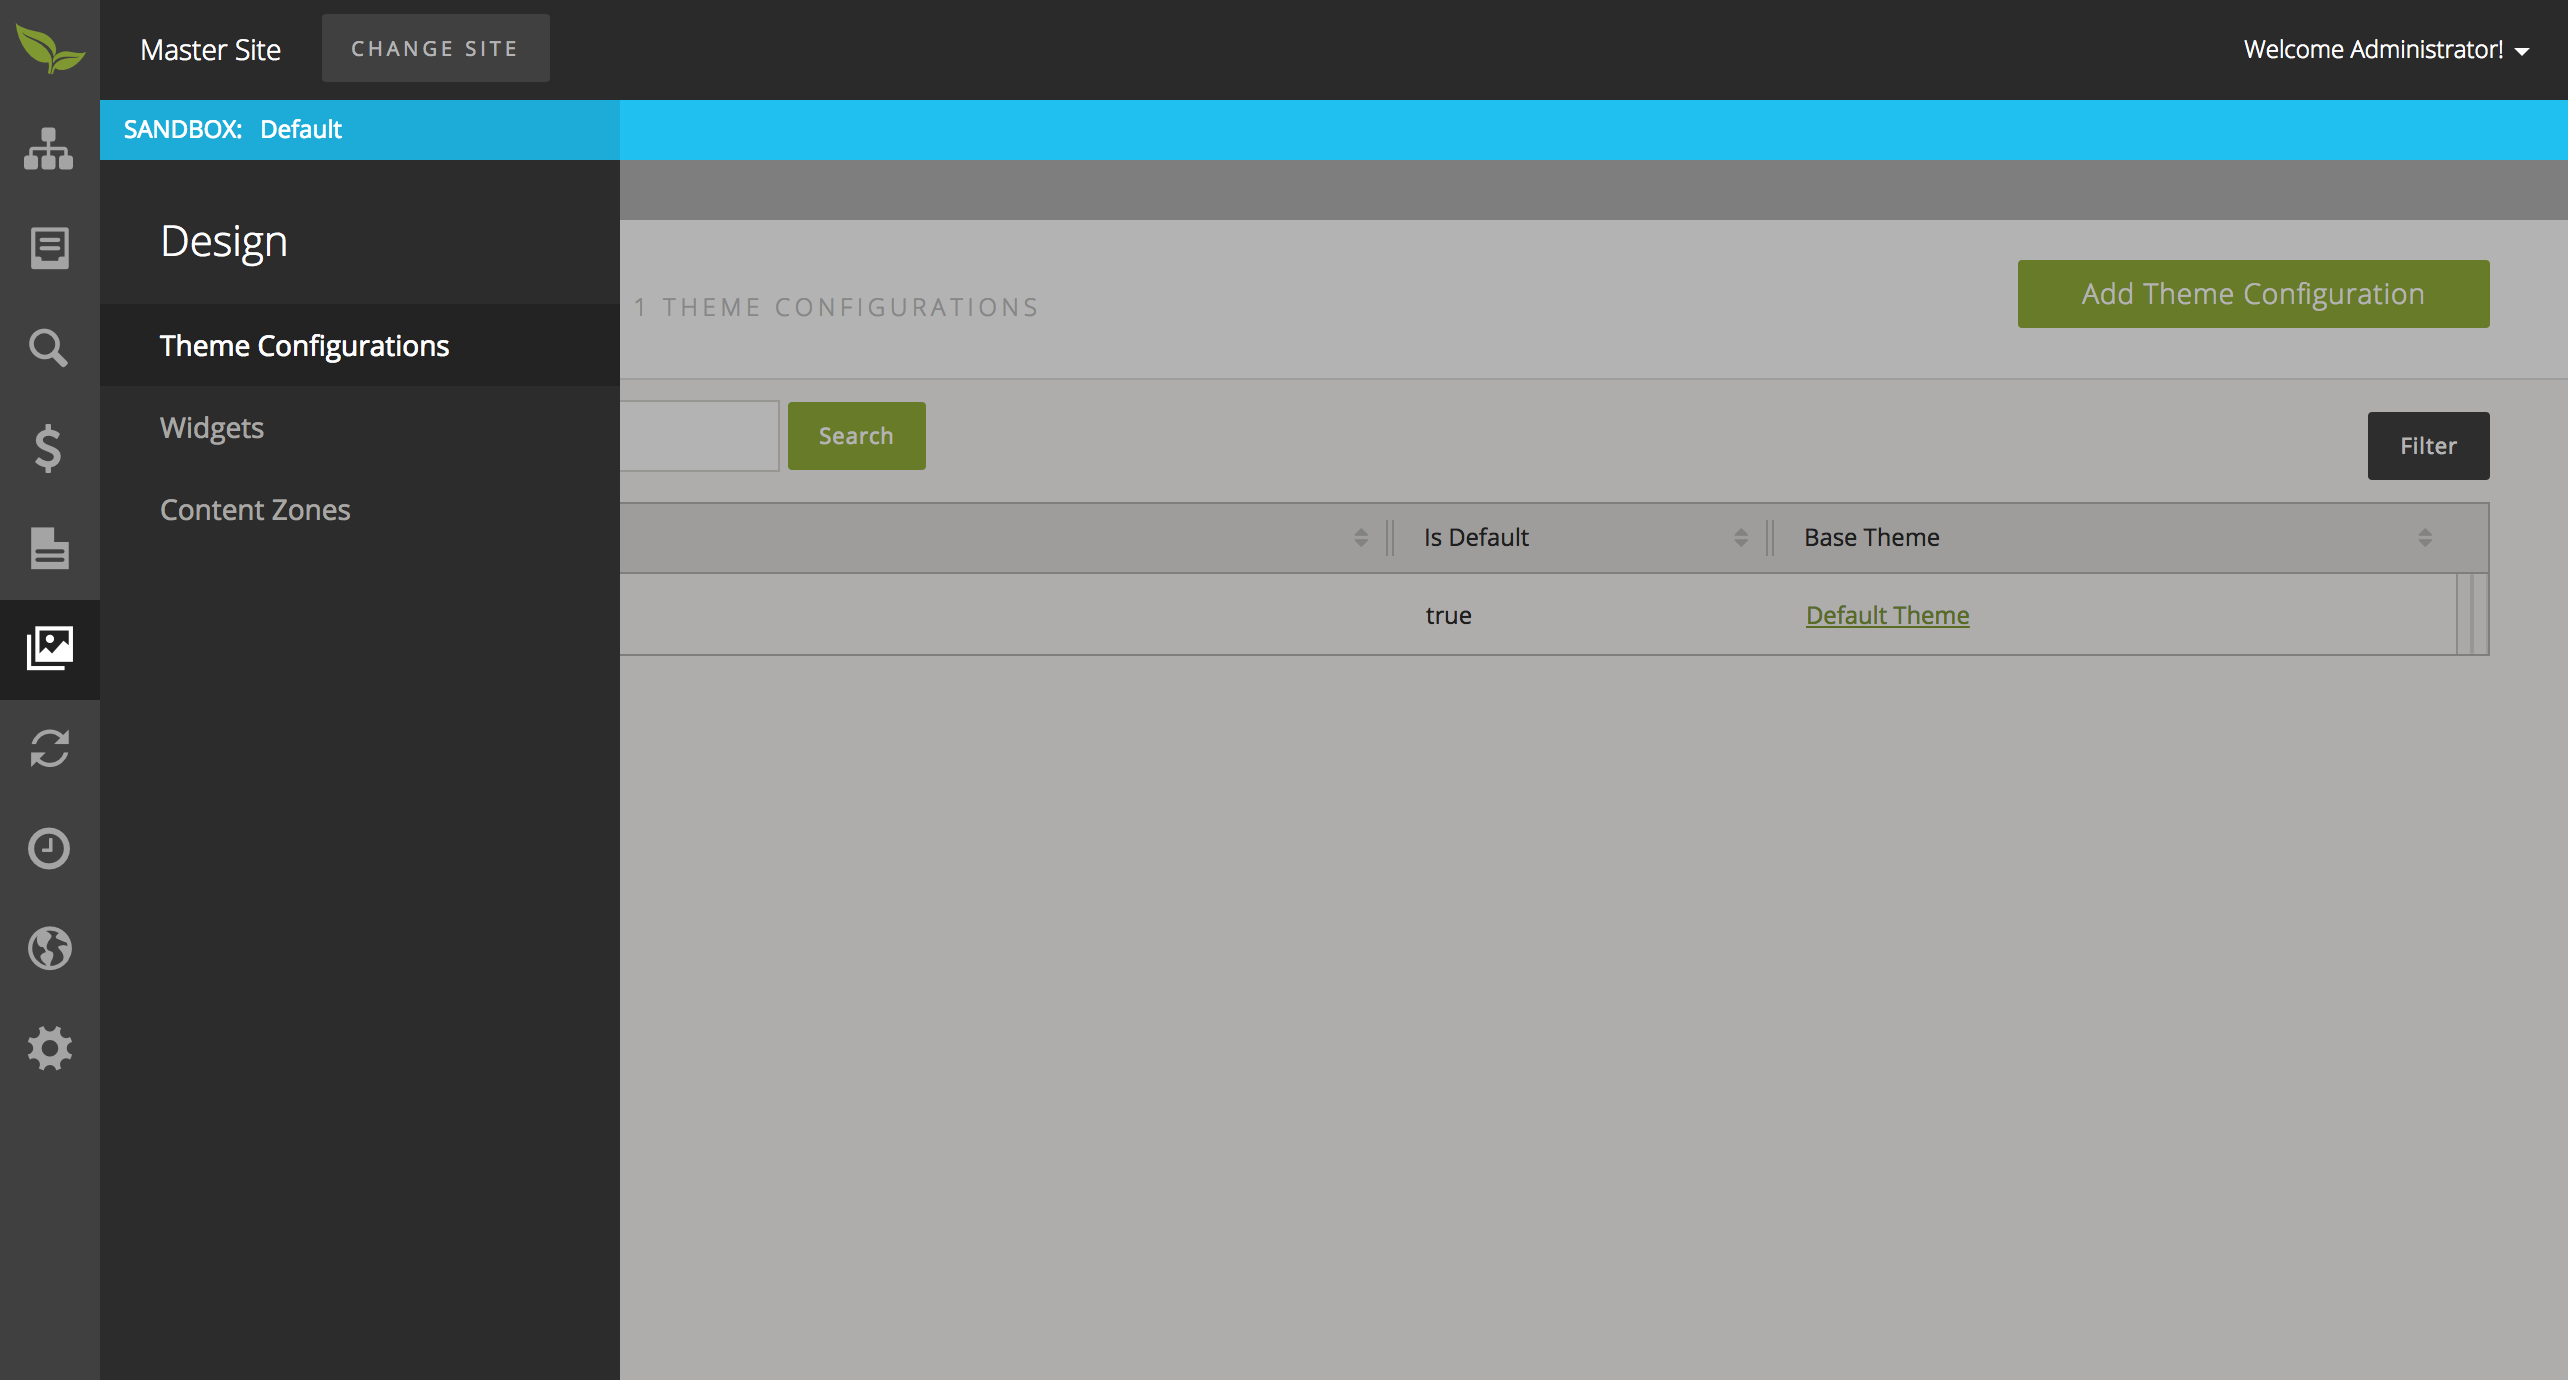
- From this page, please select the Theme Configuration you wish to add a Theme File to. This will take you to the details page of the selected Theme Configuration.
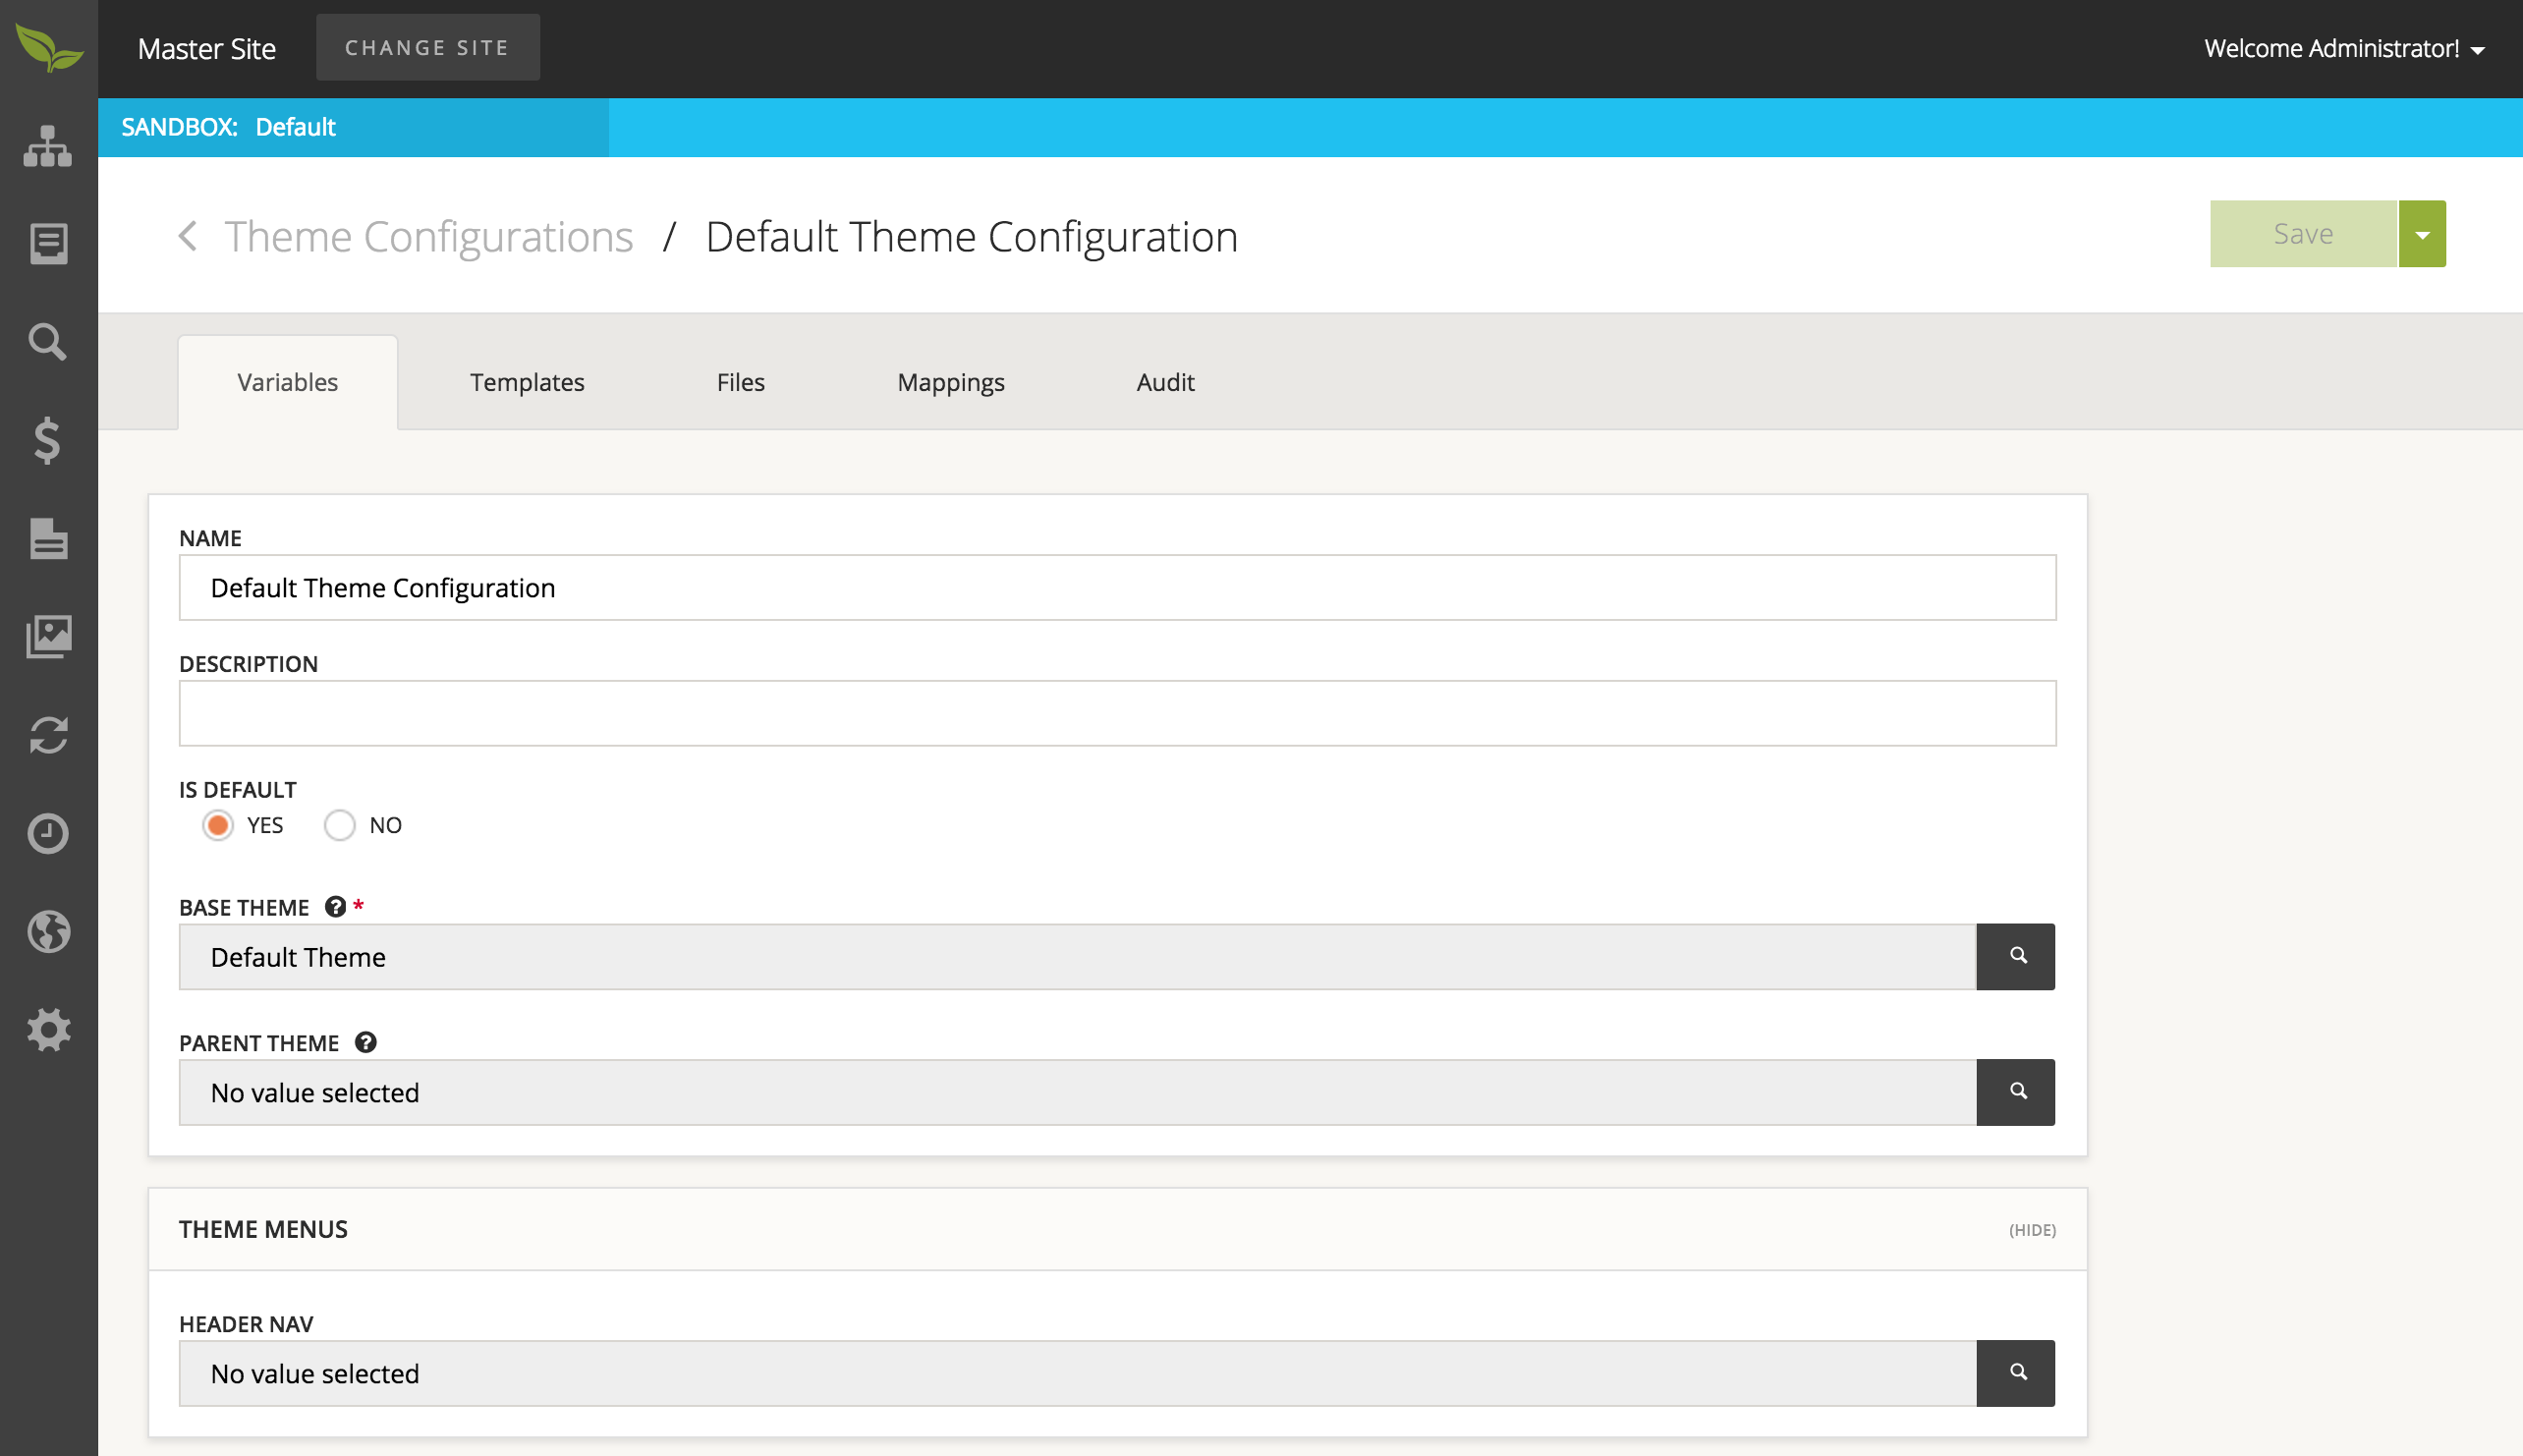
- On the details page, please select the 'Files' tab at the top of this page.
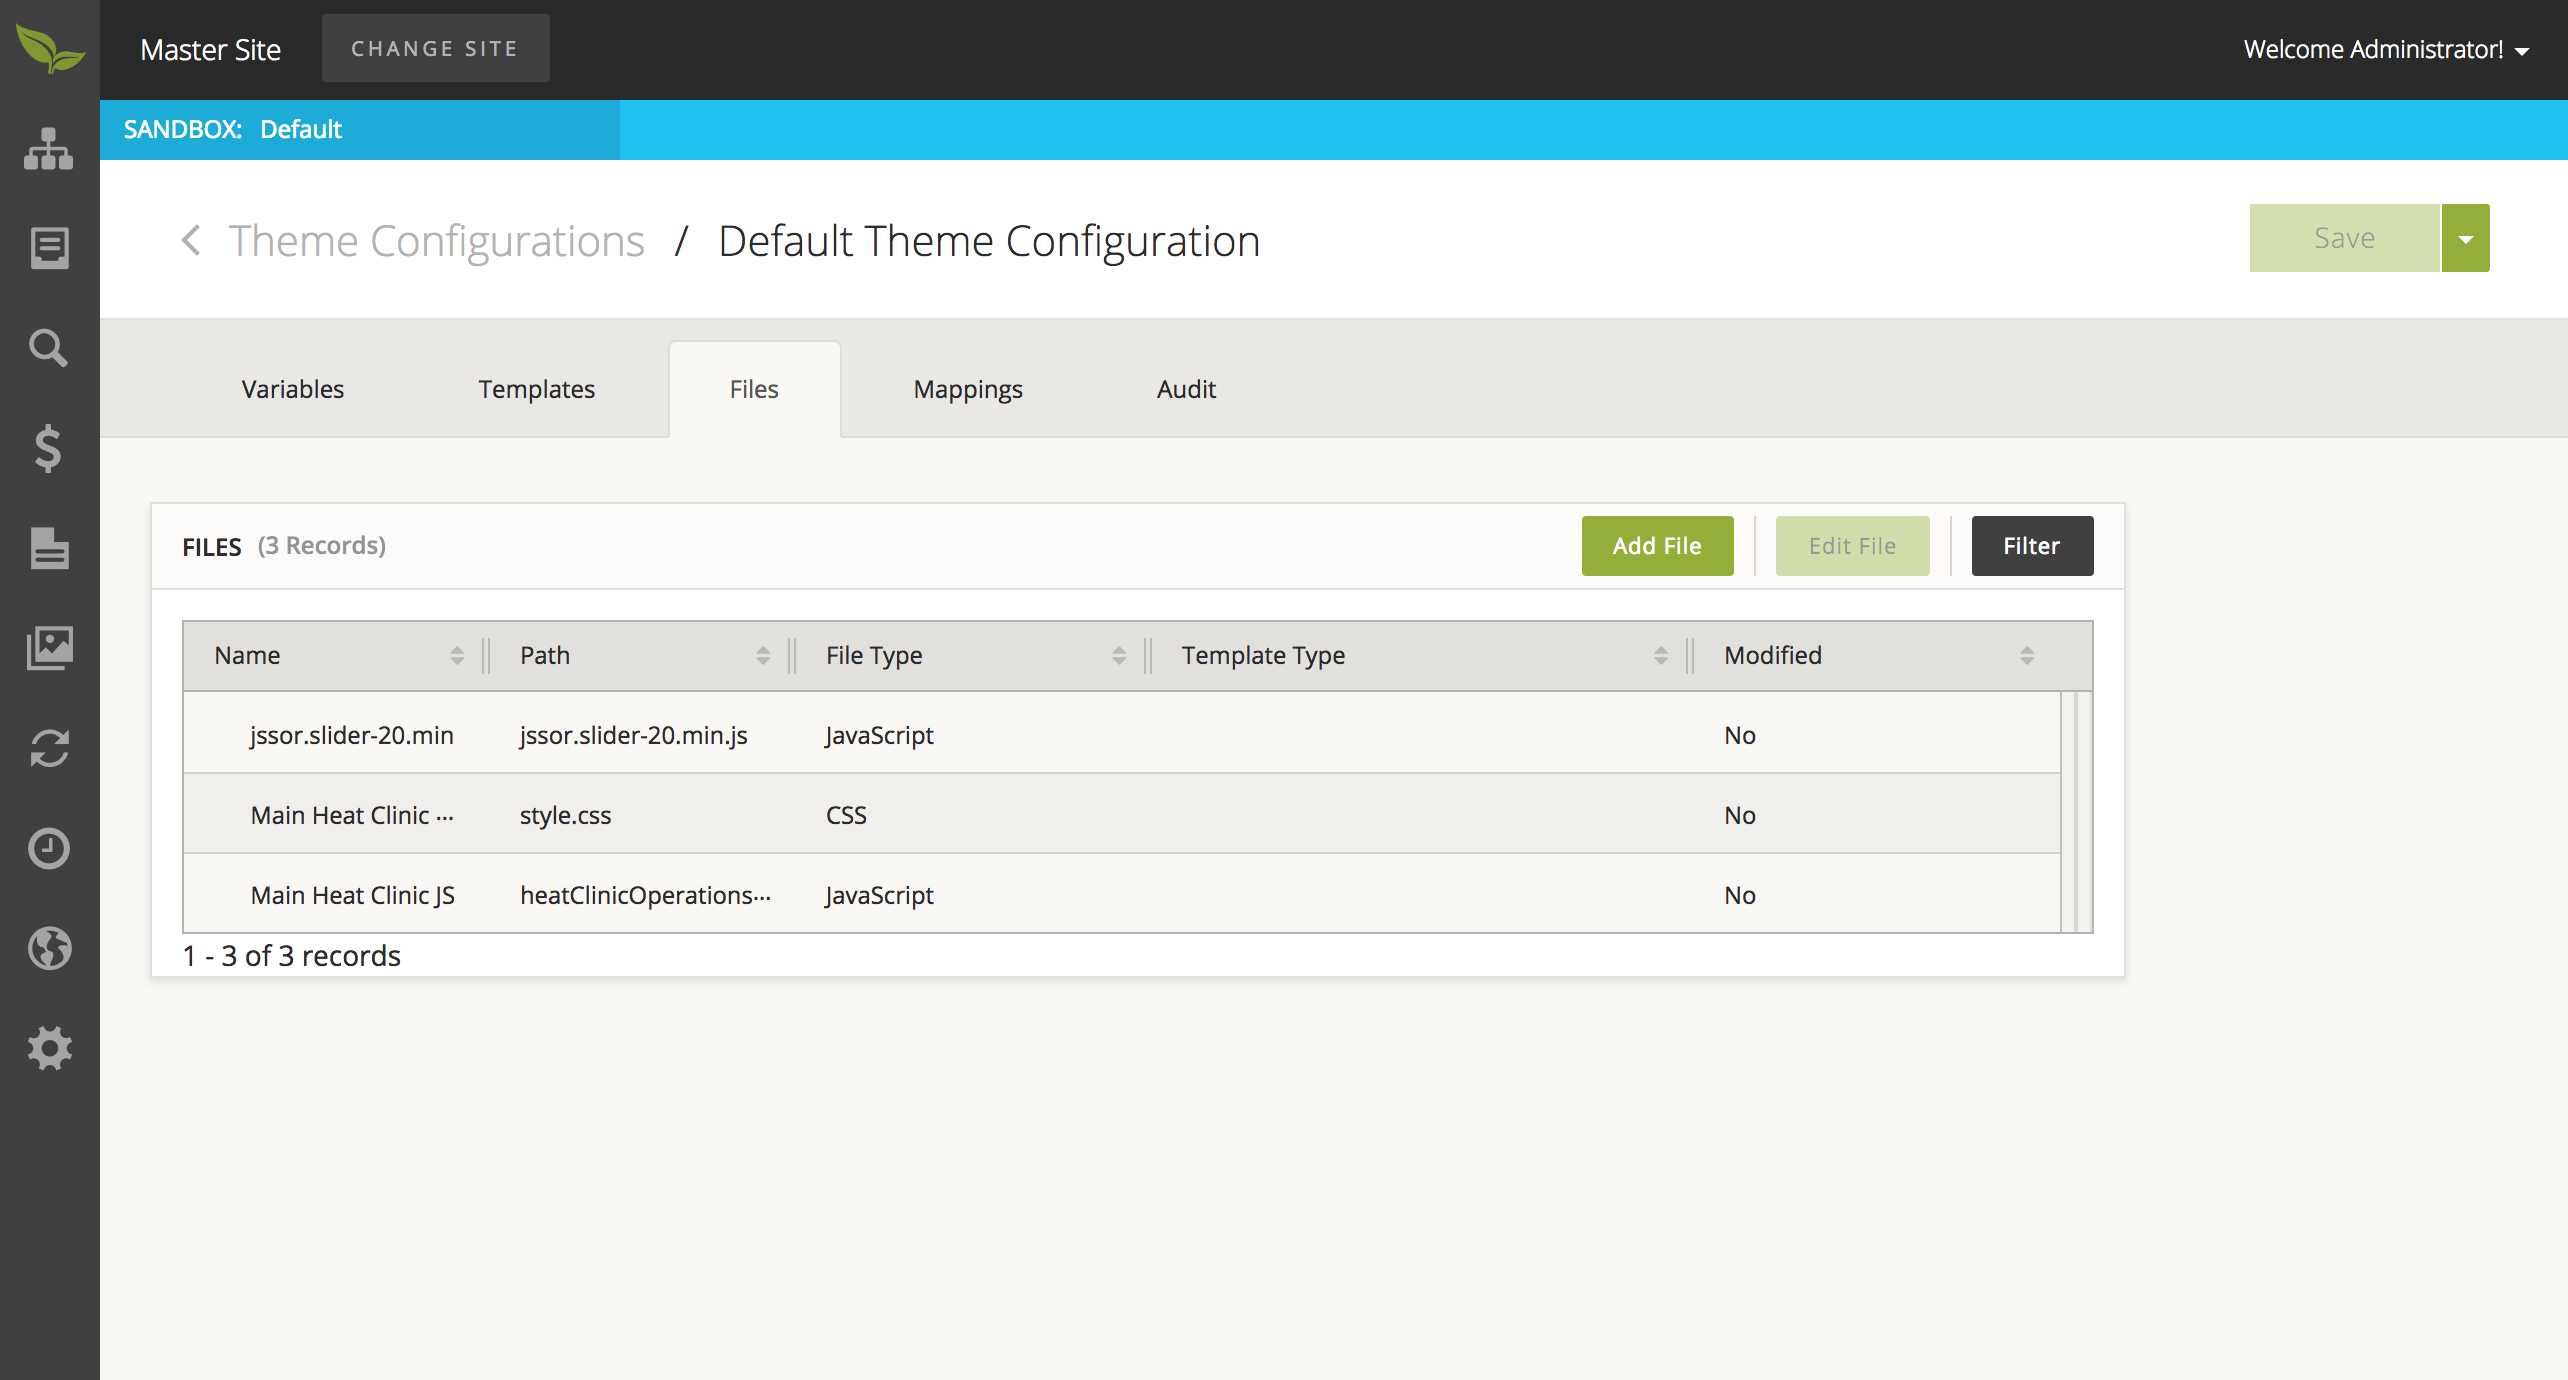
- This page lists all the Theme Files currently associated to this Theme Configuration. To add a new one, please select the 'Add File' button from the Files table and provide information in the window that opens up. When you are satisfied with the information provided, please select the 'Save' button.
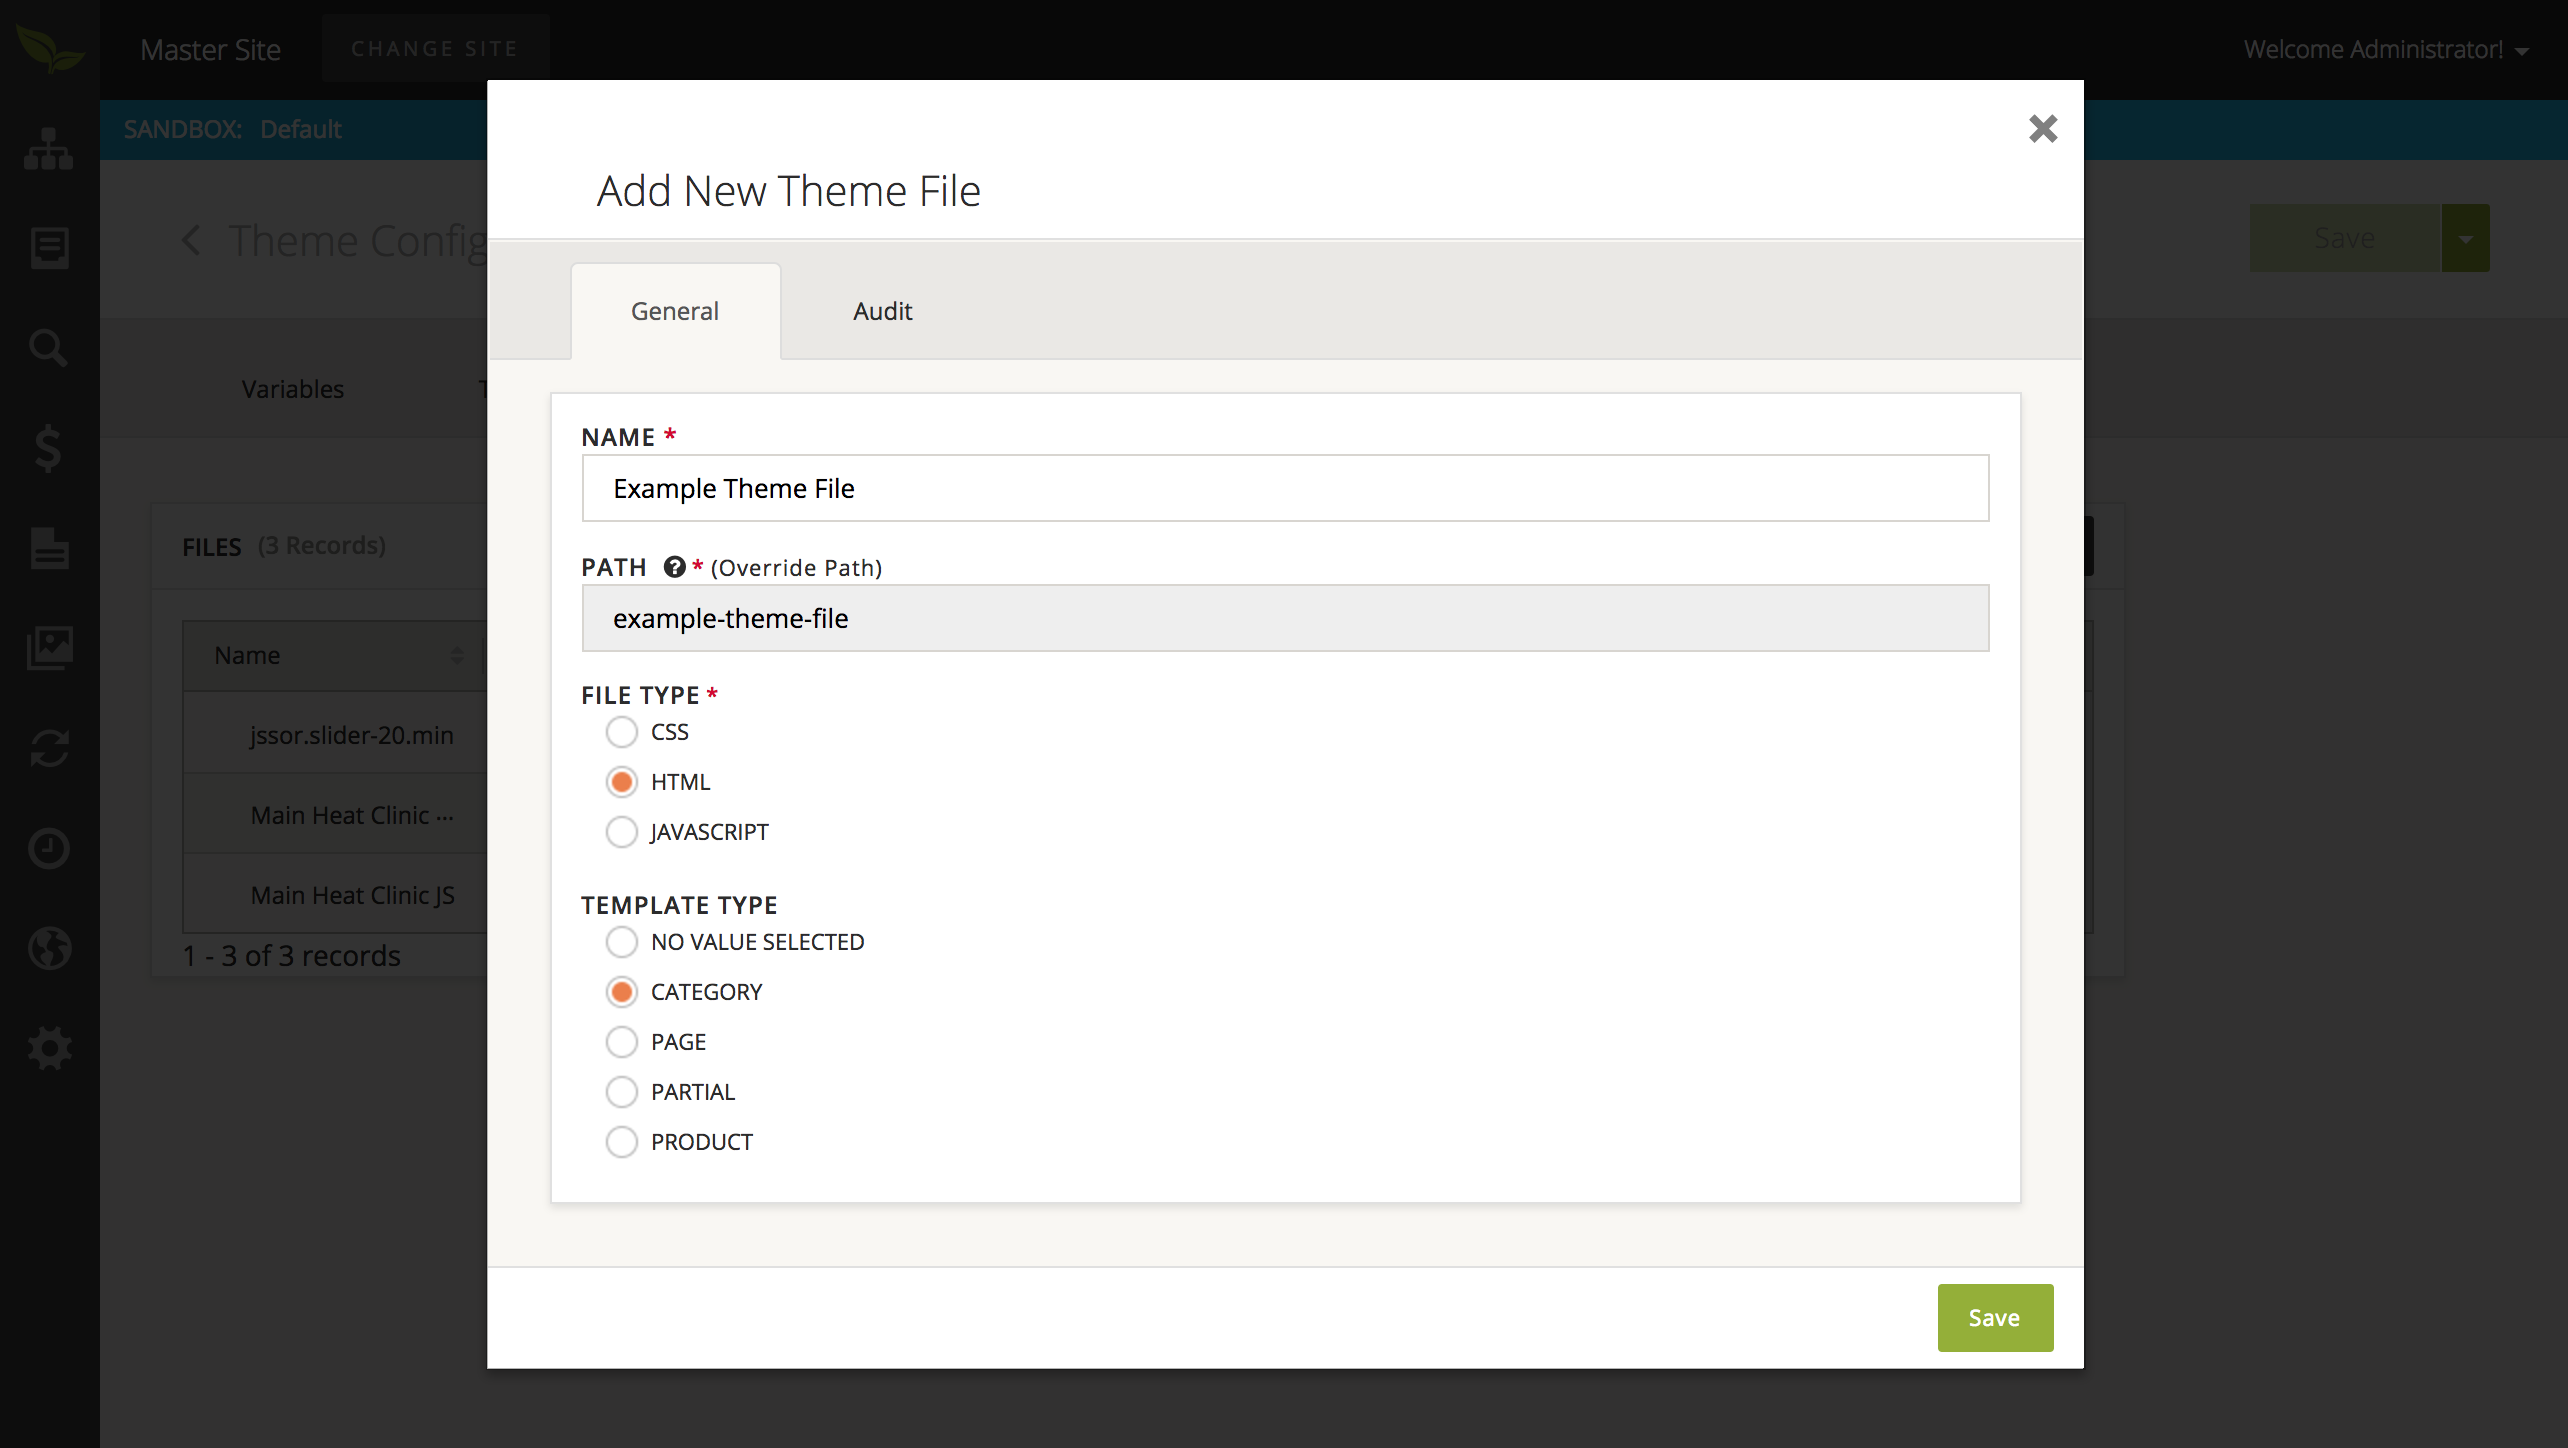
Note that if this Theme File is intended to override an existing file, then the path value should be updated to match the path of the overridden resource.
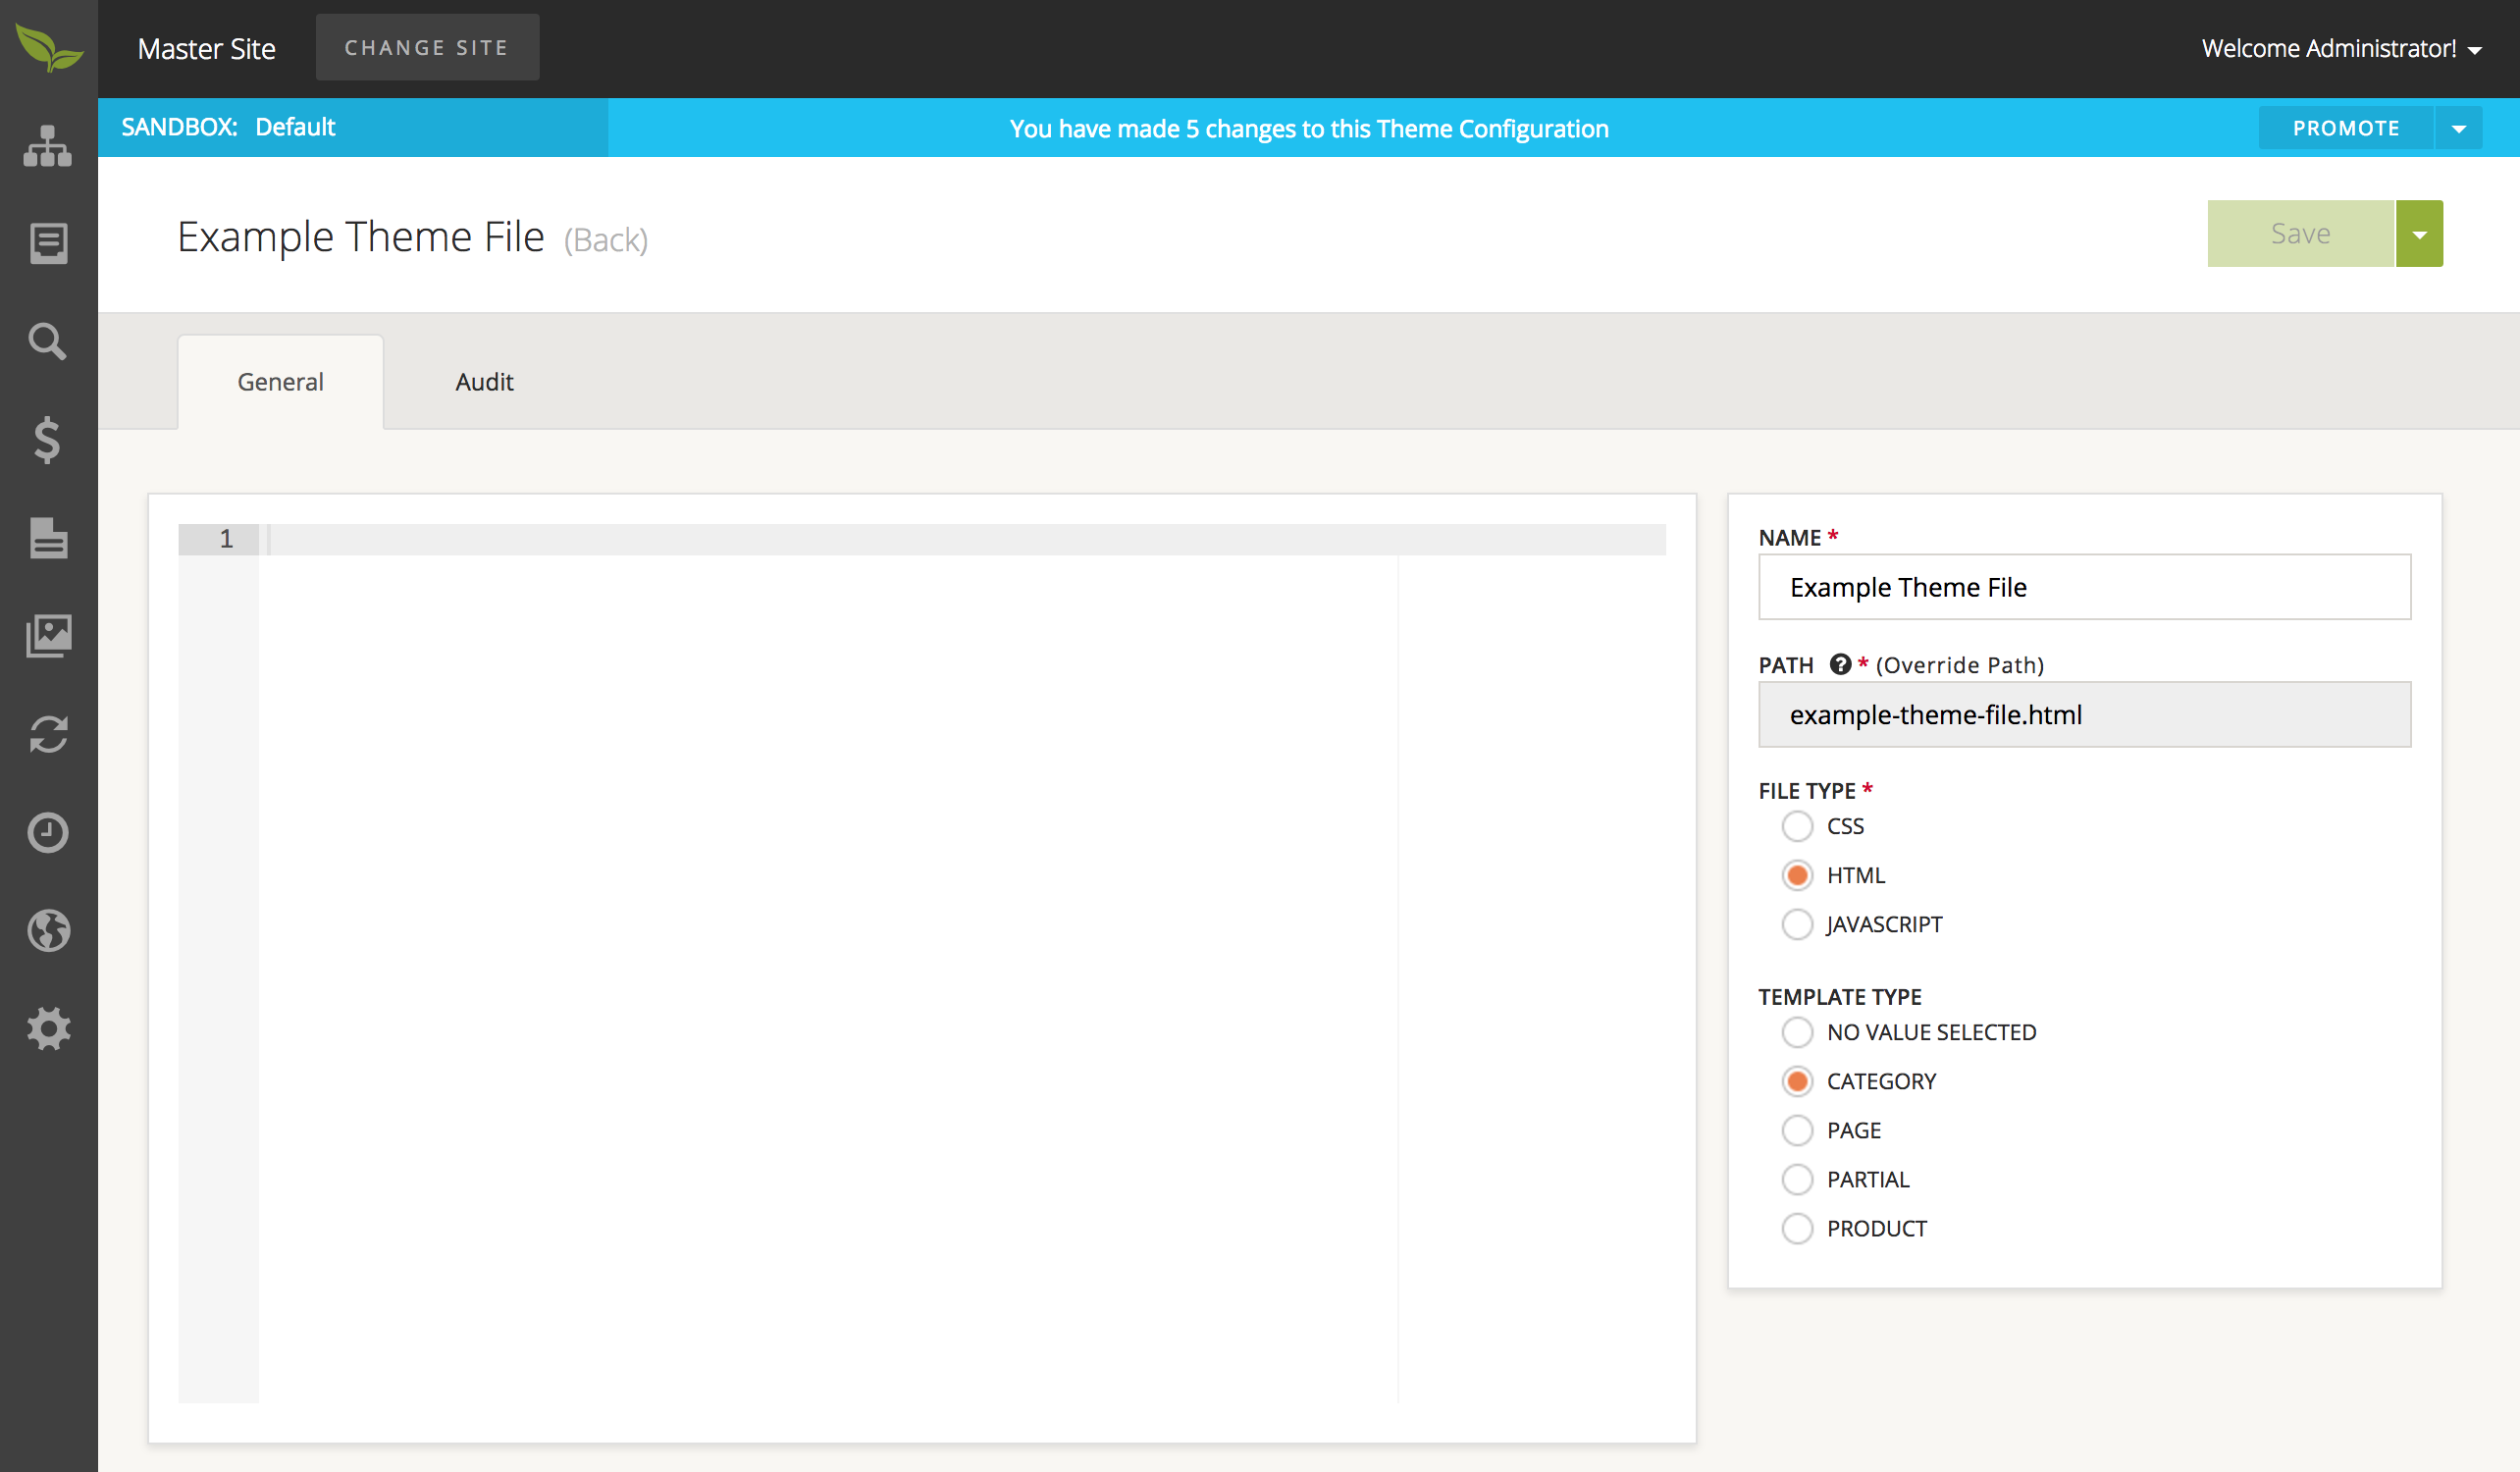
- You will then be taken to the details page of the newly created Theme File. The first tab is the Contents page, where you may put
HTML,CSS, orJScode depending on the previously provided information. You may also leave this section blank if this Theme File entry is to reference an existing file. Once complete, select the 'Save' button at the upper right corner of the page to save your Theme File.