IntelliJ Setup
In addition to Eclipse, the Intellij IDE is a great tool for developing on top of Broadleaf Commerce (half of our team uses it to develop the Broadleaf platform itself). This guide will take you through the steps to setup the Broadleaf Commerce demo site in Intellij so that you can modify, build and run it.
Prerequisites
- Intellij 10 or above (this guide was written against version 13.1.6)
- Intellij Ultimate edition recommended for Tomcat and Spring support
- JRebel plugin for development workflow enhancement
- JDK 1.7
- Tomcat 7 to follow along with the native container support example
Getting the Source of Heat Clinic
First, you should decide if you want to fork the Heat Clinic Demo Site or if you want to wipe its history and start your own. If you choose to fork, you will see history of our check-ins on your upstream remote, and you'll be able to pull in changes that we make pretty easily. However, if your site will diverge from Heat Clinic drastically, you may be better off cloning the project, deleting the .git folder, and initializing a new repository.
We suggest you start with the latest stable release branch (at the time of this writing it is BroadleafCommerce-3.1.x), or if you want the bleeding edge features, check out the develop branch.
Intellij Setup
You can check out the demosite project directly through Intellij or through external means, but regardless of how you get the source, we suggest you not allow Intellij to automatically create the project. Rather, we'll create it manually ourselves.
- Choose File -- Import Project in the Intellij application menu and select the
POM.xmlof the repository you cloned.
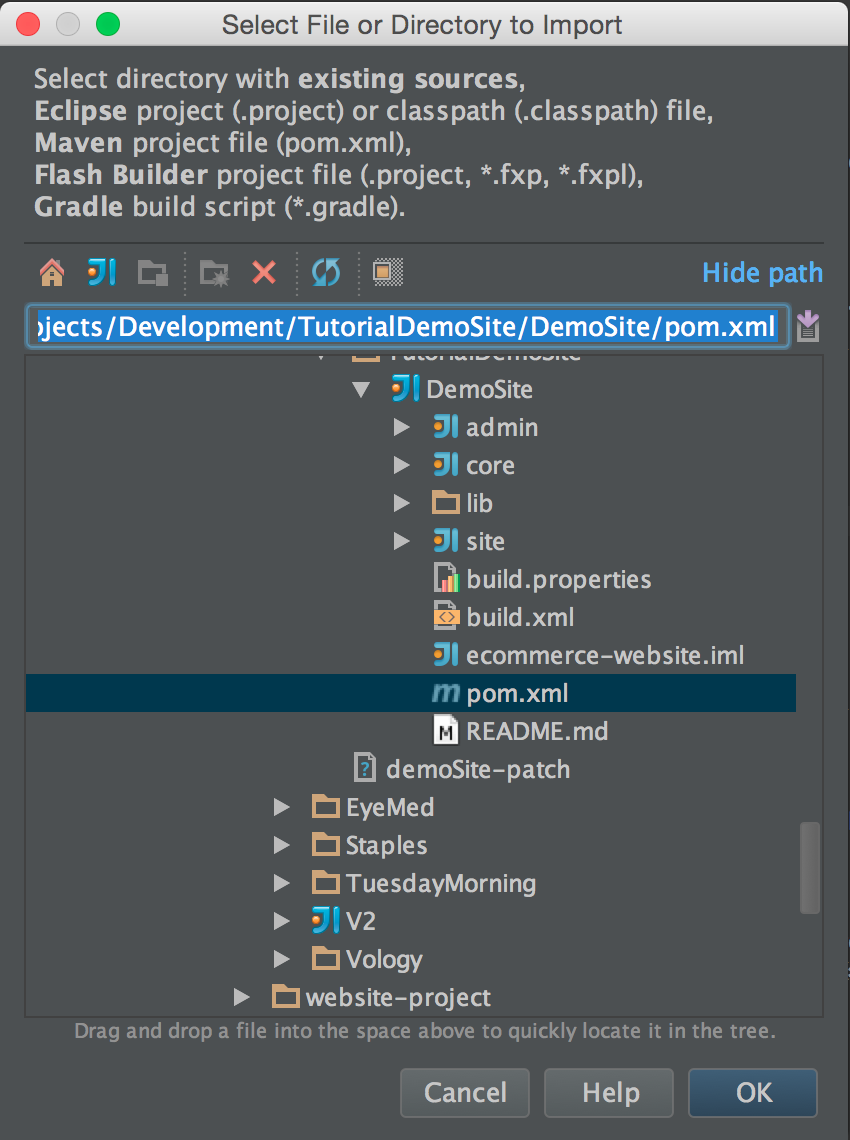
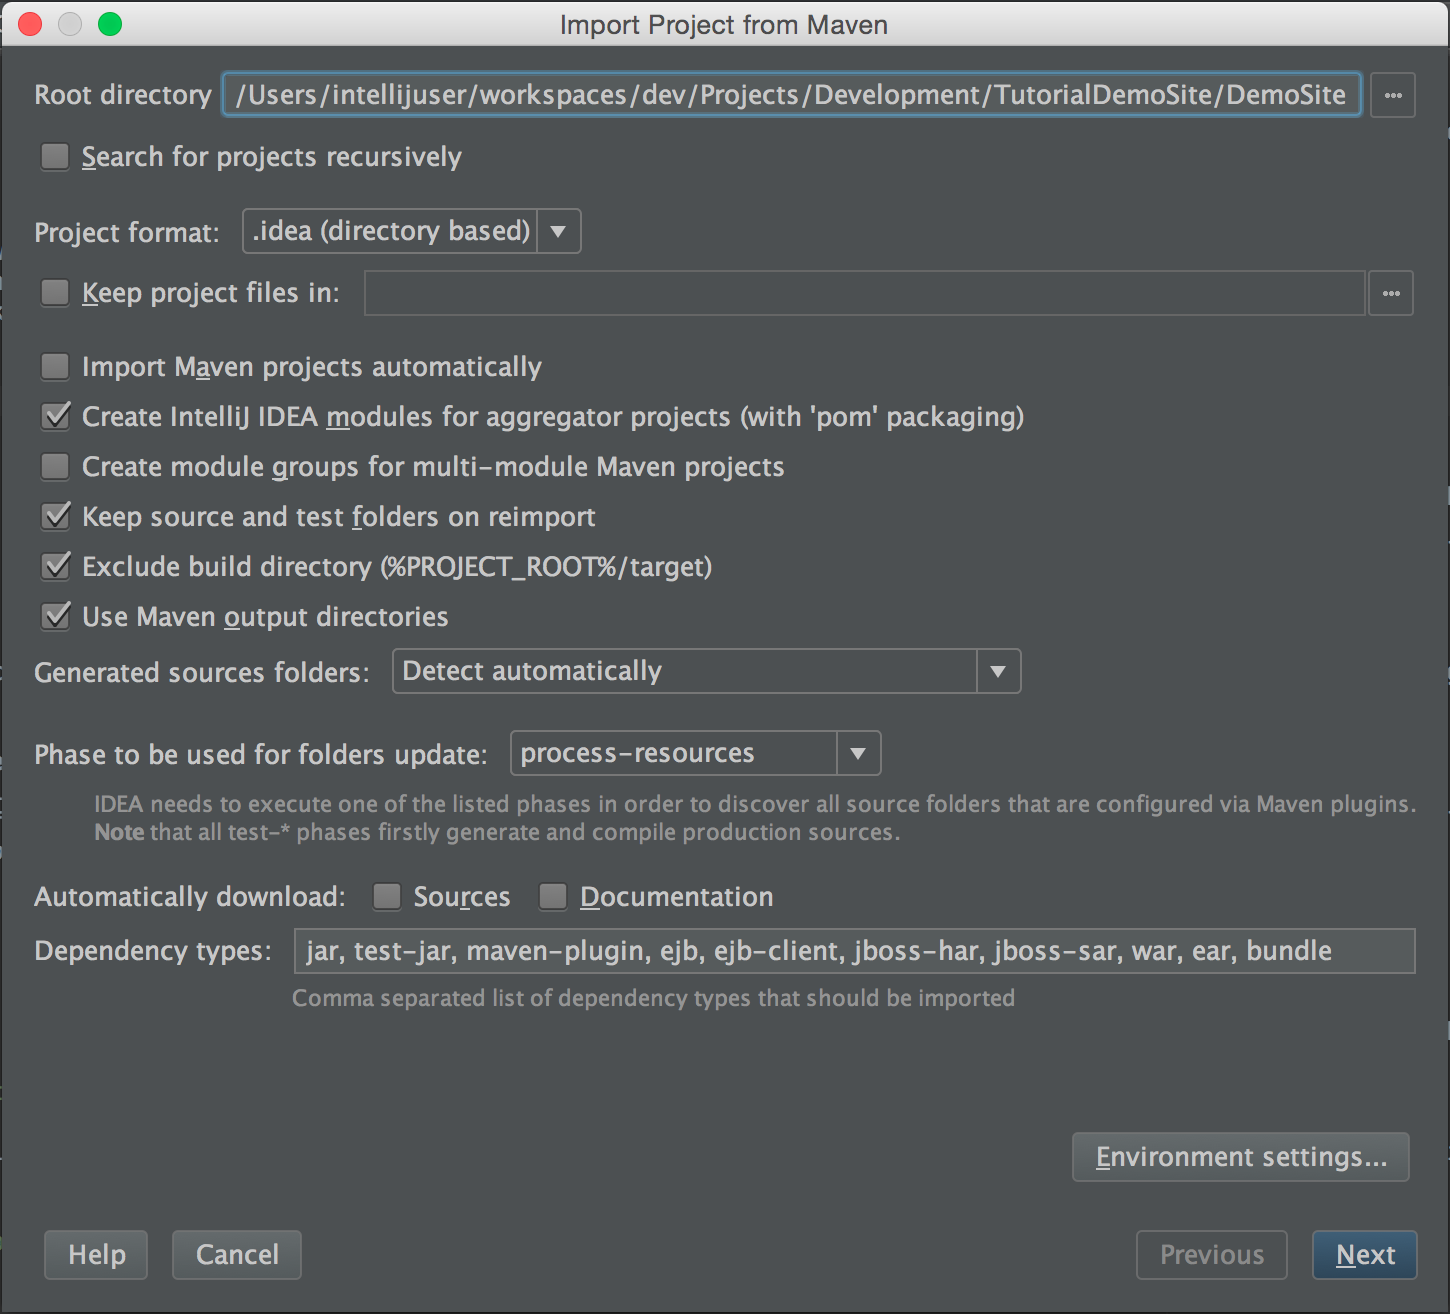
- You will now see the import project settings. You can use the default settings shown here:
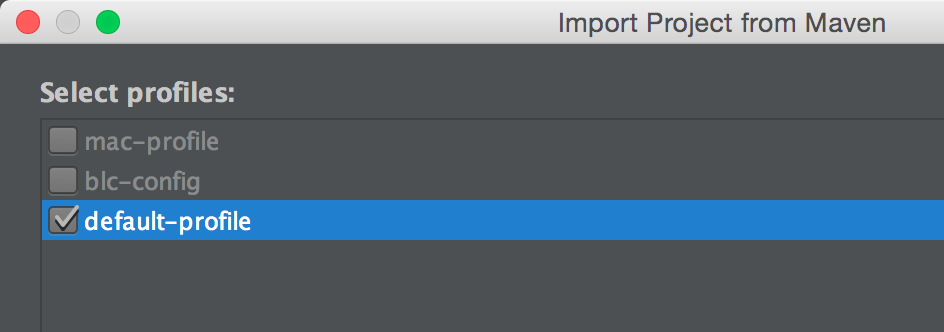
- Select default-profile in the Select Profiles dialog.
- The com.mycompany:ecommerce-website project should be selected by default. Leave it selected and simply click Next.

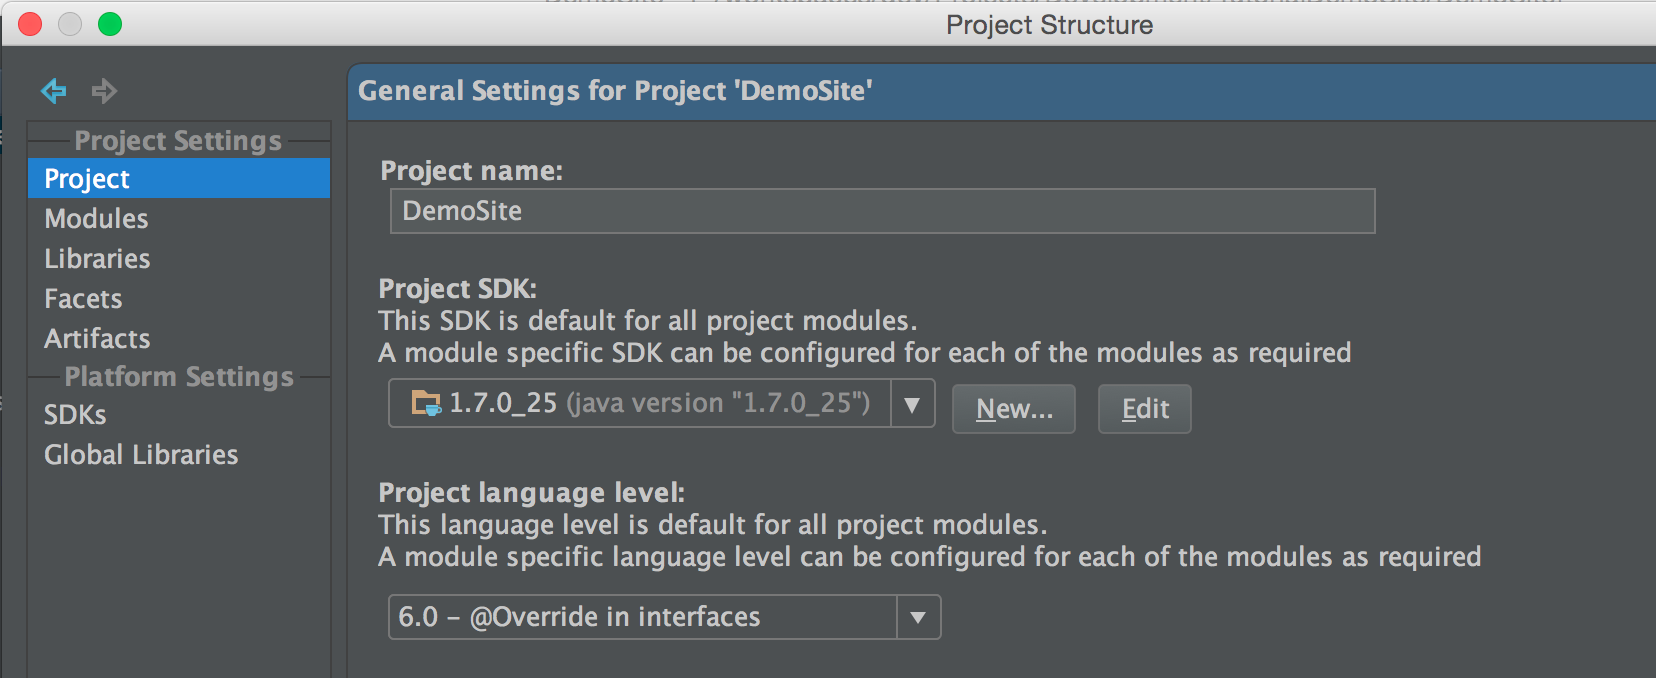
- Intellij will now ask you to select a project SDK. If you have previously set one up you can now select it (we are using
1.7.0_25in this guide).
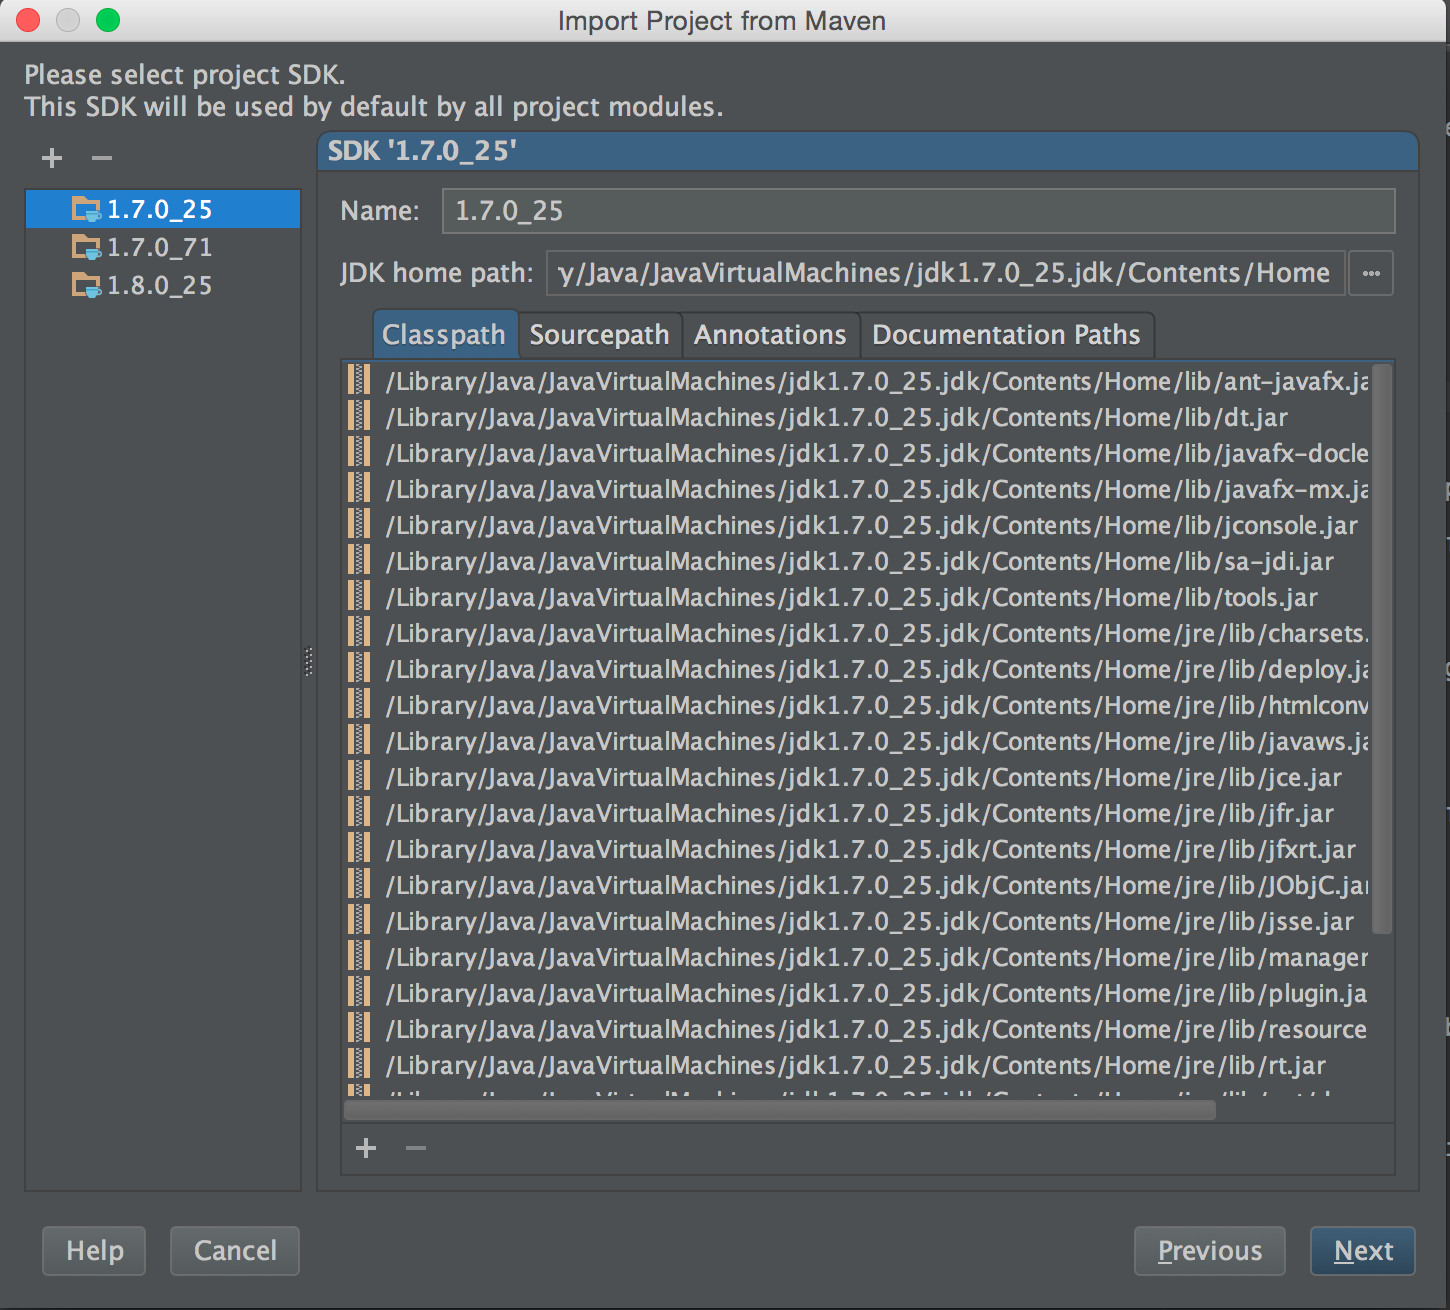
Note: If you haven't set one, Intellij will ask you to add an SDK. You can also change the SDK via the Project Structure menu. You can easily do this by right-clicking on the project root folder and selecting Open Module Settings. Select the Project option on the left and select the SDK you want in the Project SDK dropdown.
- Give your project a relevant name and location. Click Finish.

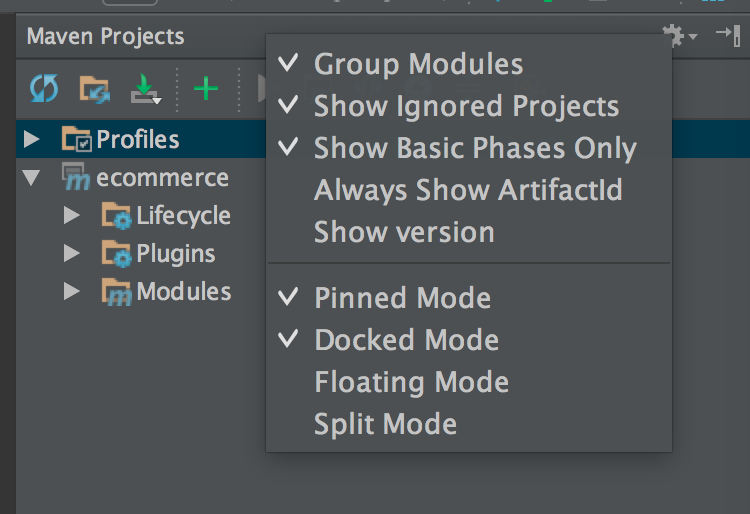
- Click on the Maven Projects button on the right side of the IDE. This will bring up the maven projects. We recommend you Group Modules to simplify the view.
- We now want to get the correct branch of the repository loaded. This can be done via the command line but for the purpose of this guide we will do it via Intellij.
- Click the Master on the bottom right of the IDE.
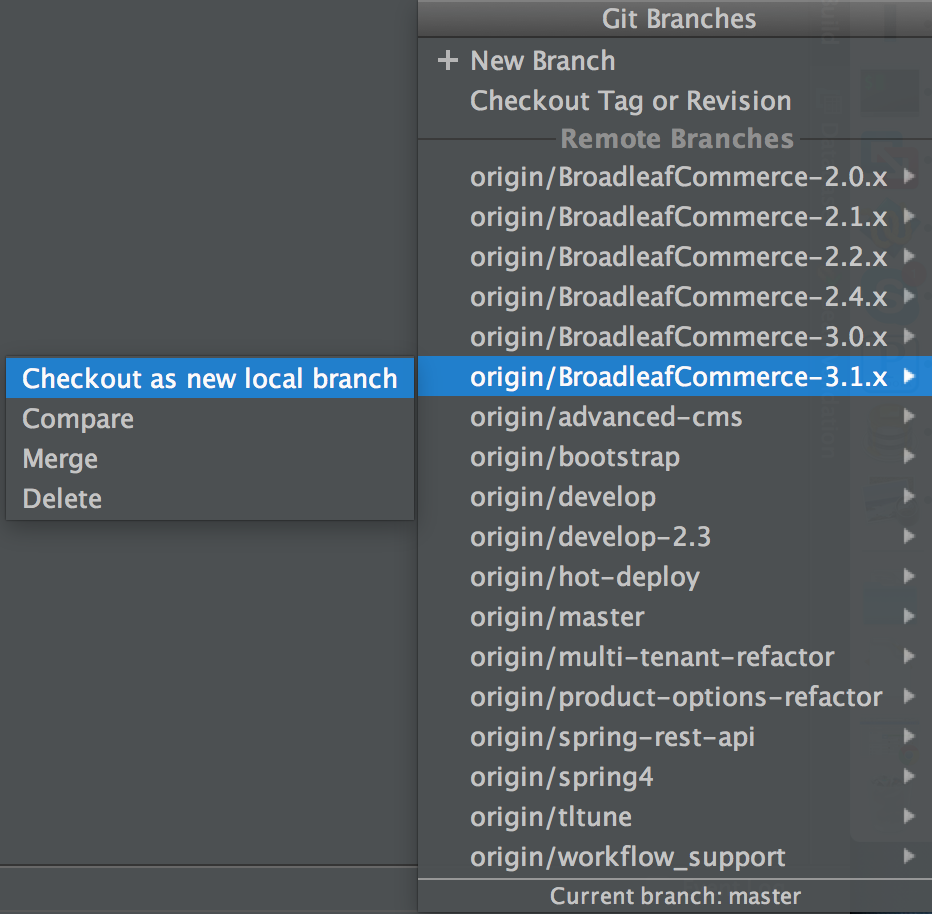
- Checkout out branch BroadleafCommerce-3.1.x

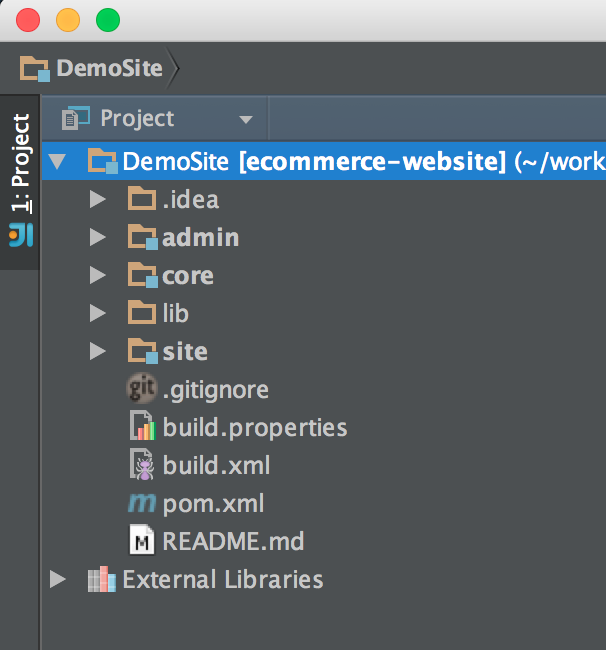
At this point, you should have a project structure in intellij resembling the following (I named my project DemoSite, but yours may be different):
Build the Project
At this point, you have a project that may be fully built and executed. To build the project in preparation for running it:
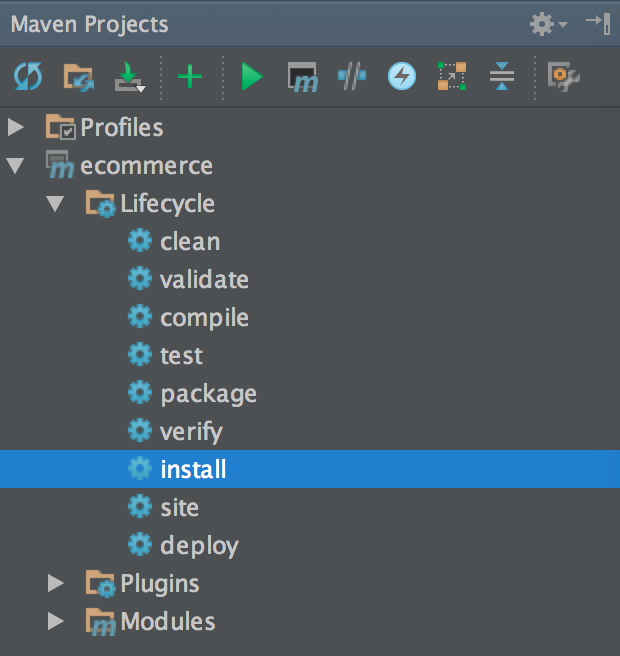
- Click the Maven Projects button on the right side of the IDE interface.
- Expand the ecommerce node and then expand the Lifecycle node.
- Double click the install option to make Maven build the entire project (this can take several minutes to finish compilation).
Run the Project
Once the maven install is complete, you have several options for running the site. You can use the ant scripts packaged with the project to launch a standalone version of the site and admin in a jetty instance, or use the common application container support built directly into intellij (recommended).
Ant Support
If you want to use the ant scripts for whatever reason, separate build.xml files are included in the admin and site modules that launch each app under a standalone version of jetty listening on ports 8081 and 8080, respectively. Make sure these ports are not already in use on your computer before attempting to launch. You can mount these ant files in the Ant Build view in intellij and execute the jetty-demo task from each. When both jetty instances have completed starting up, you can access the admin and site at http://localhost:8081/admin and http://localhost:8080, respectively. The username and password for the admin login is admin/admin.
Native Intellij Support
The preferred method is to run the project using the intellij native support for various application containers. In this example we'll use Tomcat 7.
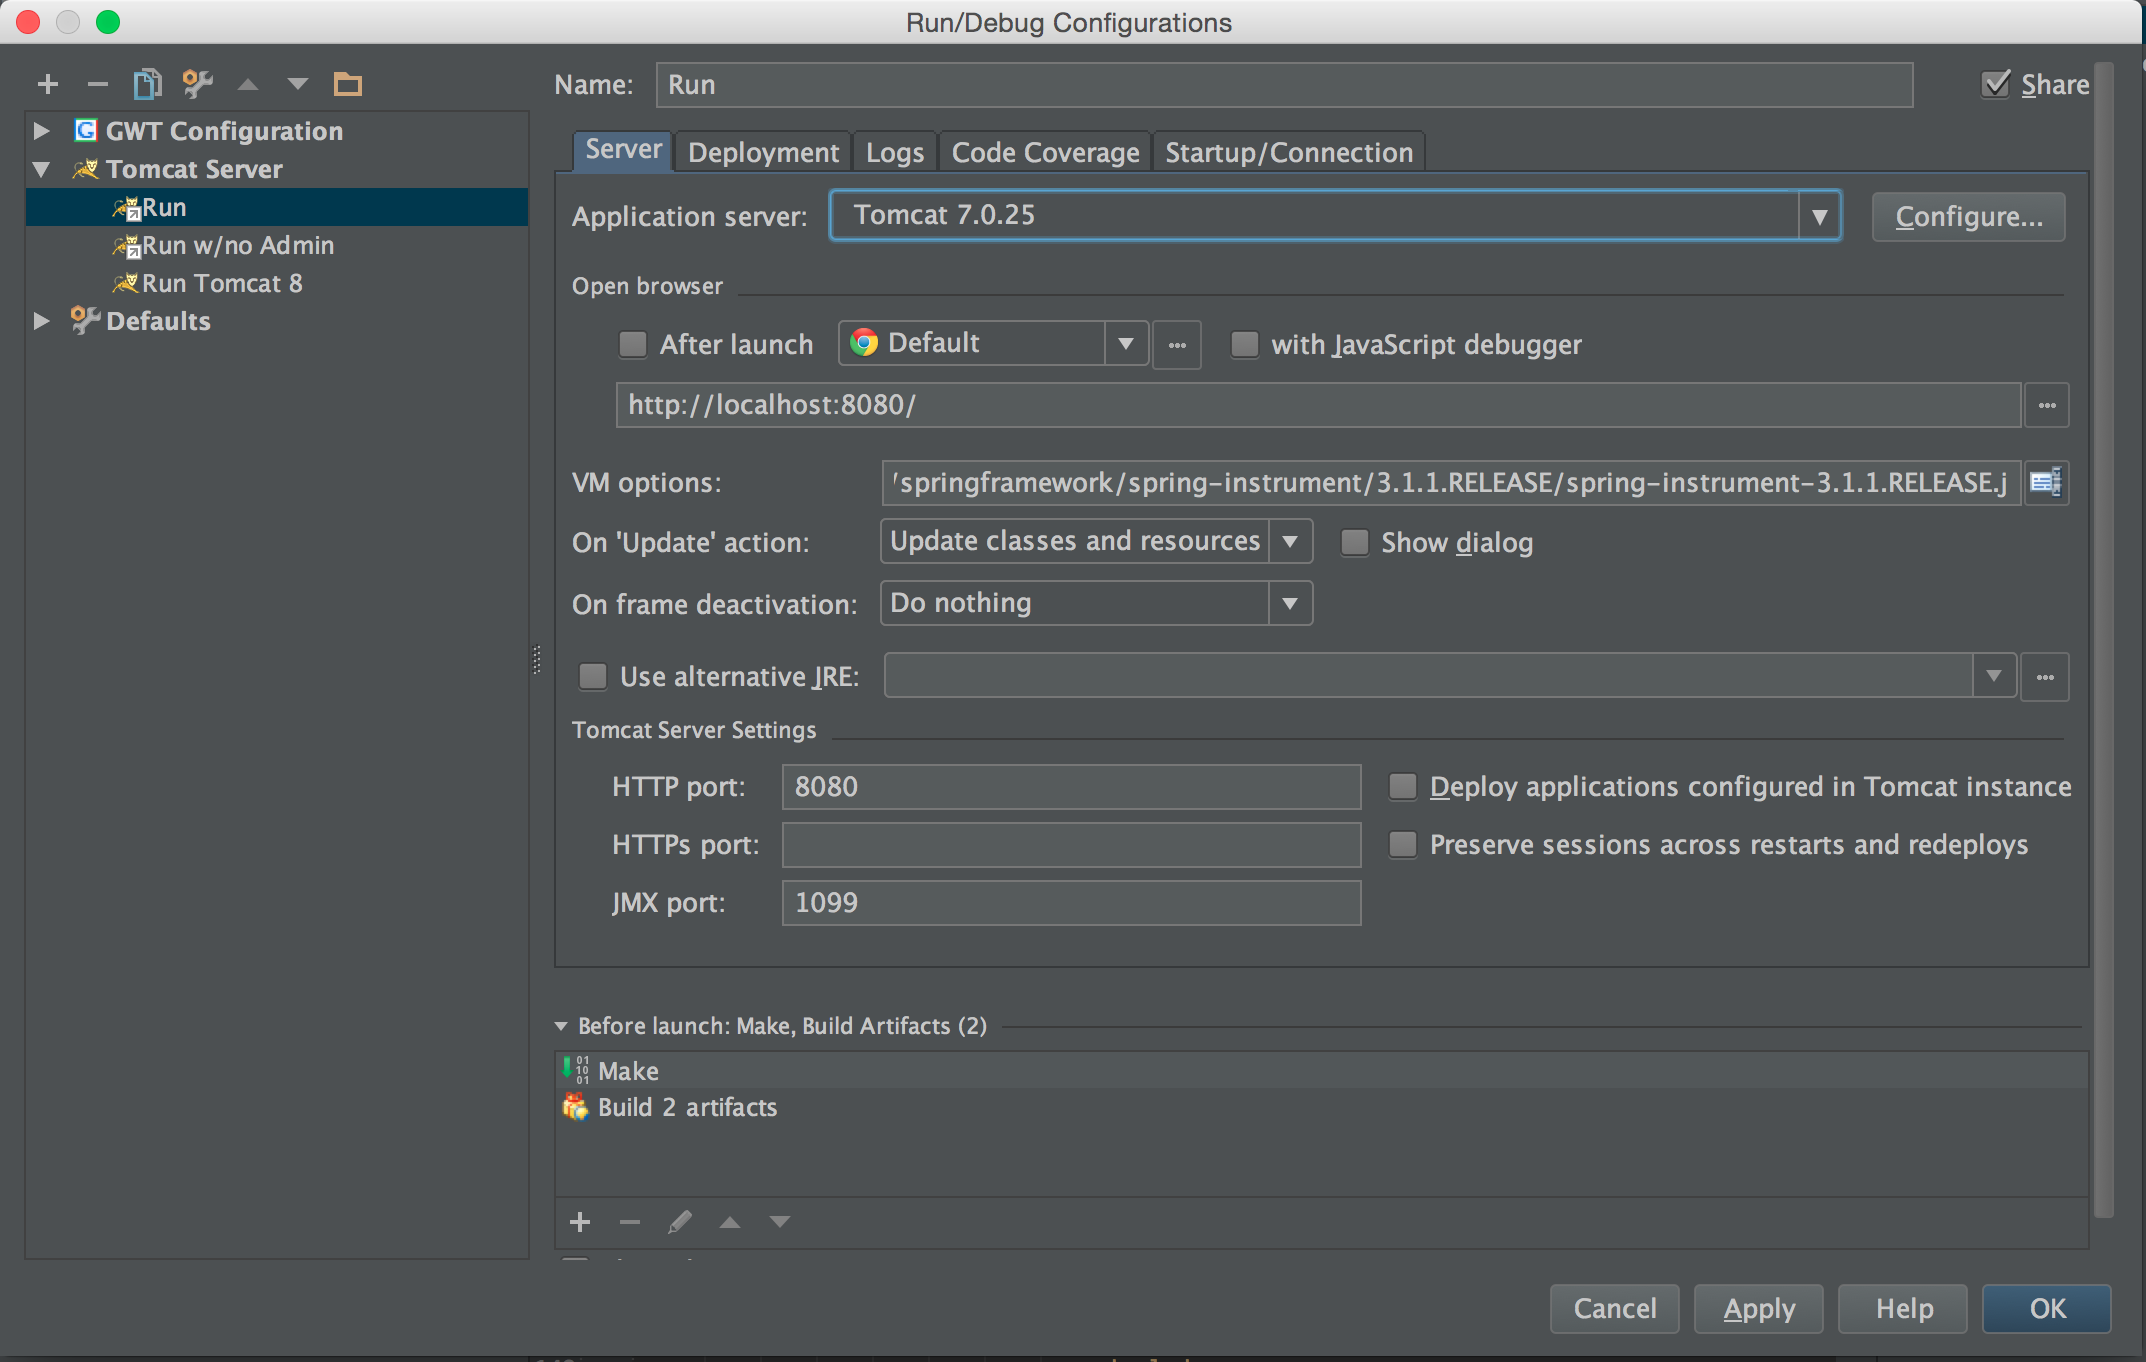
- Click the down arrow just to the left of the Run and Debug icons. There will be an option to Edit Configurations. In the resulting popup, click the Add icon, then click Tomcat and Local.
- Click the Configure… button if you have not already setup a Tomcat instance with intellij. This will allow you to associate intellij with the Tomcat 7 instance on your computer.
- In the VM options field, paste in the following: -XX:MaxPermSize=256M -Xmx512M
- Click the Deployment button at the top of the dialog and click the + button in order to specify a module to deploy. Select the site:war exploded and the admin:war exploded module.
- Make sure that the Make option is selected and the Build Artifacts option is not selected in the Before Launch section.
When finished your dialog should look something like this - click OK at the bottom of the dialog.
At this point we have a valid configuration for launching both the admin and demo site. However, the only thing we're missing is a database instance to point at. The easiest way to get a demonstration database running is to use the Hypersonic HSQL instance from the ant launch script.
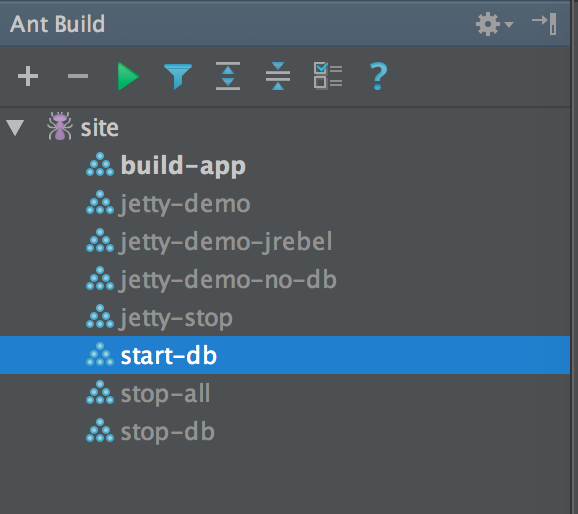
If you haven't already, mount the build.xml from the site module in the intellij ant view and execute the start-db task. Note - this is a very low performing option and should only be used for demonstration purposes. For a better database configuration, follow our MySQL configuration guide at: http://docs.broadleafcommerce.org/current/MySQL.html.
Once the demo database is started, you're ready to launch Tomcat. Make sure your Tomcat 7 instance is selected in the configuration dropdown at the top of the intellij interface and click the start button.

Intellij will proceed to launch Tomcat with both the site and the admin application. When Tomcat has finished starting, you can access the admin at http://localhost:8080/admin and the demosite at http://localhost:8080. The username and password for the admin login is admin/admin.
Note: If you wish to only load only one application remove one opf the exploded wars from the tomcat run configuration.
JRebel Development Enhancement
The Broadleaf Commerce team makes extensive use of JRebel during our development of the platform and we recommend our users do the same during development of their Broadleaf-based projects. Adding JRebel support to intellij is relatively easy by installing the JRebel plugin:
http://zeroturnaround.com/software/jrebel/intellij-idea-jrebel-tutorial-formerly-javarebel/
The default configuration for your demosite build will already generate rebel.xml files for your project's modules, so you don't need to worry about anything beyond installing and configuring the plugin in the IDE. Once the plugin is successfully installed, you will see several new button options (run and debug) for launch Tomcat with JRebel support. We typically suggest running debug with jrebel support during development.

Once you click the JRebel debug button, intellij will launch Tomcat in debug mode with JRebel support. This will allow you to add/edit Java classes in your implementation and immediately see the effect of the change without restarting the application container, which can be a huge timesaver.
