Authorize.net Environment Setup
Prerequisites
- Users must establish their own test account with Authorize.net in order to use the BroadleafCommerce Authorize.net payment functionality. This can be done here: https://developer.authorize.net/testaccount
Configure your Authorize.net Account*
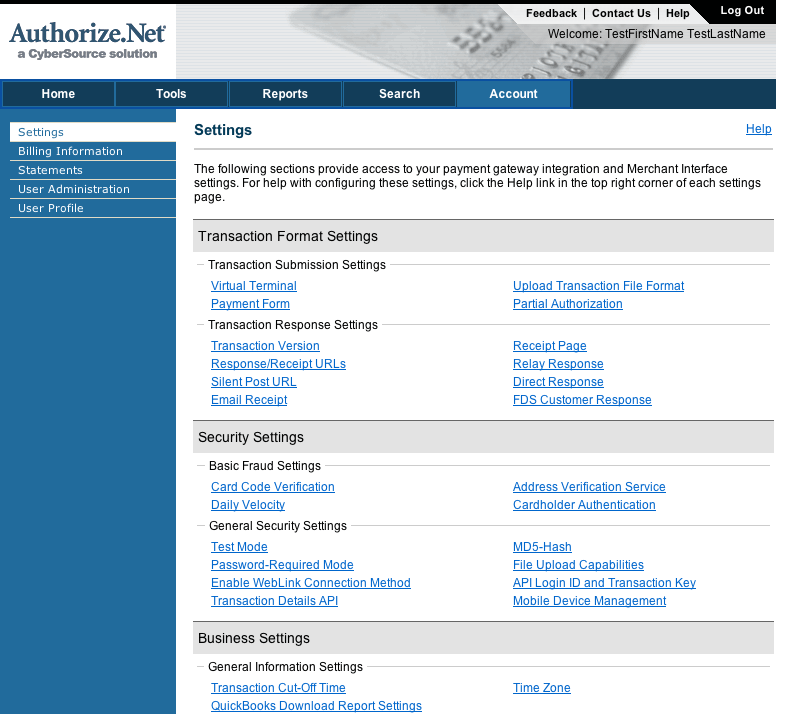
- Login to your Authorize.net account (https://account.authorize.net/ or https://sandbox.authorize.net/) and navigate to your Account Settings.

- Check your email to find the default Secret Answer that will be asigned to you. You can change this by going into Account > User Profile > Change Security Question and Answer
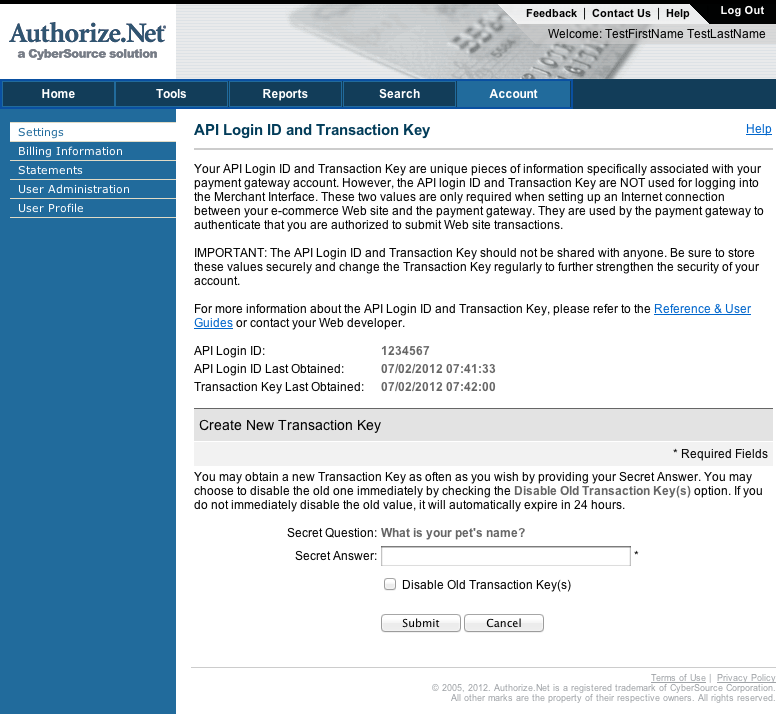
- Create a new Transaction Key by navigating to Account > Settings > API Login ID and Transaction Key. Fill out the form to generate a new key

- Obtain a Client Token Key to use Accept.js https://developer.authorize.net/api/reference/features/acceptjs.html
- Note all of these values down as you will need to enter them in your environment properties files.
<!-- Authorize.net Dependencies -->
<dependency>
    <groupId>org.broadleafcommerce</groupId>
    <artifactId>broadleaf-authorizenet</artifactId>
    <version>2.5.x-GA</version>
    <type>jar</type>
    <scope>compile</scope>
</dependency>
Make sure to include the dependency in your CORE pom.xml as well:
<!-- Authorize.net Dependencies -->
<dependency>
    <groupId>org.broadleafcommerce</groupId>
    <artifactId>broadleaf-authorizenet</artifactId>
</dependency>
Note: If using the sample Heat Clinic, you'll want to remove the sample payment gateway dependency from your poms as well
You should now begin to setup your environment to work with Broadleaf Commerce Authorize.net support.
The first step is to make Broadleaf Commerce aware of your Authorize.net account credentials.
This is accomplished through environment configuration (see [[Runtime Environment Configuration]]).
Broadleaf allows you to create your own property files per environment (e.g. common.properties, local.properties, development.properties, integrationdev.properties, integrationqa.properties, staging.properties, and production.properties)
You will need to enter the following key/value pairs in the appropriate locations:
common.properties
gateway.authorizenet.transactionVersion=3.1
gateway.authorizenet.sandbox=true
gateway.authorizenet.acceptJsUrl=https://jstest.authorize.net/v1/Accept.js
local.properties, development.properties, integrationdev.properties, integrationqa.properties
gateway.authorizenet.loginId=?
gateway.authorizenet.clientKey=?
gateway.authorizenet.transactionKey=?
gateway.authorizenet.serverUrl=https://test.authorize.net/gateway/transact.dll
staging.properties
gateway.authorizenet.loginId=?
gateway.authorizenet.clientKey=?
gateway.authorizenet.transactionKey=?
gateway.authorizenet.serverUrl=https://secure2.authorize.net/gateway/transact.dll
production.properties
gateway.authorizenet.loginId=?
gateway.authorizenet.clientKey=?
gateway.authorizenet.transactionKey=?
gateway.authorizenet.serverUrl=https://secure2.authorize.net/gateway/transact.dll
gateway.authorizenet.sandbox=false
gateway.authorizenet.acceptJsUrl=https://js.authorize.net/v1/Accept.js
Now that you have your environment set up, let's begin setting up the Authorize.net Quick Start.
