Authorize.net Environment Setup
Prerequisites
- Users must establish their own test account with Authorize.net in order to use the BroadleafCommerce Authorize.net payment functionality. This can be done here: https://developer.authorize.net/testaccount
- Please familiarize yourself with the Direct Post Method of the Authorize.net API before proceeding: https://developer.authorize.net/integration/fifteenminutes/java
- Must have a publicly accessible URL ending with /authorizenet/process for local testing environments. We recommend using Ngrok to setup a temporary publicly accessible URL. This will be the URL set on Step 5 below and in your gateway.authorizenet.responseUrl property of your development.properties file.
Configure your Authorize.net Account*
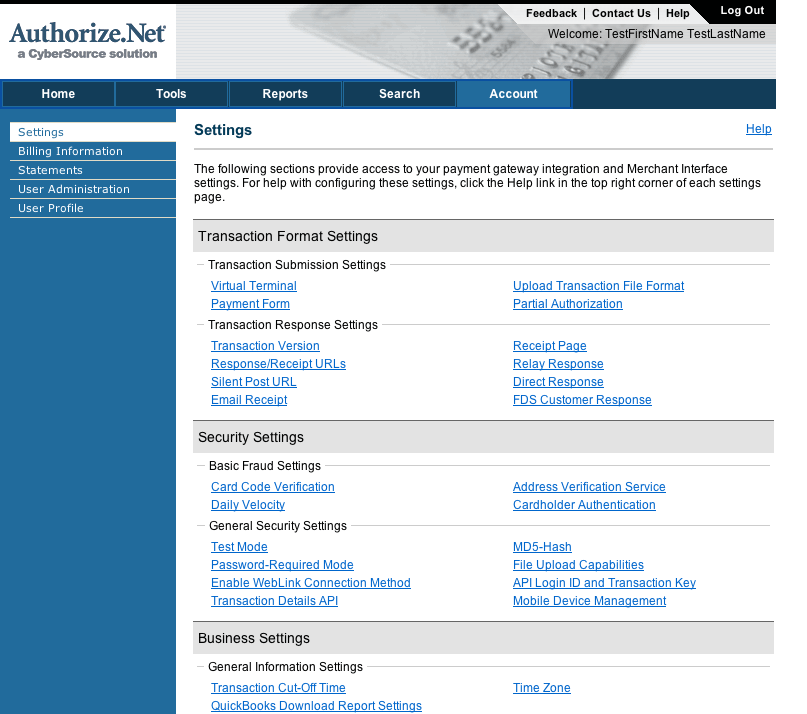
- Login to your Authorize.net account (https://account.authorize.net/ or https://sandbox.authorize.net/) and navigate to your Account Settings.

- Check your email to find the default Secret Answer that will be asigned to you. You can change this by going into Account > User Profile > Change Security Question and Answer
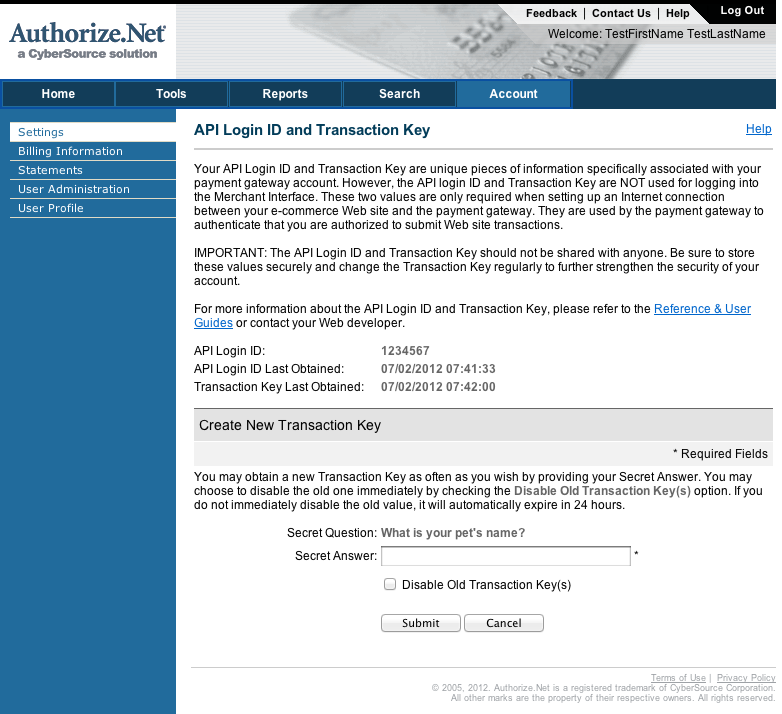
- Create a new Transaction Key by navigating to Account > Settings > API Login ID and Transaction Key. Fill out the form to generate a new key

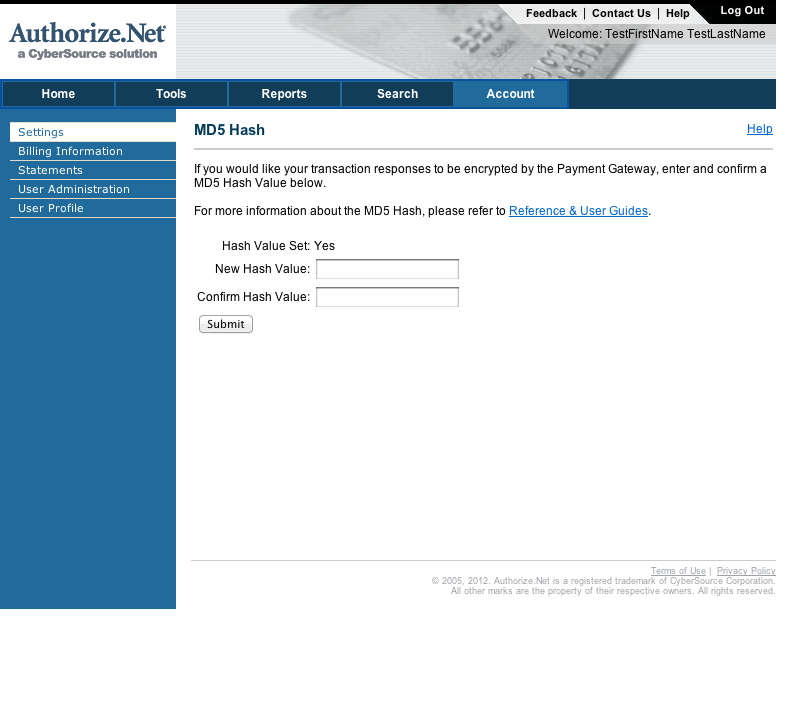
- Create an MD5Hash (e.g. 12345) by navigating to Account > Settings > MD5Hash

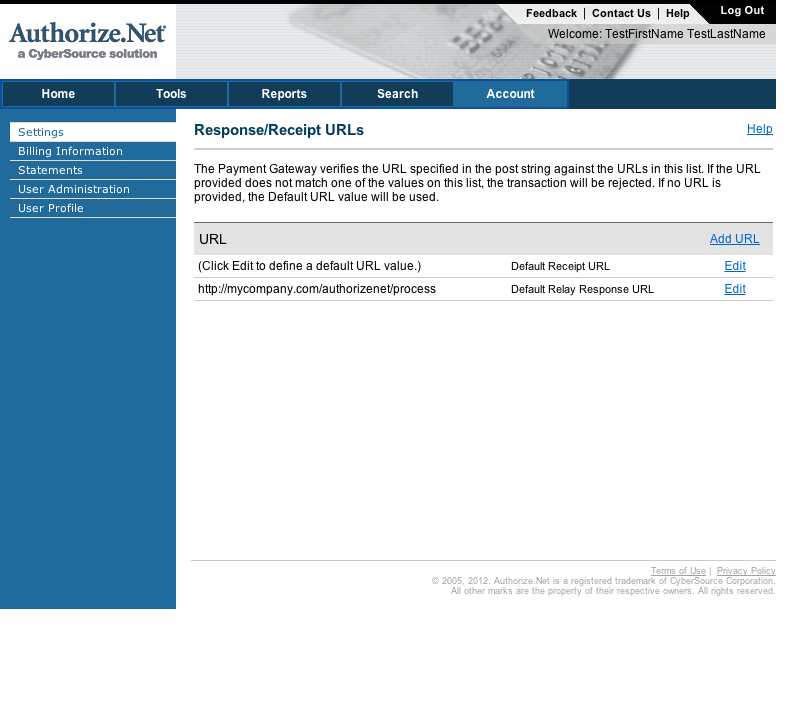
- Finally, configure the Relay Response URL by navigating to Account > Settings > Response/Receipt URLs. This is the public URL that Authorize.net will send the response of the transaction to.

- Note all of these values down as you will need to enter them in your environment properties files.
Download and Install the Authorize.net Java SDK
The Authorize.net SDK is not available on any public maven repository, so you must download and install it manually.
You can do that here: https://developer.authorize.net/downloads/
Once downloaded, you can install this dependency into your local or shared maven repository
mvn install:install-file -Dfile=anet-java-sdk-1.4.6.jar -DgroupId=net.authorize -DartifactId=anet-java-sdk -Dversion=1.4.6 -Dpackaging=jar
Alternatively, you can install it in a nexus proxy that the local development build is configured to point to.
Next, include both the Authorize.net Java SDK and the Broadleaf Authorize.net Module dependency to your pom.xml.
<!-- Authorize.net Dependencies -->
<dependency>
    <groupId>net.authorize</groupId>
    <artifactId>anet-java-sdk</artifactId>
    <version>1.4.6</version>
    <type>jar</type>
    <scope>compile</scope>
</dependency>
<dependency>
    <groupId>org.broadleafcommerce</groupId>
    <artifactId>broadleaf-authorizenet</artifactId>
    <version>2.4.0-GA</version>
    <type>jar</type>
    <scope>compile</scope>
</dependency>
Make sure to include the dependency in your CORE pom.xml as well:
<!-- Authorize.net Dependencies -->
<dependency>
    <groupId>net.authorize</groupId>
    <artifactId>anet-java-sdk</artifactId>
</dependency>
<dependency>
    <groupId>org.broadleafcommerce</groupId>
    <artifactId>broadleaf-authorizenet</artifactId>
</dependency>
You should now begin to setup your environment to work with Broadleaf Commerce Authorize.net support.
The first step is to make Broadleaf Commerce aware of your Authorize.net account credentials.
This is accomplished through environment configuration (see [[Runtime Environment Configuration]]).
Broadleaf allows you to create your own property files per environment (e.g. common.properties, local.properties, development.properties, integrationdev.properties, integrationqa.properties, staging.properties, and production.properties)
You will need to enter the following key/value pairs in the appropriate locations:
common.properties
gateway.authorizenet.transactionVersion=3.1
local.properties, development.properties, integrationdev.properties, integrationqa.properties
gateway.authorizenet.loginId=?
gateway.authorizenet.transactionKey=?
gateway.authorizenet.merchantMd5Key=?
gateway.authorizenet.responseUrl=? (e.g. Publicly accessible URL ending with /authorizenet/process)
gateway.authorizenet.confirmUrl=? (e.g. http://localhost:8080/authorizenet/return)
gateway.authorizenet.errorUrl=? (e.g. http://localhost:8080/authorizenet/error)
gateway.authorizenet.serverUrl=https://test.authorize.net/gateway/transact.dll
gateway.authorizenet.xTestRequest=FALSE
- gateway.authorizenet.responseUrl: must be a publicly accessible URL. We recommend using Ngrok to setup a temporary publicly accessible URL.
staging.properties
gateway.authorizenet.loginId=?
gateway.authorizenet.transactionKey=?
gateway.authorizenet.merchantMd5Key=?
gateway.authorizenet.responseUrl=? (e.g. http://staging.mycompany.com/authorizenet/process)
gateway.authorizenet.confirmUrl=? (e.g. http://staging.mycompany.com/authorizenet/return)
gateway.authorizenet.errorUrl=? (e.g. http://staging.mycompany.com/authorizenet/error)
gateway.authorizenet.serverUrl=https://secure.authorize.net/gateway/transact.dll
gateway.authorizenet.xTestRequest=TRUE
- gateway.authorizenet.responseUrl: must be a publicly accessible URL.
- gateway.authorizenet.xTestRequest: Once the integration is successfully tested in the developer test environment, the merchant’s Authorize.Net Payment Gateway API Login ID and Transaction Key can be plugged into the integration for testing against the live environment. By including the x_test_request field with a value of “TRUE” in the HTML Form POST
production.properties
gateway.authorizenet.loginId=?
gateway.authorizenet.transactionKey=?
gateway.authorizenet.merchantMd5Key=?
gateway.authorizenet.responseUrl=? (e.g. http://mycompany.com/authorizenet/process)
gateway.authorizenet.confirmUrl=? (e.g. http://mycompany.com/authorizenet/return)
gateway.authorizenet.errorUrl=? (e.g. http://mycompany.com/authorizenet/error)
gateway.authorizenet.serverUrl=https://secure.authorize.net/gateway/transact.dll
gateway.authorizenet.xTestRequest=FALSE
- gateway.authorizenet.responseUrl: must be a publicly accessible URL.
- gateway.authorizenet.xTestRequest: Only needed for testing in a live environment, e.g. staging
Now that you have your environment set up, let's begin setting up the Authorize.net Quick Start.
